

This article explains changing the “Flash my screen during audio notifications” in Windows 11.
The “Flash my screen during audio notifications” feature in Windows 11 enables your screen to flash whenever there is an incoming audio notification. This feature is handy for users who need visual cues to get notified of incoming messages or calls while they work on their computer.
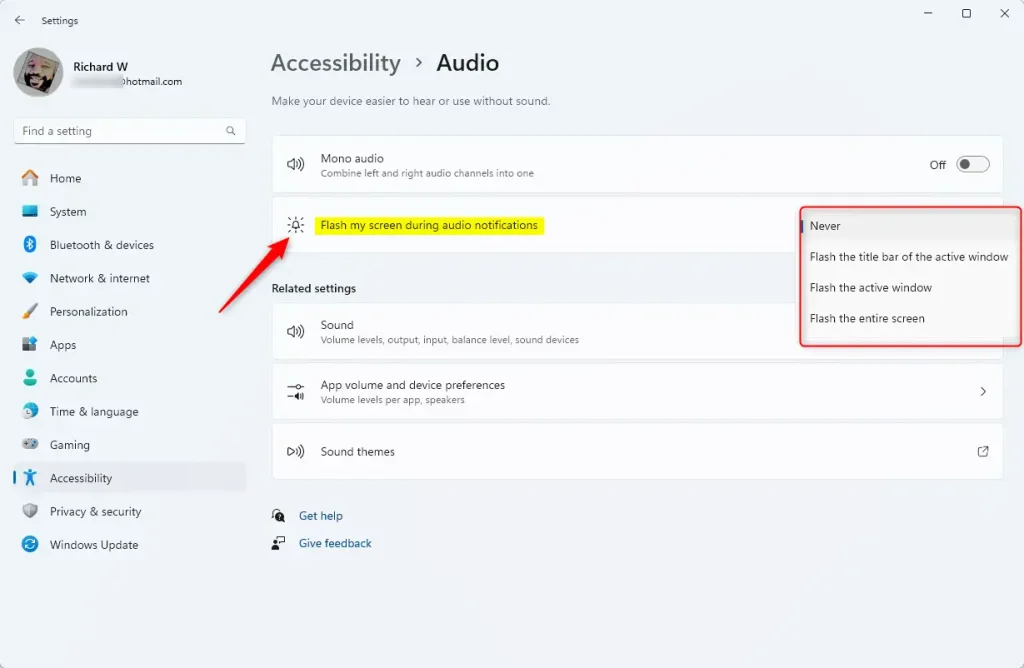
By default, this feature is set to “Never” in Windows 11, but you can change it if you find it useful.
Options available are: [Never], [Flash the title bar of the active window], [Flash the active window], and [Flash the entire screen].
Change the Flash my screen during audio notification feature in Windows
As mentioned, users can change the “Flash my screen during audio notifications” feature in Windows.
Here’s how to do it.
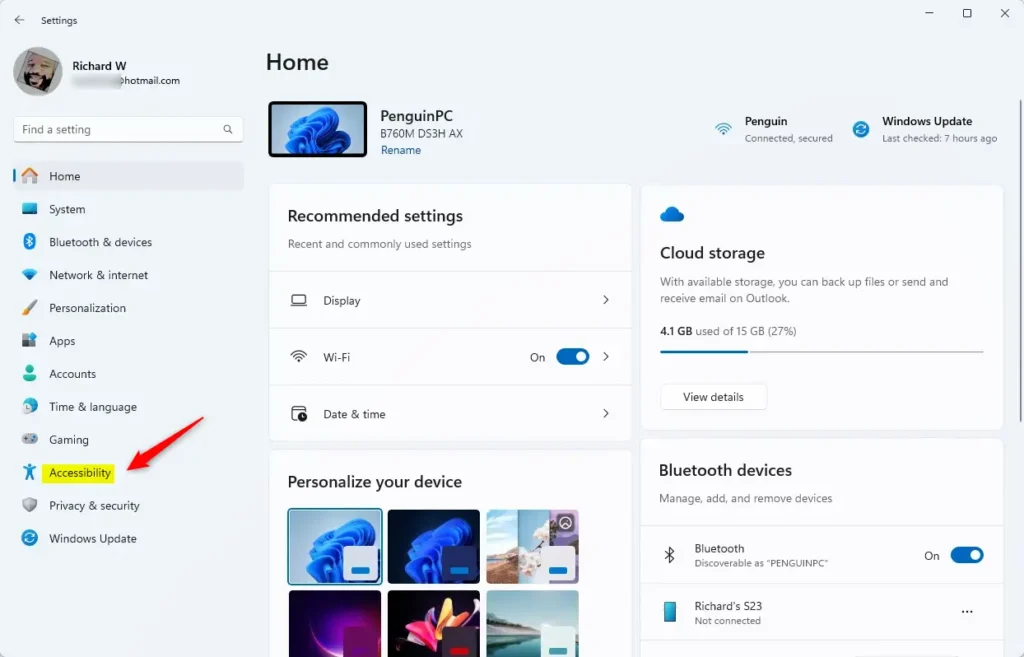
First, open the Windows Settings app.
You can do that by clicking on the Start menu and selecting Settings. Or press the keyboard shortcut (Windows key + I) to launch the Settings app.
When the Setting app opens, click the Accessibility button on the left.
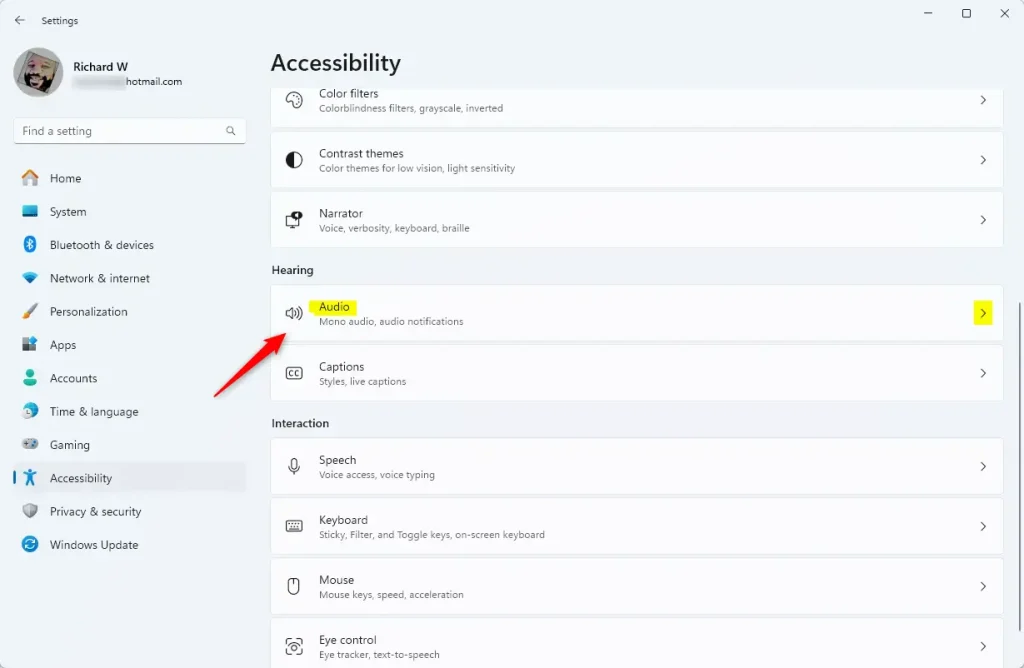
Select the “Audio” tile on the Accessibility on the right to expand it.
On the Accessibility > Audio settings pane, select the “Flash my screen during audio notifications” tile. Then, choose one of the options available.
- Never (default)
- Flash the title bar of the active window
- Flash the active window
- Flash the entire screen
That should do it!
Conclusion:
- Changing the “Flash my screen during audio notifications” feature in Windows 11 is simple through the Settings app.
- Users can select from multiple options, including “Never,” “Flash the title bar of the active window,” “Flash the active window,” and “Flash the entire screen” based on their preferences.
- This feature is especially beneficial for individuals who rely on visual cues for notifications while working on their computers.
Leave a Reply