
When protecting your WordPress blog, you should do everything necessary to secure it. In addition, I’d recommend all web admins look into enabling two-step and single sign-on authentication with WordPress.
Multiple plugins enable two-factor authentication with WordPress, and many are good.
I opt for Jetpack. Jetpack is a free plugin created by WordPress developers to provide more features to enhance WordPress. I don’t use all the features added to Jetpack, but Single Sign On (SSO) is one of the features I enable on all my WordPress websites.
This brief tutorial will show students and new users how to enable 2-factor and SSO authentication with WordPress using Jetpack. When it is enabled, only users who received the authentication code on their mobile device will be allowed to sign on to the site’s admin dashboard.
This will significantly enhance your blog security. Other security requirements should probably be implemented to provide a robust security measurement for your WordPress sites.
To enable Jetpack 2-factor / SSO authentication with WordPress, follow the guide below:
Sign up for a free WordPress.com account
Before you can use Jetpack, you must have a free wordpress.com account. Go to the link below to sign up for a free account. After signing up, log back onto your account and go to your Profile –> Security –> Two-Step Authentication.
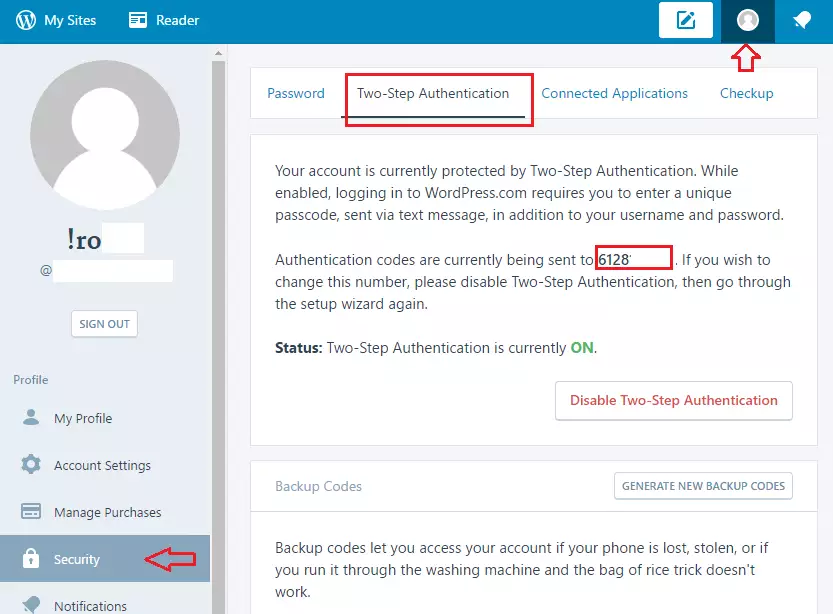
After enabling the two-step authentication and providing the mobile device number to receive the authentication codes, log back onto your WordPress blog and install the free Jetpack plugin.
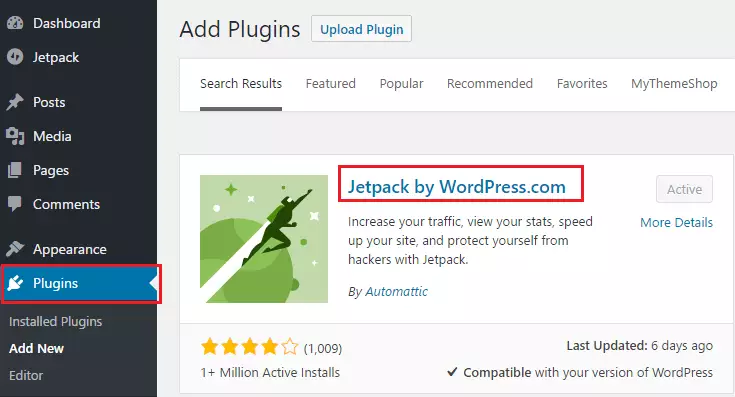
Install the Jetpack plugin on WordPress
To install the free Jetpack plugin, log on to your WordPress admin dashboard and go to Plugins –> Add New. The search for and install Jetpack
Connect Jetpack to WordPress.com and turn on SSO
After installing and activating Jetpack, go to Jetpack –> Settings –> Security –> and turn on Single Sign On. It would be best to connect Jetpack to wordpress.com before seeing the settings page. Next, check the box to Require Two-Step Authentication and save your settings. You don’t have to Match by Email. You can leave it unchecked.
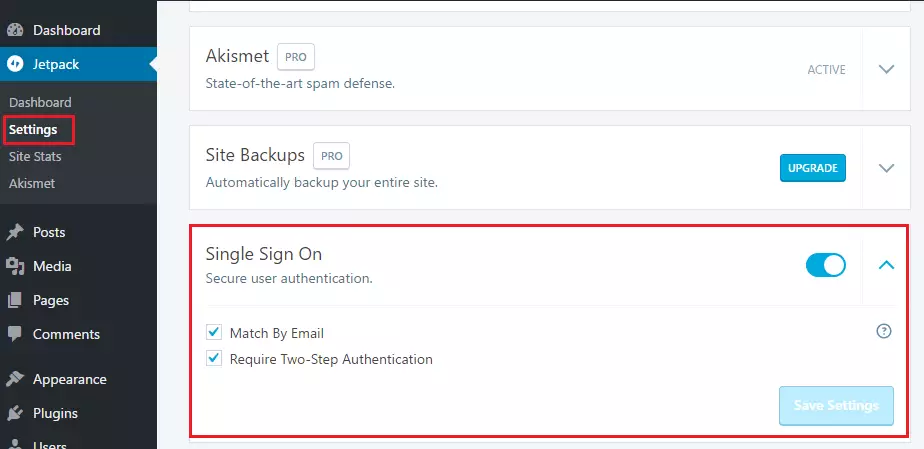
Save your settings, and you’re done.
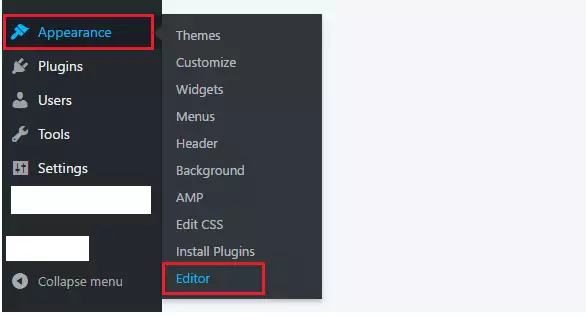
Add Jetpack codes to your theme’s file.
Finally, you must add the two lines of code to your theme’s function.php file. To edit the function.php file for your theme, click Appearance –> Editor, as shown in the image below.
Then, save the two lines to the middle of the theme’s functions.php file on a blank line.
add_filter( 'jetpack_remove_login_form', '__return_true' );
add_filter( 'jetpack_sso_require_two_step', '__return_true' );
Save the file, and you’re done. After saving the changes, log out of WordPress and try to log back in; you should see a message to log on with wordpress.com.
Visit the page below to see all custom code settings you can use with Jetpack.
Leave a Reply