
This article explains how to install SparkleShare on Ubuntu Linux.
SparkleShare is a genuinely open-source, self-hosted file-syncing program that can replace proprietary sync and cloud services with something open and decentralized.
Installing SparkleShare on Ubuntu Linux allows you to have a self-hosted, open-source file-syncing program that can replace proprietary sync and cloud services with something open and decentralized.
With SparkleShare, you can create a folder on your computer to host small projects, and any changes made to the files will be automatically kept in sync with both the host and all of your peers.
Additionally, SparkleShare provides similar functions as other open-source cloud services, but it allows you to choose where your data is stored and how it is accessed.
Following the installation instructions gives you more privacy, control, and higher transfer speeds with SparkleShare.
For more about SparkleShare, please visit its homepage.
Install Flatpak
The easiest way to install SparkleShare is via Flatpak. You can install it from the Ubuntu software center, but the version that comes with Ubuntu is likely old and not updated as often.
If you want SparkleShare to update automatically when new versions are available, you may want to use Flatpak.
Flatpak is a next-generation technology for building and distributing desktop applications on Linux.
To install Flatpak, follow the steps below:
On Ubuntu 18.04 and up, run the commands below:
sudo apt install flatpak
If you’re running Ubuntu 16.04 and previous, add the recommended PPA below and install Flatpak.
sudo add-apt-repository ppa:alexlarsson/flatpak
sudo apt update
sudo apt install flatpak
After that, Flatpak should be installed and ready to use.
Install SparkleShare
Now that Flatpak is installd, run the commands below to add the SparkleShare repository and install its packages from Flatpak.
flatpak remote-add flathub https://flathub.org/repo/flathub.flatpakrepo
flatpak install flathub org.sparkleshare.SparkleShare
After the commands above, SparkleShare should be installed and ready to use.
Set up SparkleShare Host
SparkleShare uses the version control system Git under the hood, so setting up a host yourself is relatively easy. Using your host gives you more privacy, control, cheap storage space, and higher transfer speeds.
To set up a new host, run the commands below:
sudo bash
curl https://raw.githubusercontent.com/hbons/Dazzle/master/dazzle.sh --output /usr/bin/dazzle
sudo chmod +x /usr/bin/dazzle
After that, run the commands below to run its initial setup.
sudo dazzle setup
Running the commands above will install additional packages for SparkleShare to function.
Next, run the commands below to create your new project.
sudo dazzle create PROJECT_NAME
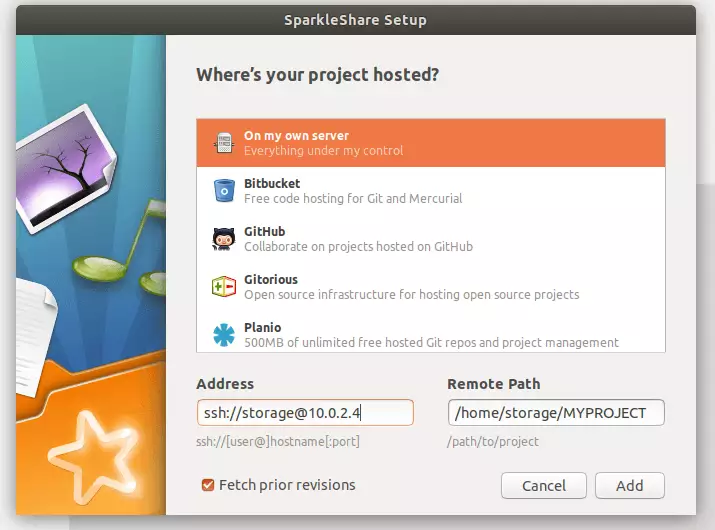
Replace PROJECT_NAME with the name of your project. Then, when you run the commands above, you will see a new project created with information on how to access as shown below:
dazzle create MYPROJECT
Creating project "MYPROJECT".
  -> /usr/bin/git init --bare /home/storage/MYPROJECT
  -> /usr/bin/git config --file /home/storage/MYPROJECT/config receive.denyNonFastForwards true
  -> echo "*.DMG -delta" >> /home/storage/MYPROJECT/info/attributes
  -> chown --recursive storage:storage /home/storage
  -> chmod --recursive o-rwx /home/storage/MYPROJECT

Project "MYPROJECT" was successfully created.
To link up a SparkleShare client, enter the following
details into the "Add Hosted Project." dialog:

      Address: ssh://[email protected]:
  Remote Path: /home/storage/MYPROJECT

To link up (more) computers, use the "dazzle link" command.
That’s all there is to it. Since SparkleShare uses plain Git repositories, you can keep using all your favorite tools that work with it.
Connect to Host
Now that a new host and project have been created, you can use a client to connect. For clients to connect, you must add the client’s unique SSH ID to the host. Run the commands below on the server to add a new client ID.
sudo dazzle link
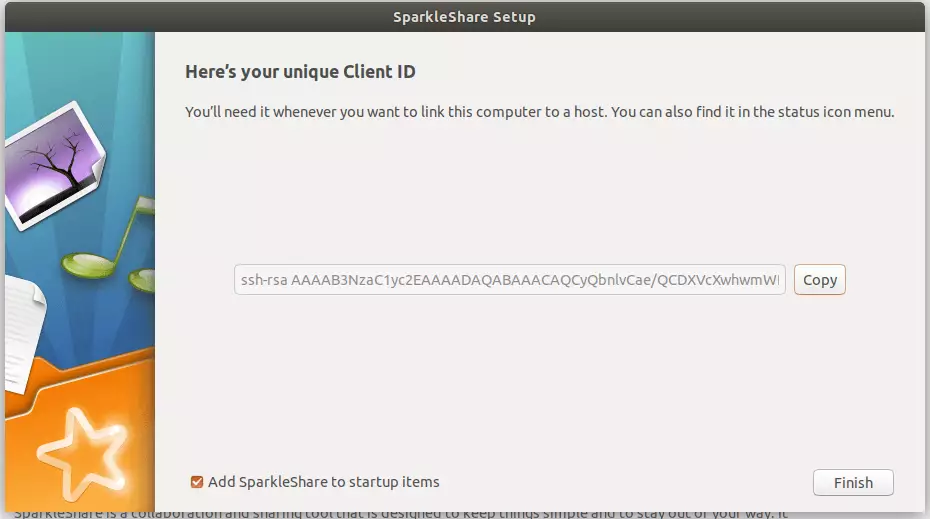
It should prompt you to enter the client ID. Grab the client ID from the client and paste it in there.
Paste your Client ID (found in the status icon menu) below and press .

 Client ID: ssh-rsa AAAAB3NzaC1yc2EAAAADAQABAAACAQCyQbnlvCae/QCDXVcXwhwmWD5IE6xPUElPPaXxLpctEdo9tL0oRsciyU8eo08/bI0q5RJWXzKhd9P7nQz2Q/idIDtNJ1CwYjwPFHVQFuYu/Ye4/rBYMl0zSfZ3cS1SLtBMNR+Y+20+e3NhDbDhCw/14cdcHXSf6J79kcxNUJ0iggVnJn6NHqYmGkcVnvgoHgu0gdg8KCq+wdRft9QSmSY2NfXJiBuF9DqO8cNwa0D2wXl84nikQOFNjsFLJiyEhYmFe/ILLgOlPUhDPSxG261lMo6KCwtQRCkCBSbEwbZEIuz7ivTXlQvy9KmaECl2pPo71vfCEMZk0ch7p+7U+ayodIAMff1DeT4GsZrSsk5L5wioF7v1t+r00bNT7llnJiU1IspKAr0hR8IB9lmOGB+PMIK/OFUk3hhaUByIh7dm7iZVL6wznt69kNS3ylhEx5oNIQBniNDqHw/SSu8eyUPVs1jMl8IVk2ADWnkqAMiCtMlmi+G+30aF3hdWpBKCKsc6gBTQ3Mypmw4uX2X99+oLZAXoKja0T2cg1zaBmJVSy4MKu1WxyidDuKIKJ+TEsbktlgPFtKtOPz3Ab7smI5U6UE14eJOYesg25HO39hpMnXip3znPpAJoZd97GtHsyhlUc1DAxNz7Qe6RT0Vcgd3BRAInC/R0j8Fx+OYKDBnyXQ== ubuntu1804 (SparkleShare)

The client with this ID can now access projects.
Repeat this step to give access to more clients.
Use the client to connect to the project.
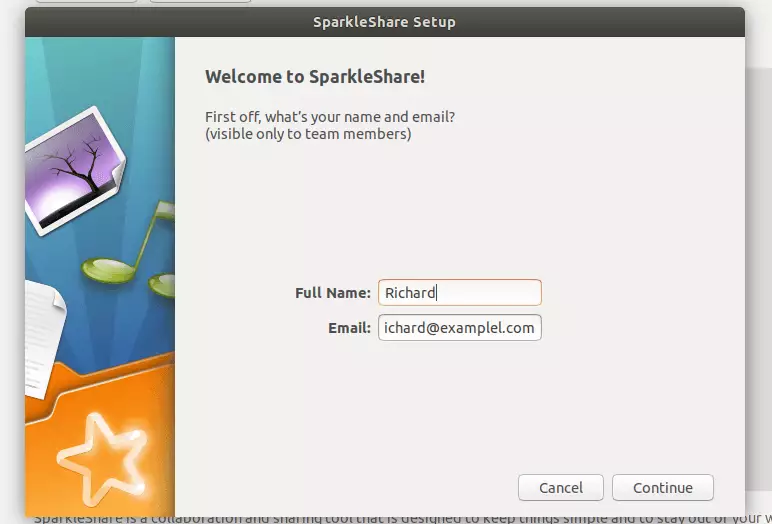
The client key is to be copied to the host.
Connect using the info presented above.
That’s it!
Congratulations! You have successfully installed and configured SparkleShare on Ubuntu.
You may also like the post below:
Leave a Reply