Refinery CMS is probably Ruby on Rails’s most famous content management system (CMS). It makes developing and designing static websites easy and is the leading open-source CMS on the Ruby on Rails framework.
Refinery CMS can create your personal or business websites in minutes by creating markup pages and content. In addition, refinery CMS offers features that may not be available to other PHP-based CMS, like WordPress, Joomla, or Drupal.
For one, you don’t have to worry about comments management and frequent updates… All you do is write your content, and it’s instantly published. Other features like permalinks, categories, pages, posts, and custom layouts are all top content and SEO-friendly.
For more about Refinery CMS, check its homepage.
These are the packages we’re going to set up.
- Ruby version 2.5.3
- Rails version 5.2.1
- MySQL Server
Install Ruby
You’ll need to install some dependencies to install Ruby and Rails on Ubuntu. To make that happen, install Node.js and Yarn repositories. This will make installing the dependencies easier.
First, install these curl and git packages.
sudo apt update
sudo apt install curl git
Then, run the commands below to add Node.js and Yarn repositories and keys to your system. Then, install some core packages to get your environment going.
curl -sL https://deb.nodesource.com/setup_8.x | sudo -E bash -
curl -sS https://dl.yarnpkg.com/debian/pubkey.gpg | sudo apt-key add -
echo "deb https://dl.yarnpkg.com/debian/ stable main" | sudo tee /etc/apt/sources.list.d/yarn.list

sudo apt-get update
sudo apt-get install nodejs yarn zlib1g-dev build-essential libpq-dev libssl-dev libreadline-dev libyaml-dev libsqlite3-dev sqlite3 libxml2-dev libxslt1-dev libcurl4-openssl-dev libffi-dev
When you’re done, Continue below:
After adding the repositories and installing the necessary packages above, install Ruby with your local profile settings using rbenv. You’ll then use rbenv to install ruby-build.
cd ~/
git clone https://github.com/rbenv/rbenv.git ~/.rbenv
echo 'export PATH="$HOME/.rbenv/bin:$PATH"' >> ~/.bashrc
echo 'eval "$(rbenv init -)"' >> ~/.bashrc
exec $SHELL

git clone https://github.com/rbenv/ruby-build.git ~/.rbenv/plugins/ruby-build
echo 'export PATH="$HOME/.rbenv/plugins/ruby-build/bin:$PATH"' >> ~/.bashrc
exec $SHELL
After setting up your local profile, run the commands below to install Ruby version 2.5.3. If a newer version is available, replace the version number with that. Then, visit this site to find out about Ruby’s latest versions.
rbenv install 2.5.3
rbenv global 2.5.3
To verify that Ruby is installed, run the commands below:
ruby -v
You should see similar lines below:
ruby 2.5.3p105 (2018-10-18 revision 65156) [x86_64-linux]
Another package management you’ll want to install is bundler. to do that, run the commands below
gem install bundler
Now run the command below after installing the bundler.
rbenv rehash
Install MySQL Server
MySQL server can be installed on Ubuntu by running the commands below:
sudo apt-get install mysql-client mysql-server libmysqlclient-dev
Install Rails
Now that the Ruby environment is set up run the commands below to install Rails. Rails can be installed from Node.Js. First, run the commands below to install the Node.js repository, then install the Node.js package.
curl -sL https://deb.nodesource.com/setup_8.x | sudo -E bash -
sudo apt-get install -y nodejs
Now that Node.js is installed run the commands below to install Rails.
gem install rails -v 5.2.1
Don’t forget to rehash your Rbenv environment and install new packages.
rbenv rehash
To verify if Rails is installed, run the commands below.
rails -v
You should see something similar to the lines below:
Rails 5.2.1
Rubygems also come installed by default. However, it could be an old version, which will cause problems. Update using:
gem update --system
Also, in the past, we faced an RDoc bug; you should also update it. Also, install ImageMagick.
gem install rdoc
brew install imagemagick
Install Refinery CMS
Now that your environment is ready run the commands below to install Refinery CMS and build your first site. Next, run the commands below.
The best way to use this guide is to follow each step as it happens. No code or step is needed to make this example application, which has been left out, so you can follow along step-by-step.
To begin, open a terminal, navigate to the home folder where you have the rights to create files, and type:
refinerycms rickrockstar
Next, change it into the Refinery CMS folder and install it there.
cd rickrockstar
After a while, the necessary packages should be installed. When you’re done, run the commands below to create an admin user and install Refinery CMS.
Finally, run the commands below to start the server.
rails server
Now open your browser and browse to the hostname followed by port # 3000
You should see the Refinery CMS home page.
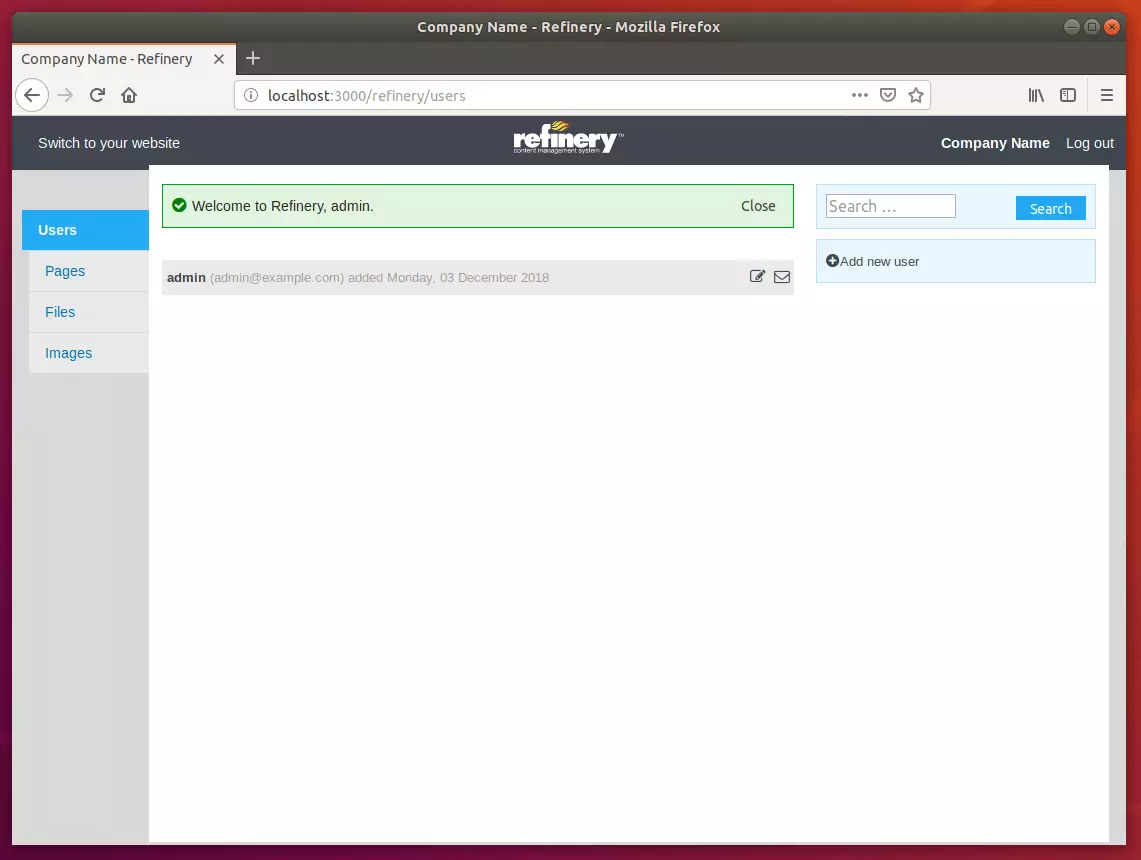
Log on to the backend using the admin address and password.
http://localhost:3000/refinery
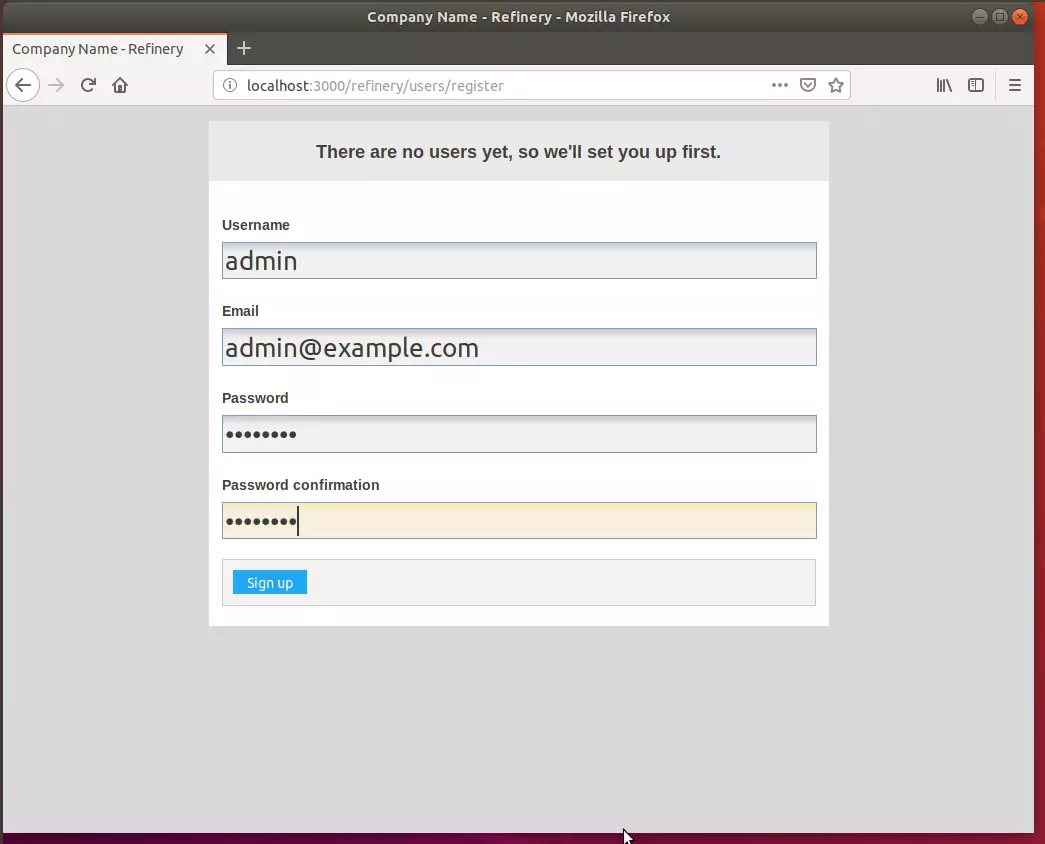
You’ll be prompted to create an admin account. The first user. After that, Refinery should be installed and ready to use.
More documentation for Refinery CMS can be found at the link below:
Congratulation! You have successfully installed the Refinery CMS platform on Ubuntu 16.04 | 18.04 | 18.10
You may also like the post below:

Leave a Reply Cancel reply