This article explains installing and using Flextype on Ubuntu Linux with Apache support.
There are several reasons why someone might want to install Flextype CMS with Apache on Ubuntu Linux. First, Flextype is a new open-source flat-file CMS that offers features that may not be available in other PHP-based content management systems, like WordPress, Joomla, or Drupal.
For example, it doesn’t need a database server to function and provides native markdown WYSIWYG support, SEO-friendly, flexible CSS framework, and dynamic contact types.
Second, the Apache2 HTTP Server is the most popular web server, so it’s a good choice for hosting Flextype. Installing Apache2 on Ubuntu is relatively straightforward, and many resources are available online to help with the process.
Finally, using Ubuntu Linux as the operating system for your server provides a stable, secure platform for hosting your website. Ubuntu Linux is widely used in the tech industry and is known for its reliability and security features. By installing Flextype CMS with Apache on Ubuntu Linux, you can have confidence that your website will run smoothly and be protected from security threats.
How to install Flextype CMS on Ubuntu Linux with Apache support
As mentioned, Flextype is a new open-source flat-file CMS that’s fast, easy to set up, and provides amazing APIs for plugins, themes, and core developers. Like other flat-file CMS, there’s installation needed; copy files to your server!
Below is how to install it on Ubuntu Linux with Apache support.
Install Apache2 HTTP Server on Ubuntu
Apache2 HTTP Server is the most popular web server in use. so install it since Flextype needs it.
To install Apache2 HTTP on the Ubuntu server, run the commands below.
sudo apt update
sudo apt install apache2
After installing Apache2, the commands below can stop, start, and enable the Apache2 service to always start up with the server boots.
sudo systemctl stop apache2.service
sudo systemctl start apache2.service
sudo systemctl enable apache2.service
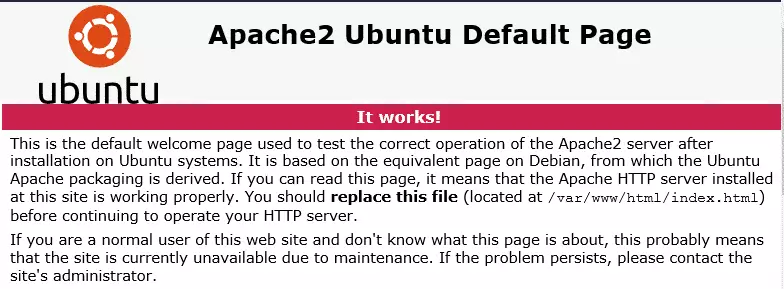
To test the Apache2 setup, open your browser and browse to the server hostname or IP address. You should see the Apache2 default test page, as shown below. When you see that, then Apache2 is working as expected.
http://localhost
Install PHP 7.2 and Related Modules
PHP 7.2 isn’t available on Ubuntu’s default repositories. To install it, you will have to get it from third-party repositories.
Run the commands below to add the below-party repository to upgrade to PHP 7.2
sudo apt-get install software-properties-common
sudo add-apt-repository ppa:ondrej/php
Then update and upgrade to PHP 7.2
sudo apt update
Next, run the commands below to install PHP 7.2 and related modules.
sudo apt install php7.2 libapache2-mod-php7.2 php7.2-common php7.2-mbstring php7.2-xmlrpc php7.2-soap php7.2-gd php7.2-xml php7.2-cli php7.2-curl php7.2-zip
After installing PHP 7.2, run the commands below to open the PHP default config file for Apache2.
sudo nano /etc/php/7.2/apache2/php.ini
Then, save the changes on the following lines below in the file. The value below is an ideal setting to apply in your environment.
file_uploads = On
allow_url_fopen = On
memory_limit = 256M
upload_max_filesize = 100M
max_execution_time = 360
date.timezone = America/Chicago
After making the change above, please save the file and close it.
After installing PHP and related modules, you must restart Apache2 to reload PHP configurations.
To restart Apache2, run the commands below
sudo systemctl restart apache2.service
To test PHP 7.2 settings with Apache2, create a phpinfo.php file in the Apache2 root directory by running the commands below
sudo nano /var/www/html/phpinfo.php
Then, type the content below and save the file.
<?php phpinfo( ); ?>
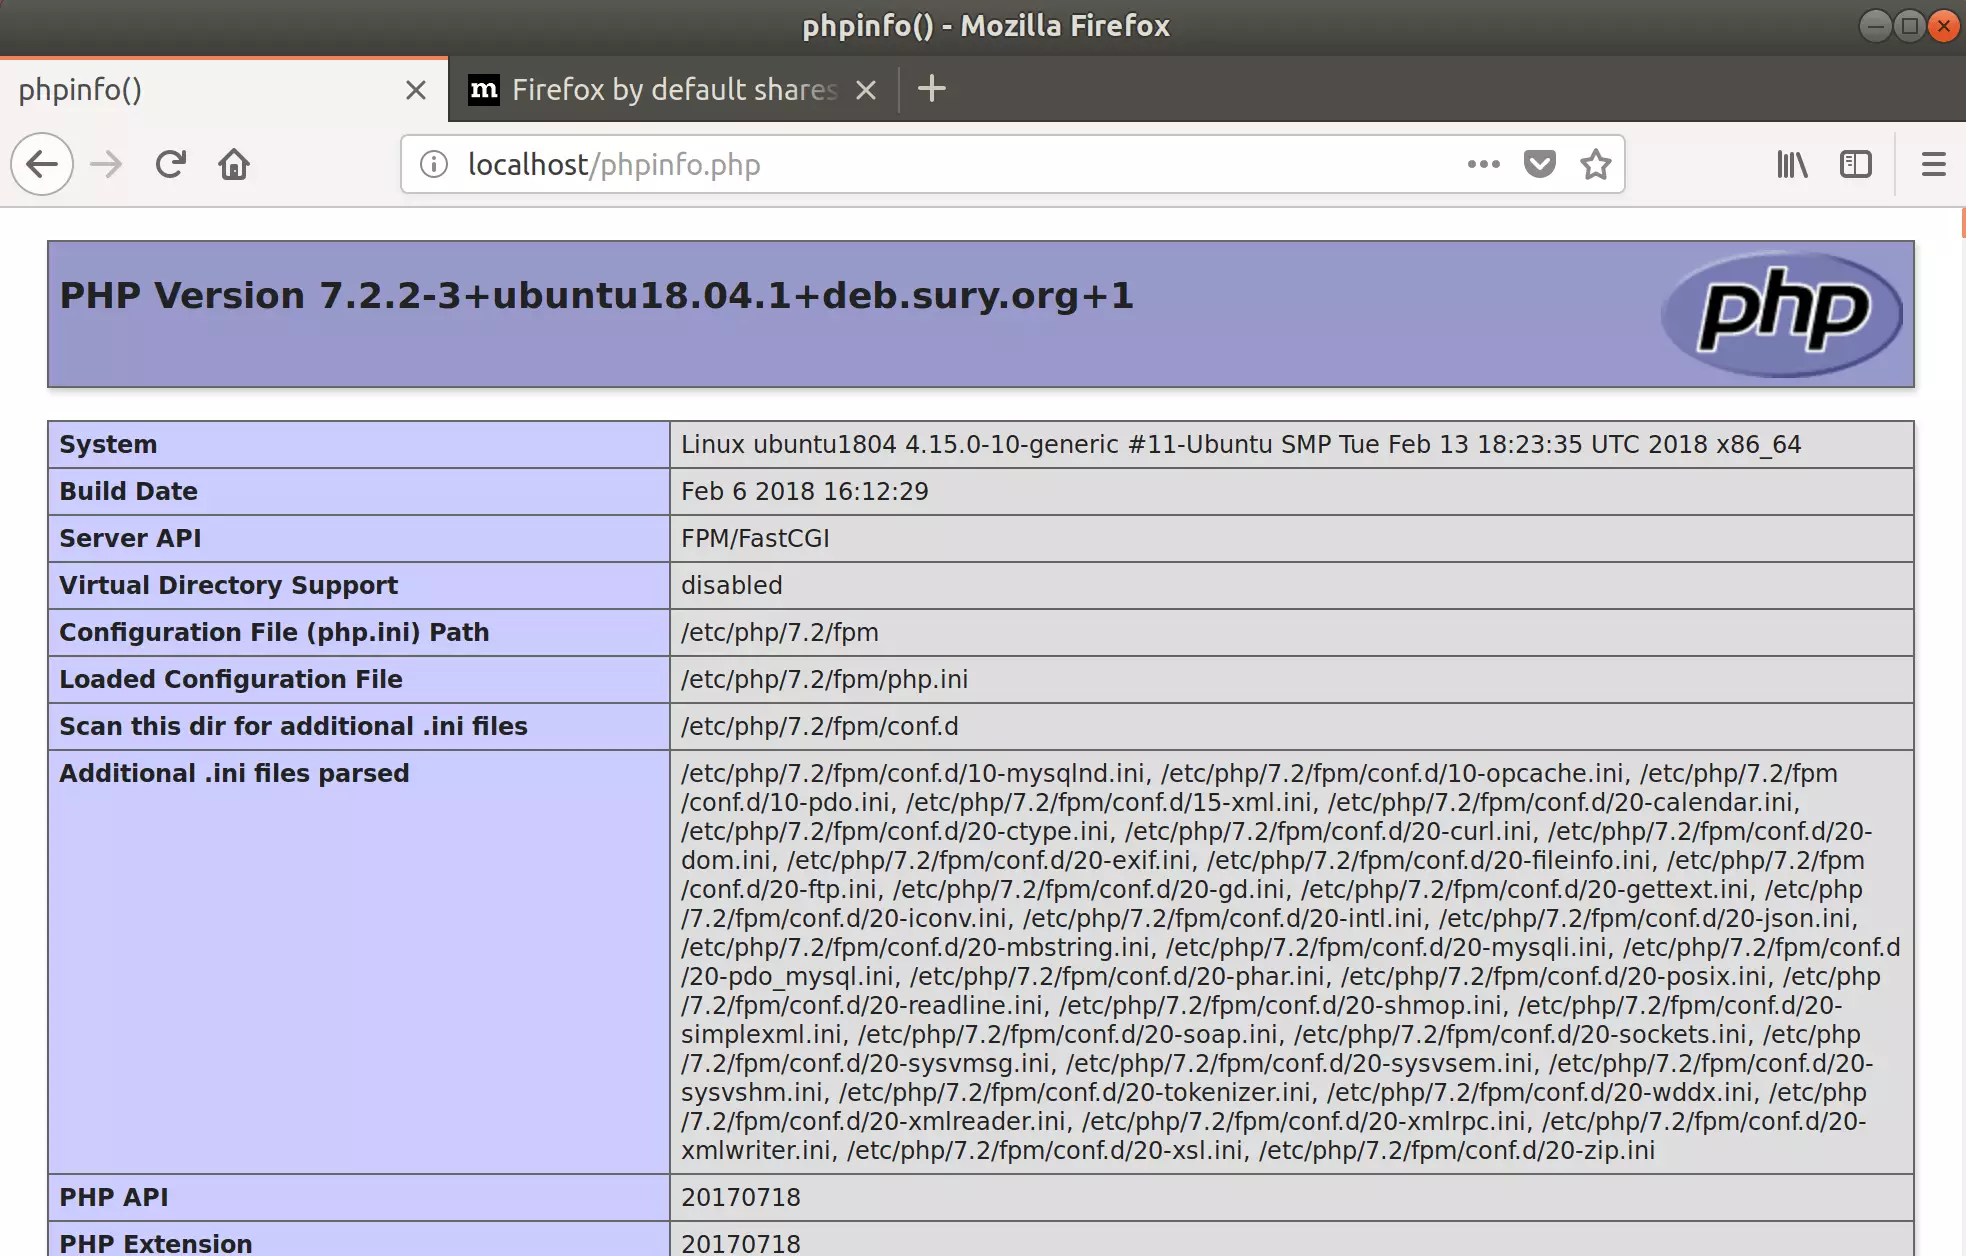
Save the file. Then browse to your server hostname followed by /phpinfo.php
http://localhost/phpinfo.php
You should see the PHP default test page.
Download Flextype Latest Release
Next, visit the Flextype site and download the latest package. Or run the commands below to download and extract Flextype content.
After downloading, run the commands below to extract the downloaded file and move it into a new Flextype root directory.
cd /tmp && wget https://github.com/flextype/flextype/releases/download/v0.2.0/flextype-0.2.0.zip
sudo mkdir /var/www/html/flextype
unzip flextype-0.2.0.zip -d /var/www/html/flextype
Then, run the commands below to set the correct permissions for Flextype to function correctly.
sudo chown -R www-data:www-data /var/www/html/flextype/
sudo chmod -R 755 /var/www/html/flextype/
Configure Apache2 Flextype Site
Finally, configure the Apache2 configuration file for Flextype. This file will control how users access Flextype content.
Run the commands below to create a new configuration file called flex type.conf
sudo nano /etc/apache2/sites-available/flextype.conf
Then copy and paste the content below into the file and save it. Replace the highlighted line with your domain name and directory root location.
<VirtualHost *:80>
     ServerAdmin admin@example.com
     DocumentRoot /var/www/html/flextype/
     ServerName example.com
     ServerAlias www.example.com

     <Directory /var/www/html/flextype/>
          Options FollowSymlinks
          AllowOverride All
          Require all granted
     </Directory>

     ErrorLog ${APACHE_LOG_DIR}/error.log
     CustomLog ${APACHE_LOG_DIR}/access.log combined

</VirtualHost>
Save the file and exit.
After configuring the VirtualHost above, please enable it by running the commands below.
Enable the Flextype Site
After configuring the VirtualHost above, please enable it by running the commands below, then restart the Apache2 server.
sudo a2ensite flextype.conf
sudo a2enmod rewrite
sudo a2enmod proxy proxy_fcgi rewrite
sudo systemctl restart apache2.service
Install Let’s Encrypt Client
You should first install its client to get Let’s Encrypt free SSL/TLS certificates on your Ubuntu machine. The client helps automate the process for you. To install it, run the commands below.
sudo apt-get install python-certbot-apache
If python-certbot-Nginx isn’t installed, you may have to add its PPA repository and install the package.
sudo add-apt-repository ppa:certbot/certbot
sudo apt-get update
sudo apt-get install python-certbot-apache
Obtaining your free SSL/TLS Certificates
After installing the Let’s Encrypt Certbot client module for Apache2, run the commands below to obtain your free Let’s Encrypt SSL/TLS certificate in the domain specified. Make sure to replace example.com with your domain.
sudo certbot --apache -m admin@example.com -d example.com -d www.example.com
After running the above commands, you should be prompted to accept the licensing terms. If everything is checked, the client should automatically install the free SSL/TLS certificate and configure the Apache2 site to use the certs.
Please read the Terms of Service at
https://letsencrypt.org/documents/LE-SA-v1.2-November-15-2017.pdf. You must
agree in order to register with the ACME server at
https://acme-v01.api.letsencrypt.org/directory
-------------------------------------------------------------------------------
(A)gree/(C)ancel: A
Choose Yes ( Y ) to share your email address.
Would you be willing to share your email address with the Electronic Frontier
Foundation, a founding partner of the Let's Encrypt project and the non-profit
organization that develops Certbot? We'd like to send you email about EFF and
our work to encrypt the web, protect its users and defend digital rights.
-------------------------------------------------------------------------------
(Y)es/(N)o: Y
This is how easy it is to obtain your free SSL/TLS certificate for your Apache2-powered website.
Please choose whether or not to redirect HTTP traffic to HTTPS, removing HTTP access.
-------------------------------------------------------------------------------
1: No redirect - Make no further changes to the webserver configuration.
2: Redirect - Make all requests redirect to secure HTTPS access. Choose this for
new sites, or if you're confident your site works on HTTPS. You can undo this
change by editing your web server's configuration.
-------------------------------------------------------------------------------
Select the appropriate number [1-2] then [enter] (press 'c' to cancel): 2
Pick option 2 to redirect all traffic over HTTPS. This is important!
After that, the SSL client should install the cert and configure your website to redirect all traffic over HTTPS.
Congratulations! You have successfully enabled https://example.com and
https://www.example.com

You should test your configuration at:
https://www.ssllabs.com/ssltest/analyze.html?d=example.com
https://www.ssllabs.com/ssltest/analyze.html?d=www.example.com
-------------------------------------------------------------------------------

IMPORTANT NOTES:
 - Congratulations! Your certificate and chain have been saved at:
   /etc/letsencrypt/live/example.com/fullchain.pem
   Your key file has been saved at:
   /etc/letsencrypt/live/example.com/privkey.pem
   Your cert will expire on 2018-02-24. To obtain a new or tweaked
   version of this certificate in the future, simply run certbot again
   with the "certonly" option. To non-interactively renew *all* of
   your certificates, run "certbot renew"
 - If you like Certbot, please consider supporting our work by:

   Donating to ISRG / Let's Encrypt:   https://letsencrypt.org/donate
   Donating to EFF:                    https://eff.org/donate-le
The highlighted code block should automatically be added to your Apache2 Flextype configuration file by Let’s Encrypt certbot. After that, your Flextype site is ready to be used over HTTPS.
<VirtualHost *:80>
     ServerAdmin admin@example.com
     DocumentRoot /var/www/html/flextype/
     ServerName example.com
     ServerAlias www.example.com

     <Directory /var/www/html/flextype/>
          Options FollowSymlinks
          AllowOverride All
          Require all granted
     </Directory>

     ErrorLog ${APACHE_LOG_DIR}/error.log
     CustomLog ${APACHE_LOG_DIR}/access.log combined

RewriteEngine on
RewriteCond %{SERVER_NAME} =example.com [OR]
RewriteCond %{SERVER_NAME} =www.example.com
RewriteRule ^ https://%{SERVER_NAME}%{REQUEST_URI} [END,NE,R=permanent]
</VirtualHost>
A new configuration file for the domain should also be created named /etc/apache2/sites-available/example.com-le-SSL.conf. This Apache2 SSL module configuration file should contain the defined certificate definitions.
<IfModule mod_ssl.c>
<VirtualHost *:443>
   ServerAdmin admin@example.com
     DocumentRoot /var/www/html/flextype/
     ServerName example.com
     ServerAlias www.example.com

     <Directory /var/www/html/flextype/>
          Options FollowSymlinks
          AllowOverride All
          Require all granted
     </Directory>

     ErrorLog ${APACHE_LOG_DIR}/error.log
     CustomLog ${APACHE_LOG_DIR}/access.log combined

SSLCertificateFile /etc/letsencrypt/live/example.com/fullchain.pem
SSLCertificateKeyFile /etc/letsencrypt/live/example.com/privkey.pem
Include /etc/letsencrypt/options-ssl-apache.conf
</VirtualHost>
</IfModule>
You’ll have to renew the certificates manually. You’ll get an email reminder to reset when the certificates are about to expire. To test the renewal process, run the commands below.
sudo certbot renew --dry-run
To set up a process to automatically renew the certificates, add a cron job to execute the renewal process.
sudo crontab -e
Then add the line below and save.
0 1 * * * /usr/bin/certbot renew & > /dev/null
The cron job will attempt to renew 30 days before expiring
After that, open your browser and browse your domain name to see the Flextype page. There’s no installation!
https://example.com
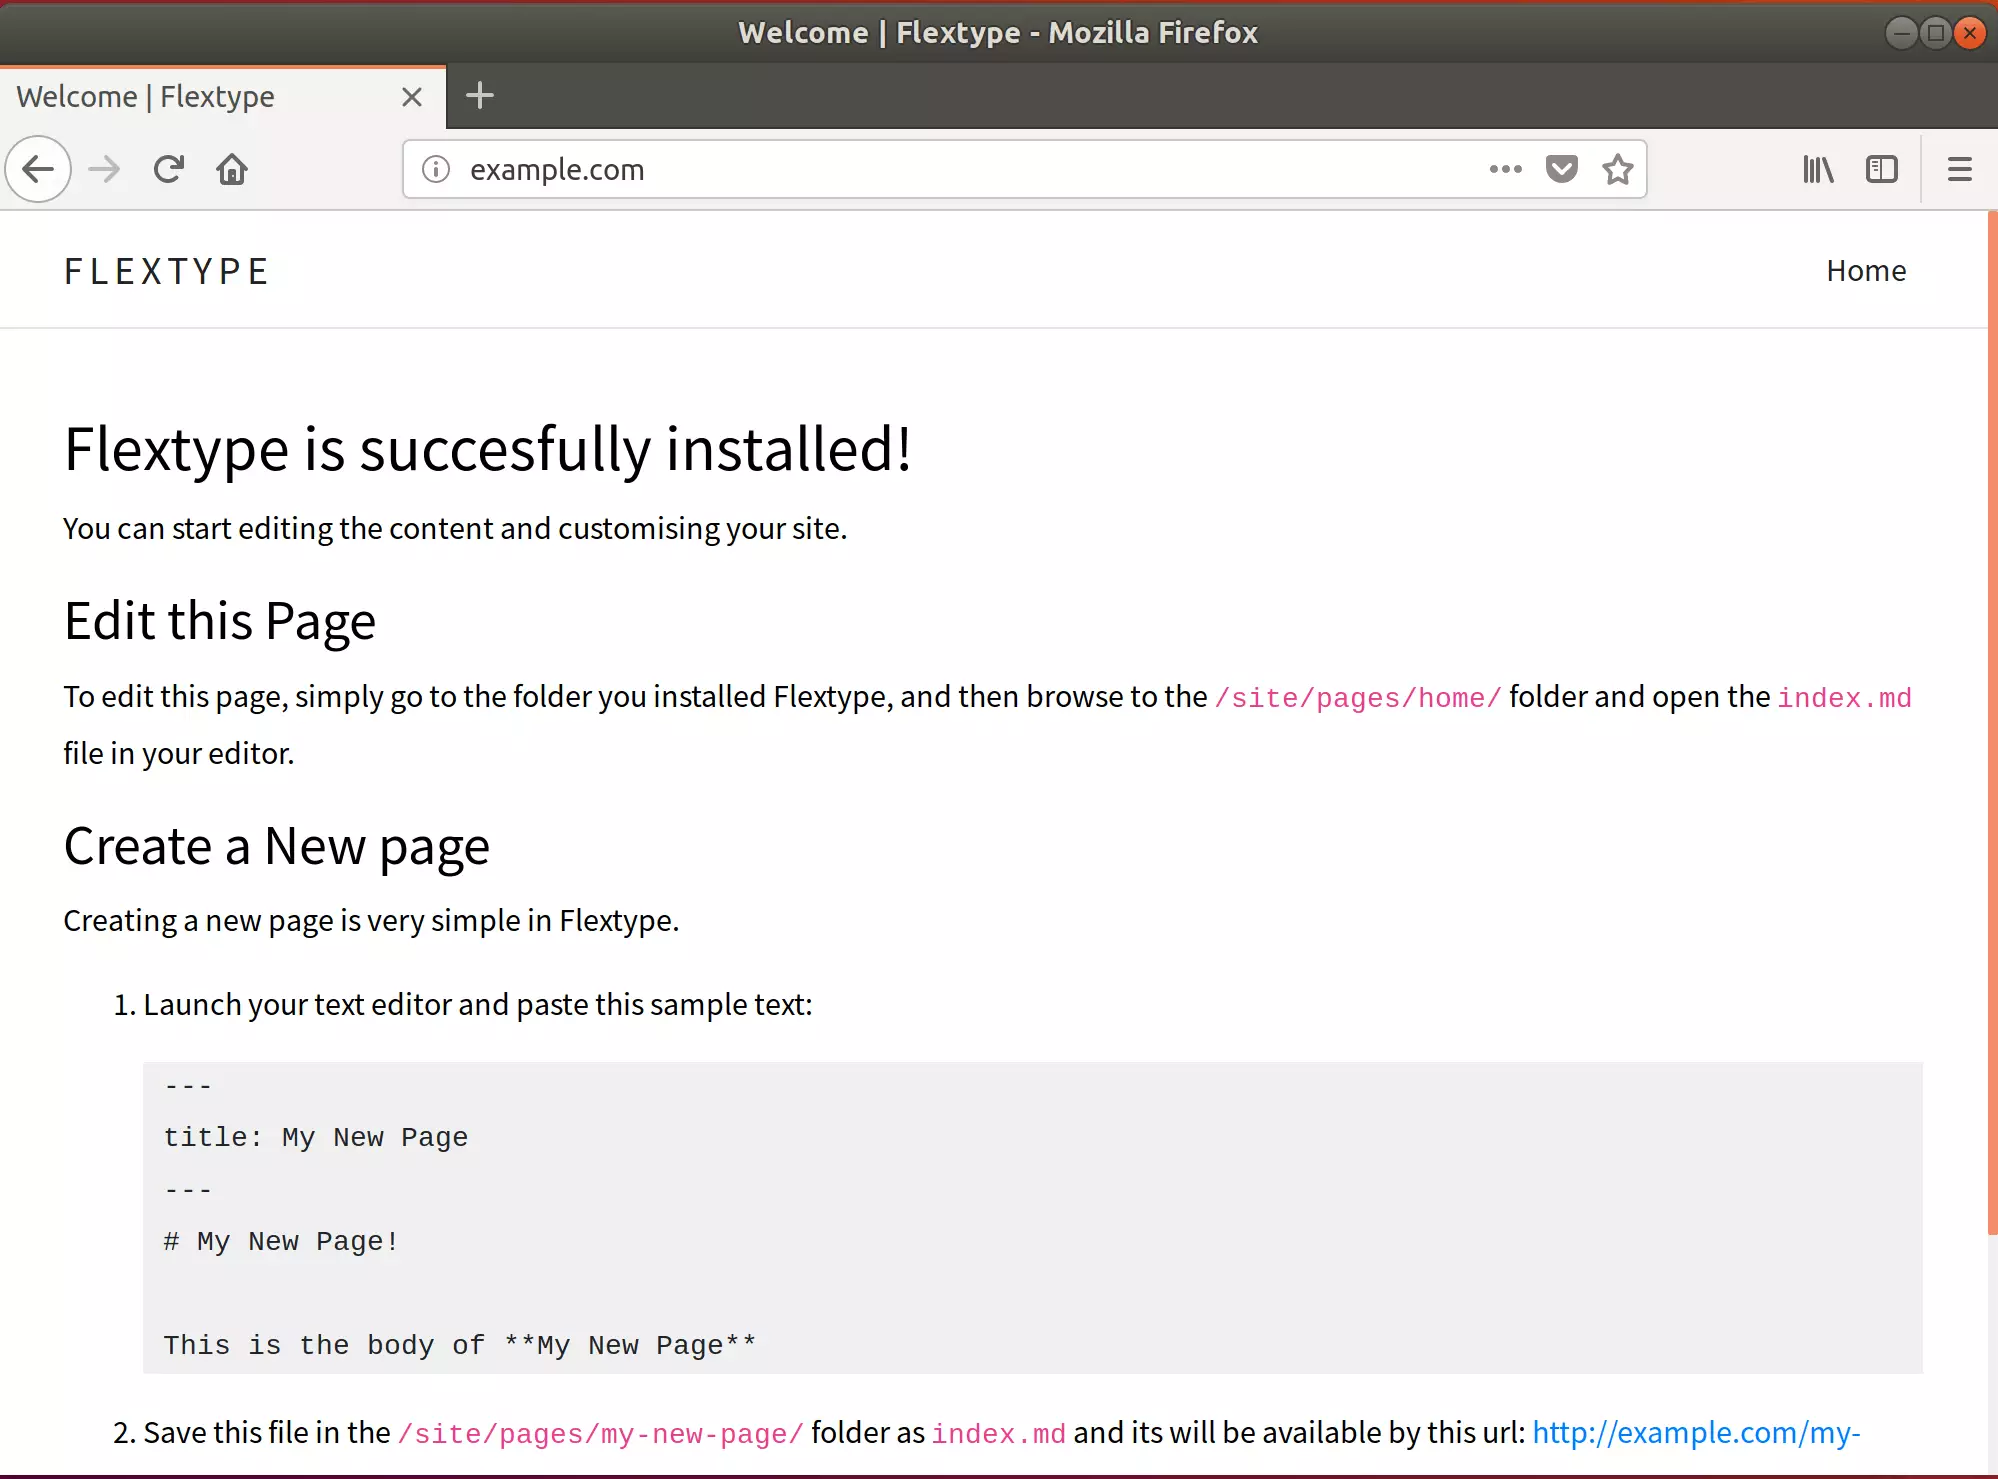
That’s it! Read its documentation to create new pages and content.


Leave a Reply Cancel reply