
This brief tutorial shows students and new users how to turn on or off Random Hardware MAC addresses in Windows 10 computers.
Windows 10 has a feature that allows users to use random hardware MAC addresses when connecting to a Wi-Fi network. This can come in handy, especially when connecting to public Wi-Fi or networks that are not trusted.
Before your computer connects to a Wi-Fi network, it requests to join. The request your computer sends will include your machine’s unique physical hardware address (MAC). This unique number can be used to track your computer location and activities.
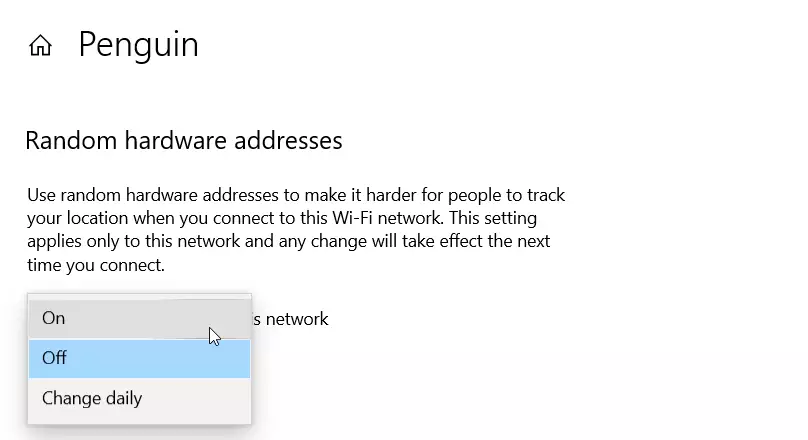
Suppose you want to add some layer of security to prevent tracking your computer MAC addresses and stop tracking you. In that case, you can enable random hardware MAC addresses if your computer supports it. Use random hardware addresses to make it harder for people to track your location when you connect to different Wi-Fi networks.
These settings can apply to all Wi-Fi networks or a single network you’re connecting to.
To get started with turning random hardware addresses on or off, follow the steps below:
Turn on all Wi-Fi
To turn off random MAC addresses for all new connections, go to Start –> Settings –> Network & Internet.
When the Network & Internet page opens, select Wi-Fi on the left menu, then switch the button to On to use random hardware addresses, as shown in the image below.
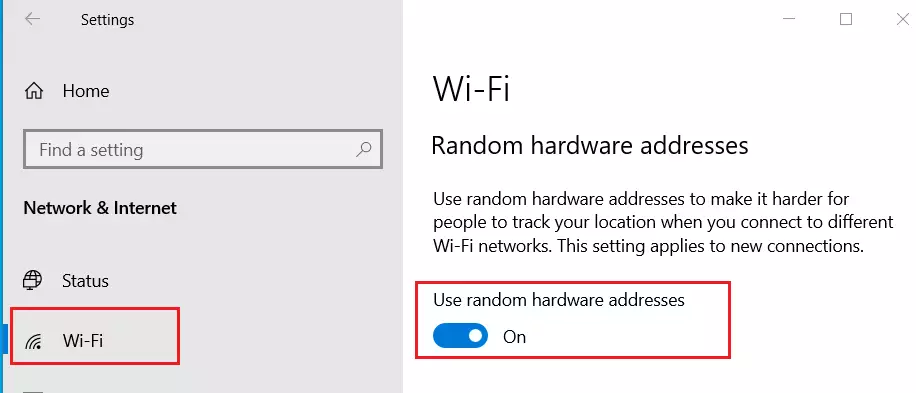
That should apply globally for all new Wi-Fi networks you join.
Turn on specific Wi-Fi
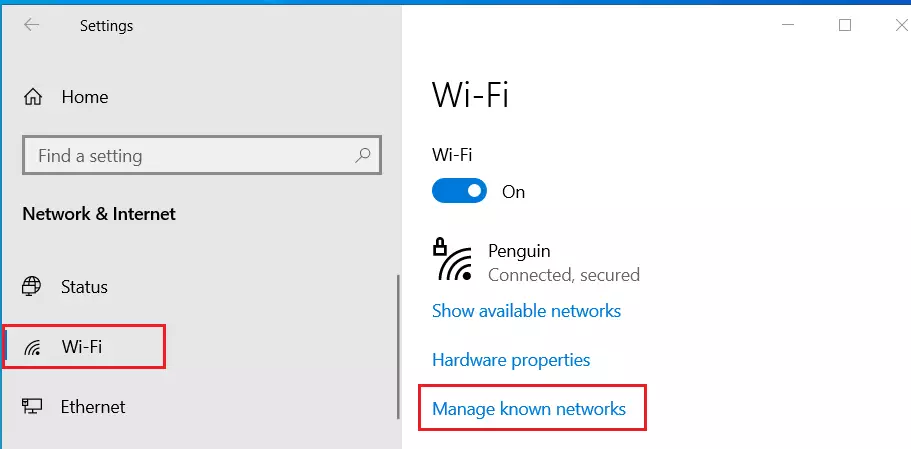
If you only want it to apply to a specific network, simply choose the network you want it to apply to. To turn it on for a specific Wi-Fi network, go to Start –> Settings –> Network & Internet.
When the Network & Internet page opens, select Wi-Fi on the left, then choose Manage Known Networks.
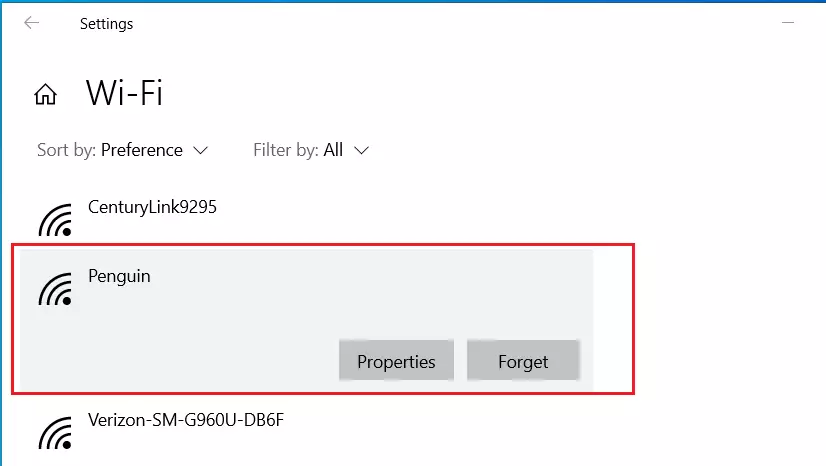
Next, select the Wi-Fi network from the list and click Properties, as shown in the image below.
Then, turn on random hardware addresses for the specific Wi-Fi network, as shown in the image below. You can select On to enable all the time or choose Change daily to replace the MAC addresses daily.
When you’re done, closeout and finish.
That should do it!
Conclusion:
- Enabling random hardware MAC addresses enhances your privacy when connecting to Wi-Fi networks, especially public ones.
- This feature prevents your unique MAC address from being consistently tracked by third parties.
- You can choose to apply random MAC addresses globally for all networks or customize it for specific connections.
- Following the simple steps outlined, you can easily manage your MAC address settings to better protect your online identity.
- Regularly reviewing your network settings can help maintain your security as technology and vulnerabilities evolve.

Leave a Reply Cancel reply