

This tutorial shows you how to turn the touch keyboard on or off in Windows 11. You can control what happens when there’s no physical keyboard attached to your device.
Why This Matters
Windows 11 has a touch keyboard you can tap to type text. This is useful if you have a touchscreen PC without a physical keyboard.
What Happens
When you turn this setting on, the touch keyboard automatically appears when you tap a text field and no hardware keyboard is detected. If you turn it off, the keyboard won’t show up automatically.
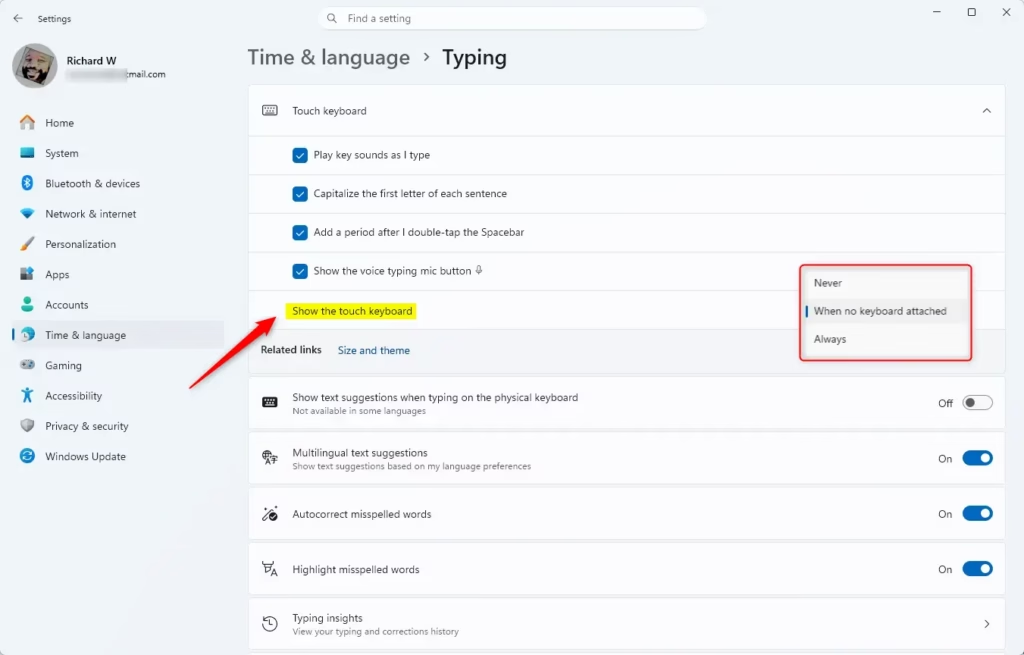
Starting with Windows 11 build 22621.1928, Microsoft changed how this setting works. Instead of a simple on/off checkbox, you now get three options:
- Never — The touch keyboard won’t show, even if no hardware keyboard is attached.
- When no keyboard attached — The touch keyboard only shows when your device is used as a tablet without a hardware keyboard.
- Always — The touch keyboard shows even when a hardware keyboard is connected.
Reference: Enable and disable the touch keyboard in Windows – Microsoft Support
By default, tablet devices have this setting turned on. Desktop and laptop devices have it turned off.
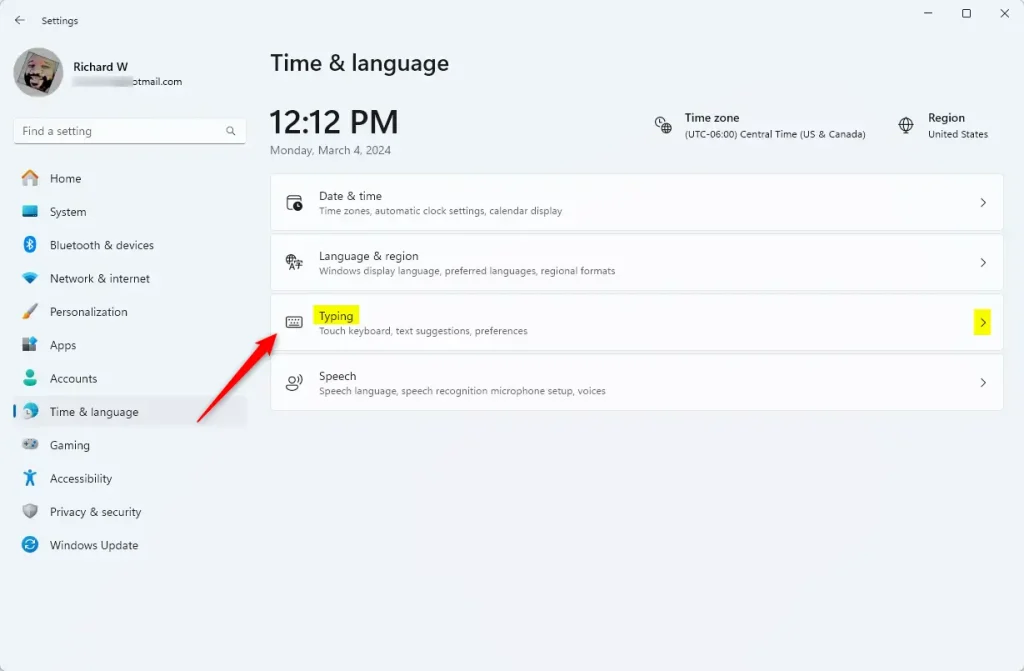
Option One: Using Settings
- Open Settings by pressing Win+I.
- Click Time & language on the left side, then click Typing on the right side.
- Click Touch keyboard to expand the options.
- Do one of the following based on your Windows 11 build:
- If you have a build older than Windows 11 build 22621.1926, check or uncheck Show the touch keyboard when there’s no keyboard attached.
- If you have Windows 11 build 22621.1926 or newer, select Never, When no keyboard attached, or Always from the Show the touch keyboard dropdown menu.
- Close Settings when done.
Option Two: Using the Registry
⚠️ Admin privileges required for this method
Open Windows Terminal and run the command below that matches what you want:
Never Show Touch Keyboard (Default Setting)
reg add "HKCU\Software\Microsoft\TabletTip\1.7" /v TouchKeyboardTapInvoke /t REG_DWORD /d 0 /f
Show Touch Keyboard When No Keyboard Attached
reg add "HKCU\Software\Microsoft\TabletTip\1.7" /v TouchKeyboardTapInvoke /t REG_DWORD /d 1 /f
Always Show Touch Keyboard
reg add "HKCU\Software\Microsoft\TabletTip\1.7" /v TouchKeyboardTapInvoke /t REG_DWORD /d 2 /f
Summary
You now know how to control the touch keyboard behavior in Windows 11. Use Settings for an easy graphical method, or use the Registry if you prefer command-line tools. Choose the option that works best for your device and how you use it.


Leave a Reply