

If you use Windows 11, you might have noticed the Network folder in the left side of your File Explorer. This folder helps you quickly find other computers or devices connected to your network.
By default, Windows 11 shows the Network folder to make it easy to browse your network. But if you don’t use it or find it distracting, you can hide it. And if it’s missing and you want it back, you can add it again.
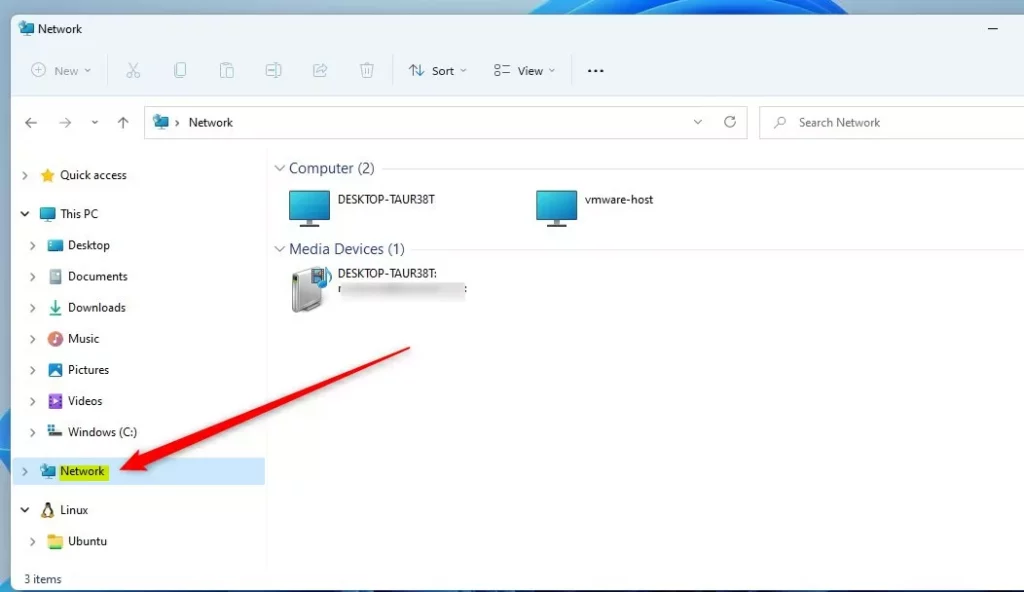
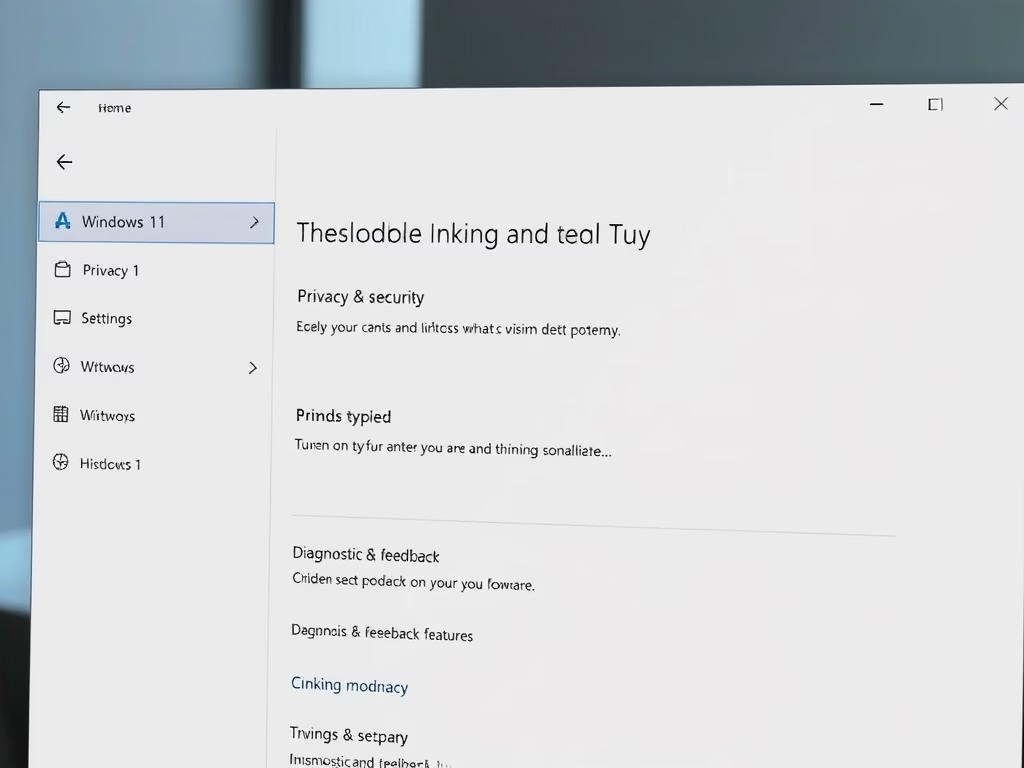
What does the Network folder look like?
Here is an example of the Network folder in the File Explorer navigation pane:
How to Show or Hide the Network Folder Quickly
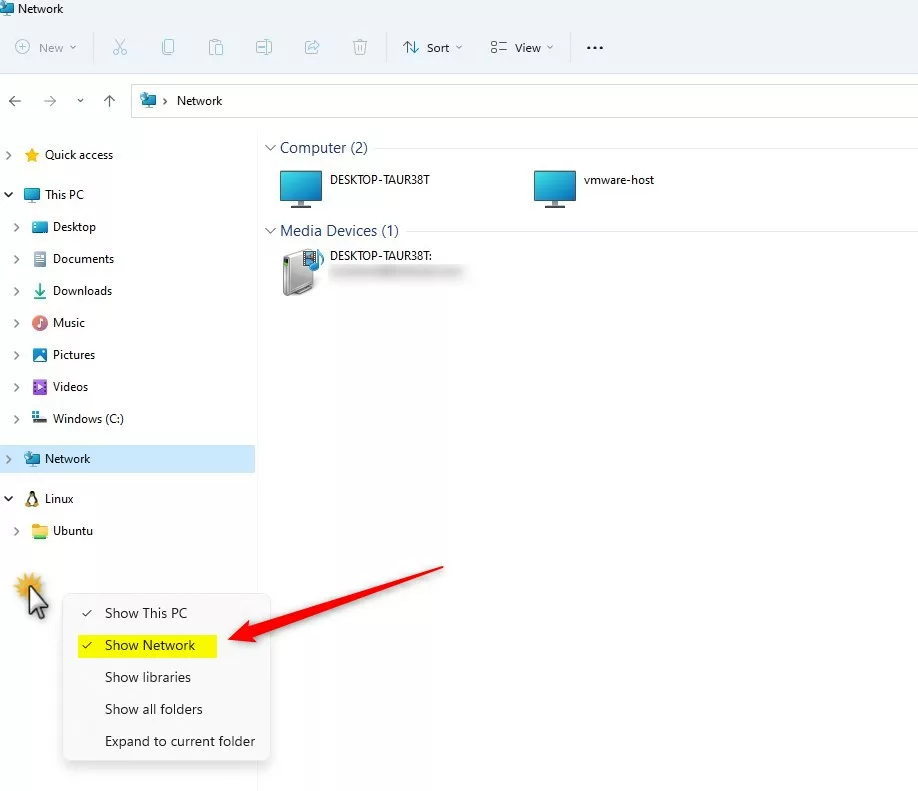
The easiest way to show or hide the Network folder is right from the File Explorer navigation pane.
- Open File Explorer.
- Look at the left side where your folders are listed.
- Right-click on an empty space in that left pane (not on a folder).
- You will see a menu with several options.
- Click on Show Network to add the Network folder if it’s missing.
- If the Network folder is there and you want to hide it, uncheck Show Network.
Show or Hide the Network Folder Using Folder Options
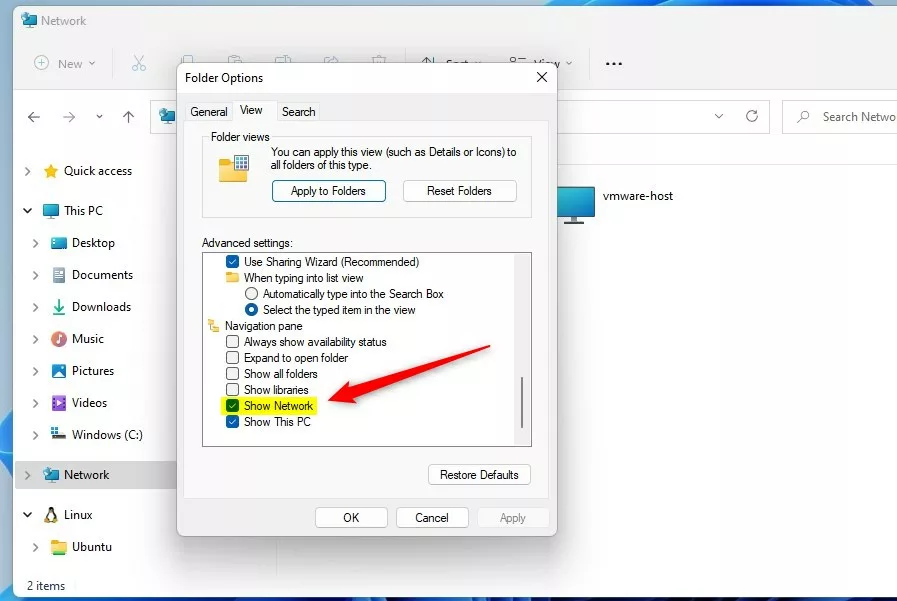
If you prefer, you can also use the Folder Options settings to show or hide the Network folder:
- Open File Explorer.
- Click on the three dots … at the top, then select Options.
- In the “Folder Options” window, click the View tab.
- Scroll down to the section called Navigation pane.
- Check the box next to Show Network to show the folder.
- Uncheck it to hide the folder.
- Click OK to save your changes.
Show or Hide the Network Folder Using Windows Registry (Advanced)
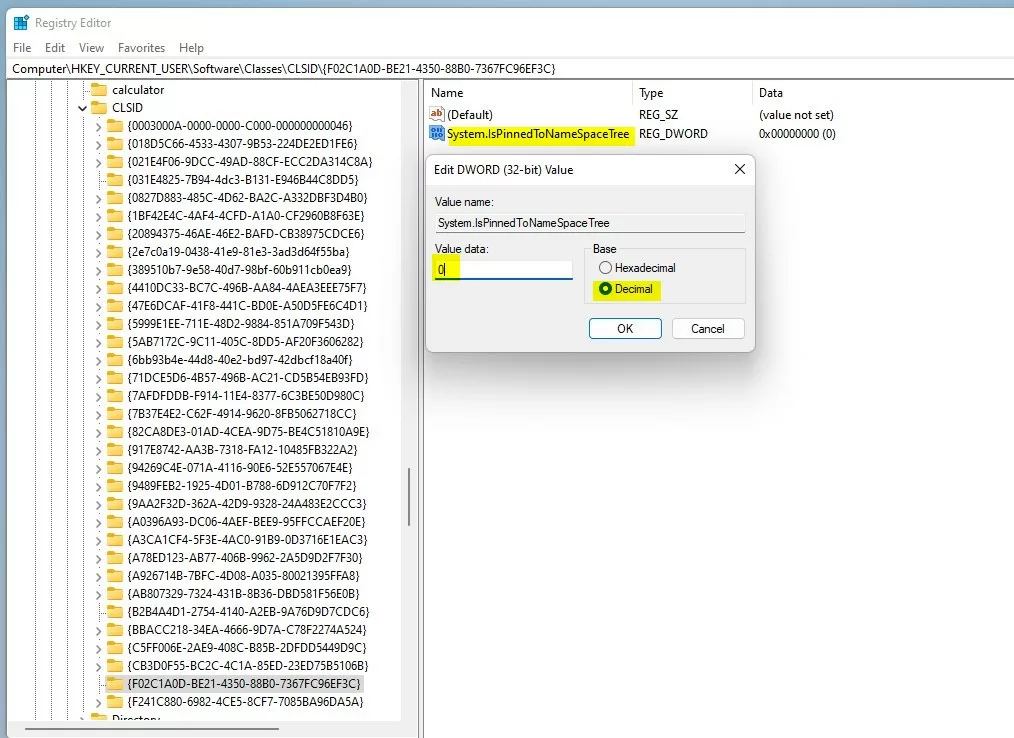
If you are comfortable making changes to your computer’s system files, you can show or hide the Network folder by editing the Windows Registry. This method is for advanced users and you should be careful.
Steps:
- Press Win + R on your keyboard, type
regedit, and press Enter to open the Registry Editor. - Navigate to this folder path:
HKEY_CURRENT_USER\Software\Classes\CLSID{F02C1A0D-BE21-4350-88B0-7367FC96EF3C} - If you don’t see the
{F02C1A0D-BE21-4350-88B0-7367FC96EF3C}folder, right-click onCLSID, select New > Key, and name it{F02C1A0D-BE21-4350-88B0-7367FC96EF3C}. - Click on this new folder, then in the right pane, right-click and choose New > DWORD (32-bit) Value.
- Name this new value
System.IsPinnedToNameSpaceTree. - Double-click on it, and set the value data to:
- 1 to show the Network folder.
- 0 to hide the Network folder.
- Click OK and close the Registry Editor.
- Restart your computer to see the changes.

Summary
- The Network folder in Windows 11 helps you find other devices on your network quickly.
- You can show or hide this folder easily by right-clicking in the File Explorer navigation pane or using Folder Options.
- Advanced users can also use the Windows Registry for more control.
- Hiding or showing this folder does not affect your computer’s network connection.
That’s it! Now you can customize your File Explorer to show only what you want.


Leave a Reply Cancel reply