How to Setup a Proxy in Windows 11

You set up a proxy in Windows 11 by configuring your network settings to route internet traffic through a specific server, effectively making it a middleman for your online activity.
A proxy server intercepts your requests to websites and forwards them, then retrieves the responses and sends them back to you. This is a common setup for businesses to enforce network policies, filter content, or boost security.
For instance, many companies require you to use their proxy to access internal resources securely. Once configured, your Windows 11 PC, specifically version 22H2 or newer, will automatically direct all its internet traffic through this designated proxy server.
Configure your proxy settings in Windows 11 by going to Settings > Network & internet > Proxy. You can then choose to use a setup script or manually enter the proxy server address and port. Click Save to apply your changes.
Setting up a proxy using a script
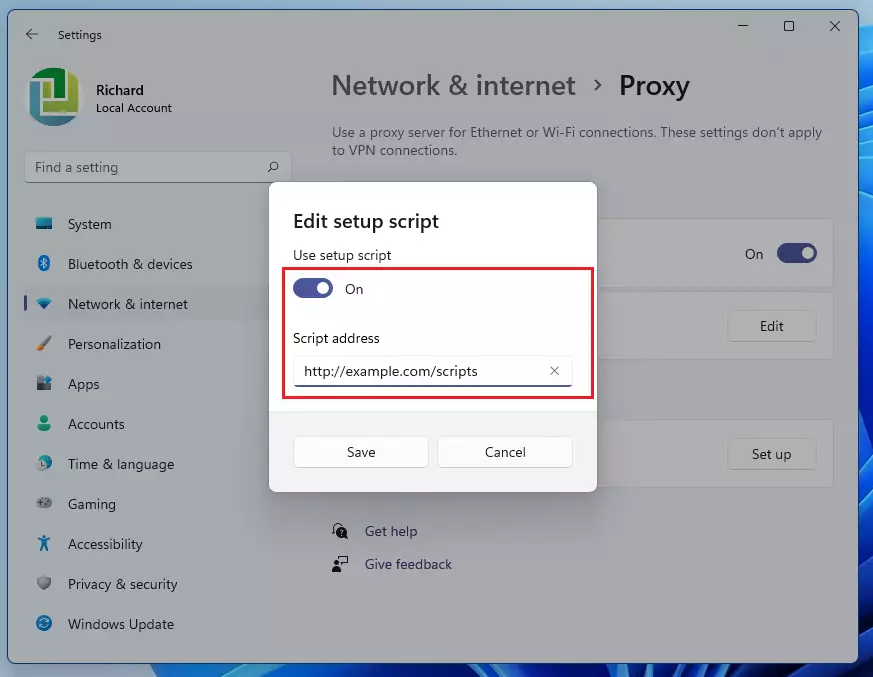
You can easily setup a proxy in Windows 11 using a script if your IT department gives you a web address for automatic connection.
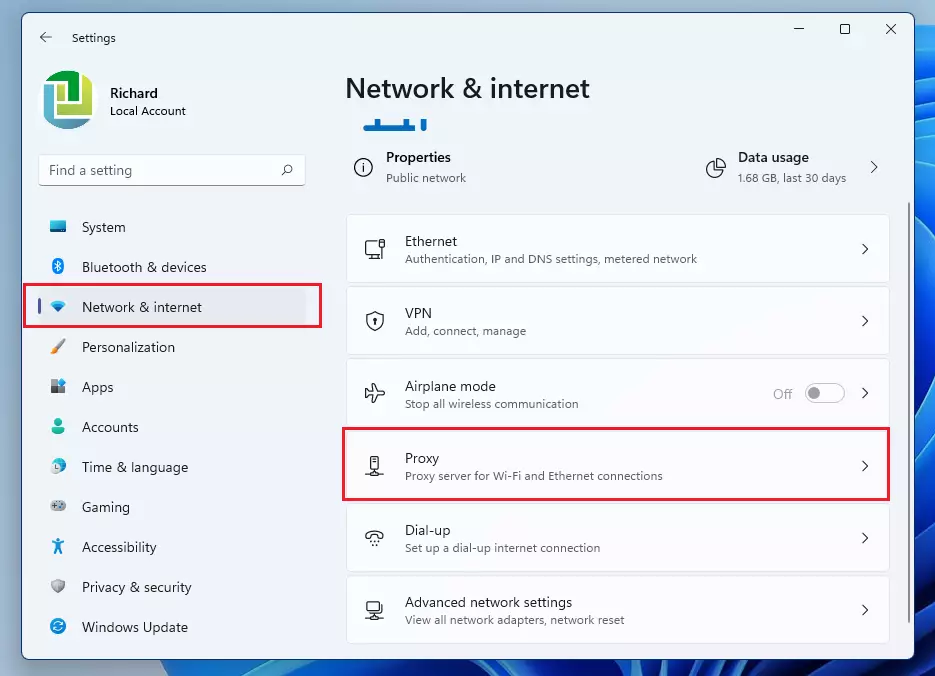
1. Open the Settings menu by pressing Windows key + I on your keyboard.

2. In the left-hand menu, click on Network & internet.
3. Select Proxy from the list on the right.
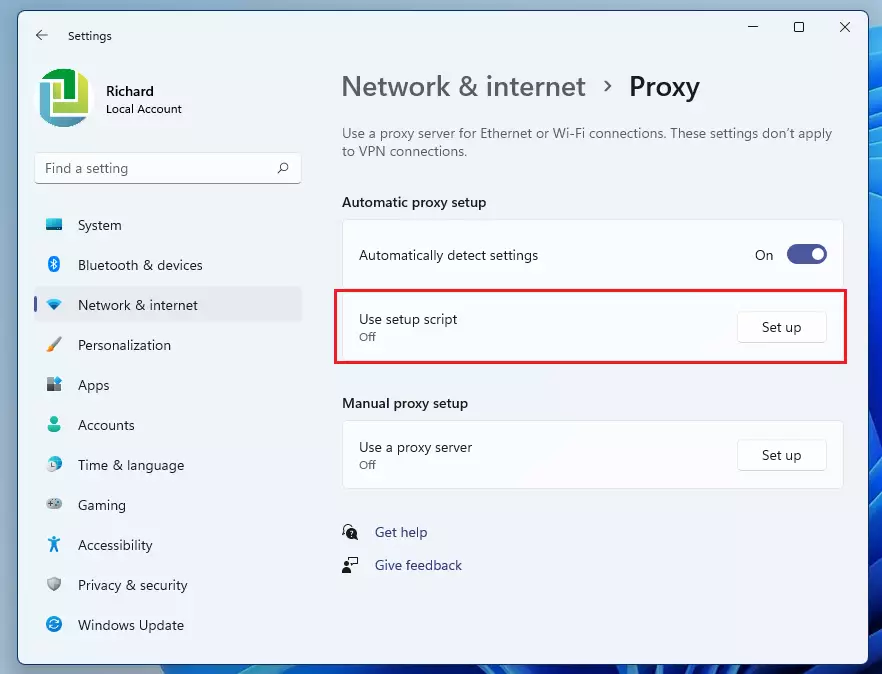
4. Click the Setup button next to “Use setup script.”
5. Toggle the switch to On. Enter the script address provided by your administrator in the box and click Save.
Setting up a manual proxy
Setting up a manual proxy in Windows 11 lets you enter the server address and port number yourself when you don’t have a setup script.
- Navigate to Settings > Network & internet > Proxy.
- Scroll down to “Manual proxy setup” and click the Setup button.

3. Toggle the switch to On.
4. In the Address field, enter the server IP (for example: 192.168.1.50). In the Port field, enter the port number provided to you.
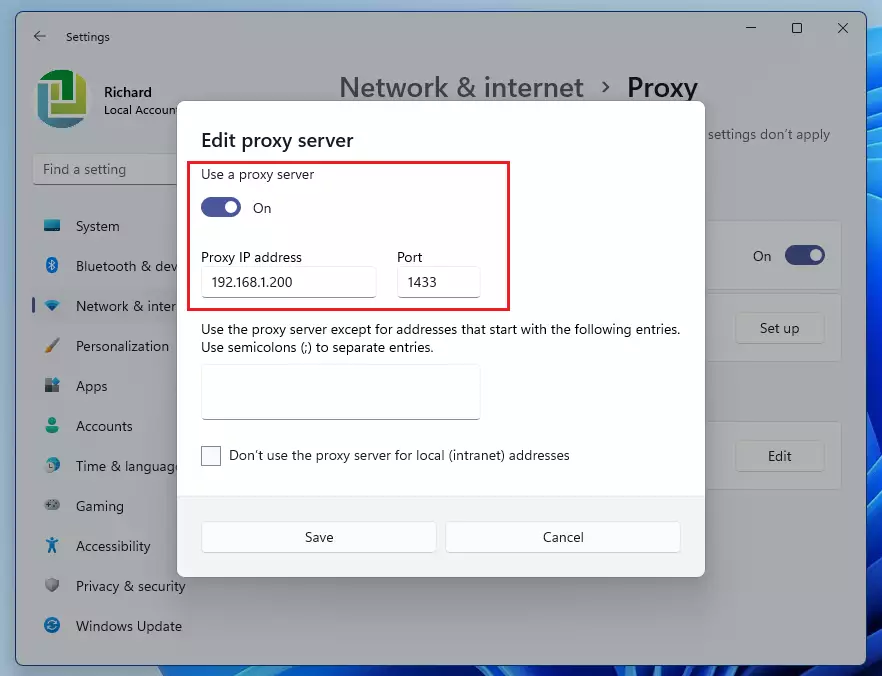
5. Click Save to finish.
Summary
Setting up a proxy in Windows 11 lets you browse the internet using an intermediary server, either through a script or by manually entering details.
Was this guide helpful?

About the Author
Richard
Tech Writer, IT Professional
Richard, a writer for Geek Rewind, is a tech enthusiast who loves breaking down complex IT topics into simple, easy-to-understand ideas. With years of hands-on experience in system administration and enterprise IT operations, he’s developed a knack for offering practical tips and solutions. Richard aims to make technology more accessible and actionable. He's deeply committed to the Geek Rewind community, always ready to answer questions and engage in discussions.

No comments yet — be the first to share your thoughts!