This brief tutorial shows students and new users how to set up a proxy in Windows 11 to access external resources or browse the Internet.
In some environments, one must use a proxy server before accessing the Internet or external services. Some businesses set up proxy servers to control what leaves and enters the Network. A proxy server is a network device between your PC and the Internet or external resources.
The proxy server requests websites and services on behalf of the user’s computer. Companies set up proxy servers to help save bandwidth since frequently used resources are cached and protect computers from ads, malware, and other harmful threats on the Internet.
By default, Windows 11 is set to detect proxy settings automatically. However, this may not always work, and you’ll have to configure a proxy setting on your machine manually.
There are multiple ways to set up a proxy on Windows. One way to set up a proxy is to use a proxy script. Another is manually entering the proxy server’s IP address and port number.
To set up a proxy server in Windows 11, follow the steps below.
How to setup a proxy via script in Windows 11
In some environments, a script is used to configure the Proxy. Usually, the IT or network administrator will provide a script to use in the setup. To setup a proxy via a script given to you by your IT administrator, follow the steps below:
Windows 11 has a centralized location for the majority of its settings. Everything can be done, from system configurations to creating new users and updating Windows from its System Settings pane.
To get to System Settings, you can use the Windows key + I shortcut or click on Start ==> Settings, as shown in the image below:

Alternatively, you can use the search box on the taskbar and search for Settings. Then select to open it.
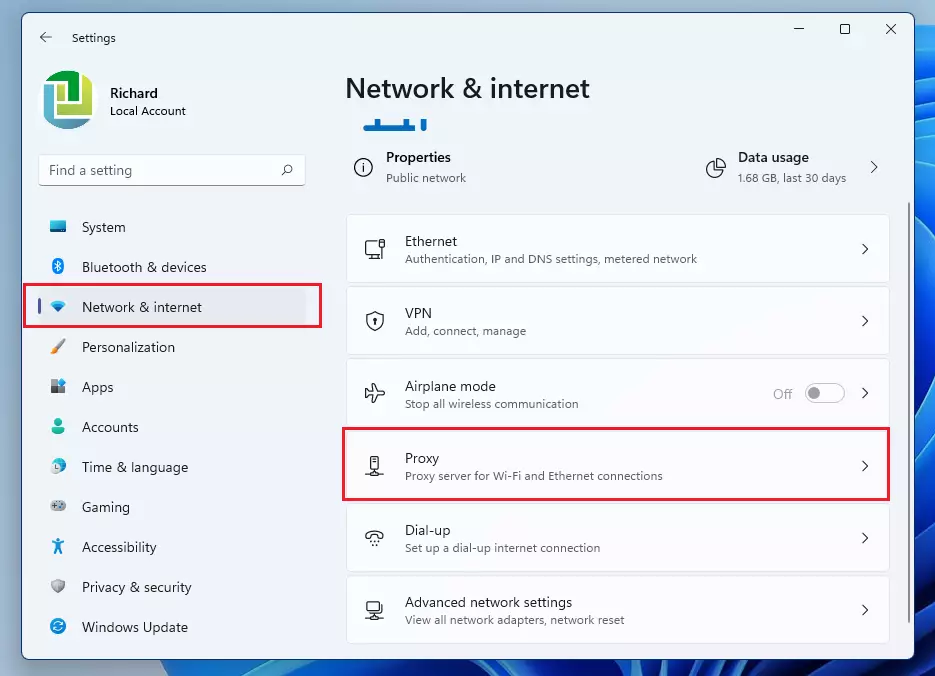
Windows Settings pane should look similar to the image below. In Windows Settings, click Network & Internet, and select Proxy on the right pane of your screen shown in the image below.
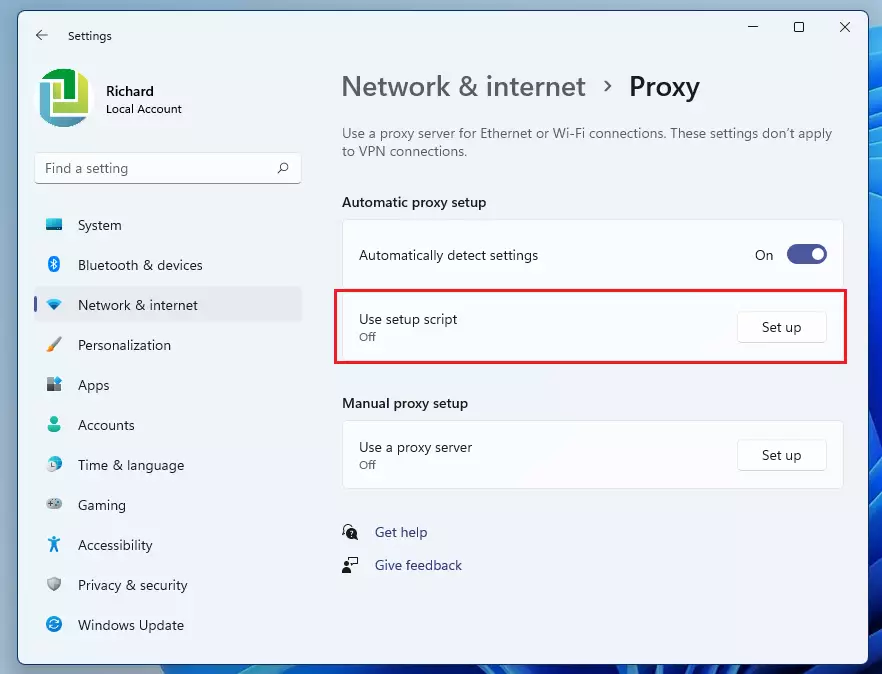
On the Proxy settings pane, click the Setup button.
On the next setting pane, turn on the script proxy, then type in the script address provided by your network administrator or service provider.
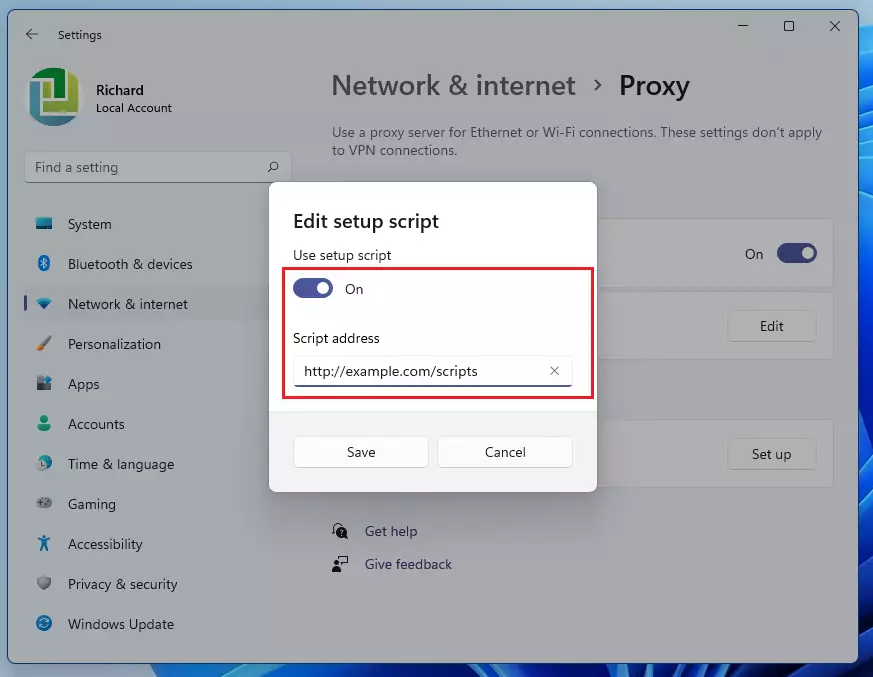
Enter the script address as it was given to you, then click Save.
How to manually setup Proxy in Windows 11
You can use a manual proxy setup if your setup does not require a script. In this setup, you must type in the Proxy server address and port number.
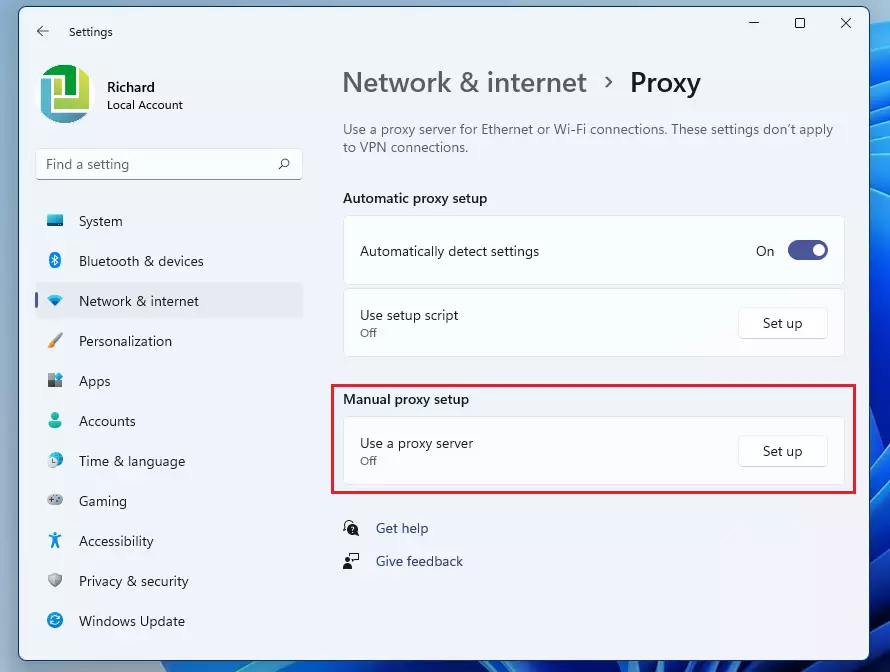
To set up a manual proxy, select Manual proxy setup. Then click on the Setup button to enter the Proxy details.
Toggle the button to turn on the manual proxy server on the pop-up setup window pane. In the Address field, type the IP address of the proxy server given to you. In the Port field, type the port.
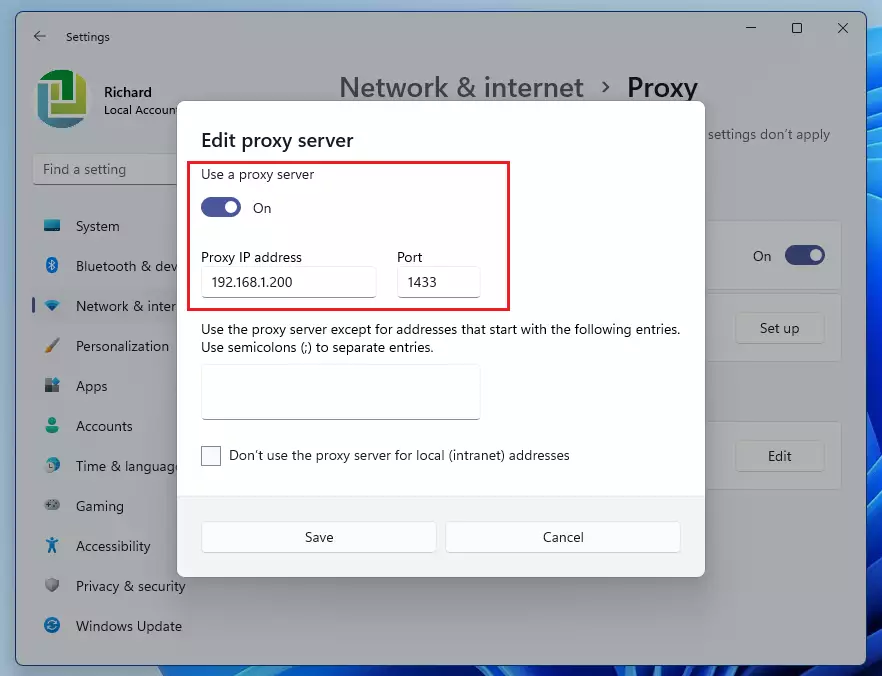
When you’re done, click Save and close the Settings window.
That should do it!
Conclusion:
- Setting up a proxy in Windows 11 can enhance your browsing experience and ensure safe access to external resources.
- Proxy servers act as intermediaries between your device and the internet, helping to manage bandwidth and mitigate security threats.
- You can configure a proxy through a script provided by your IT administrator or manually by entering the proxy server’s IP address and port.
- Following the right steps ensures that your proxy settings are correctly applied for optimal performance.
- Remember to save your settings and periodically review them to ensure you retain the necessary internet access and security features.


Leave a Reply