
This article describes selecting the default microphone and input devices in Windows 11.
When multiple input devices are connected to Windows 11, you may need to switch between these devices to select the most suitable one for a given situation.
Setting a default input device allows all apps on your system to use the same device, which saves you the hassle of switching between devices whenever you want to use a different app.
Set Windows 11 default microphone
There are several methods to choose the default input devices in Windows. By using the system settings, you can easily select the microphone that will serve as the default input device for all applications.
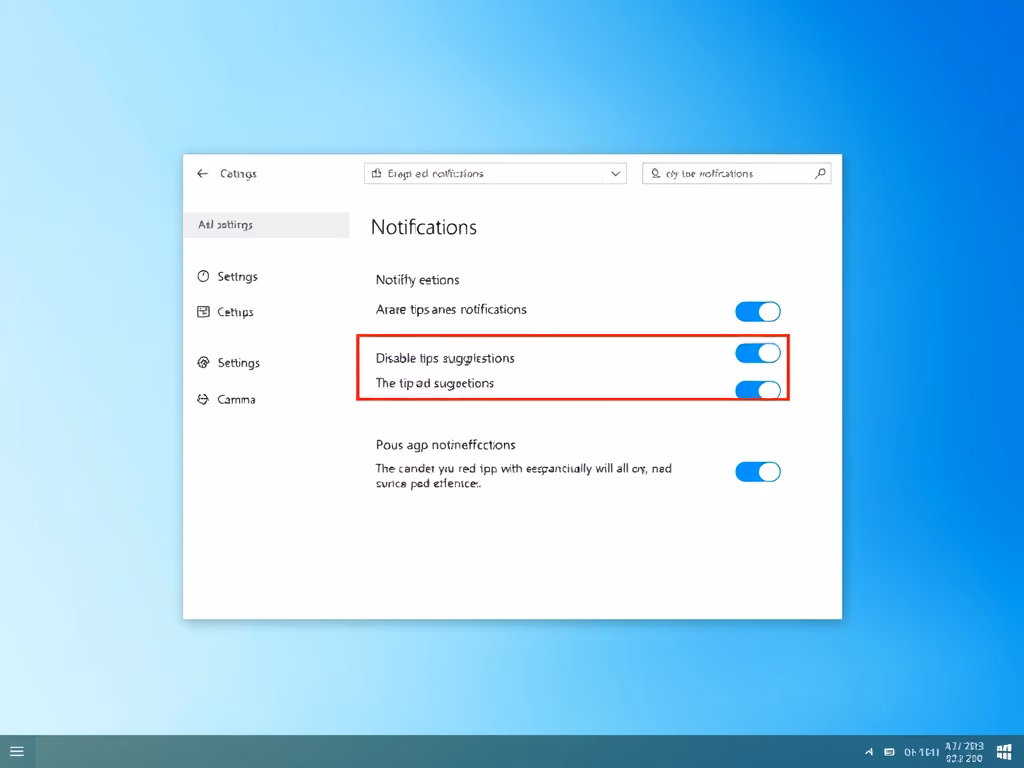
Windows 11 features a centralized location for most settings. Users can manage system configurations, create new accounts, and update Windows from the System Settings pane.
To get to System Settings, you can use the Windows key + I shortcut or click on Start ==> Settings, as shown in the image below:

Alternatively, you can use the search box on the taskbar and search for Settings. Then select to open it.
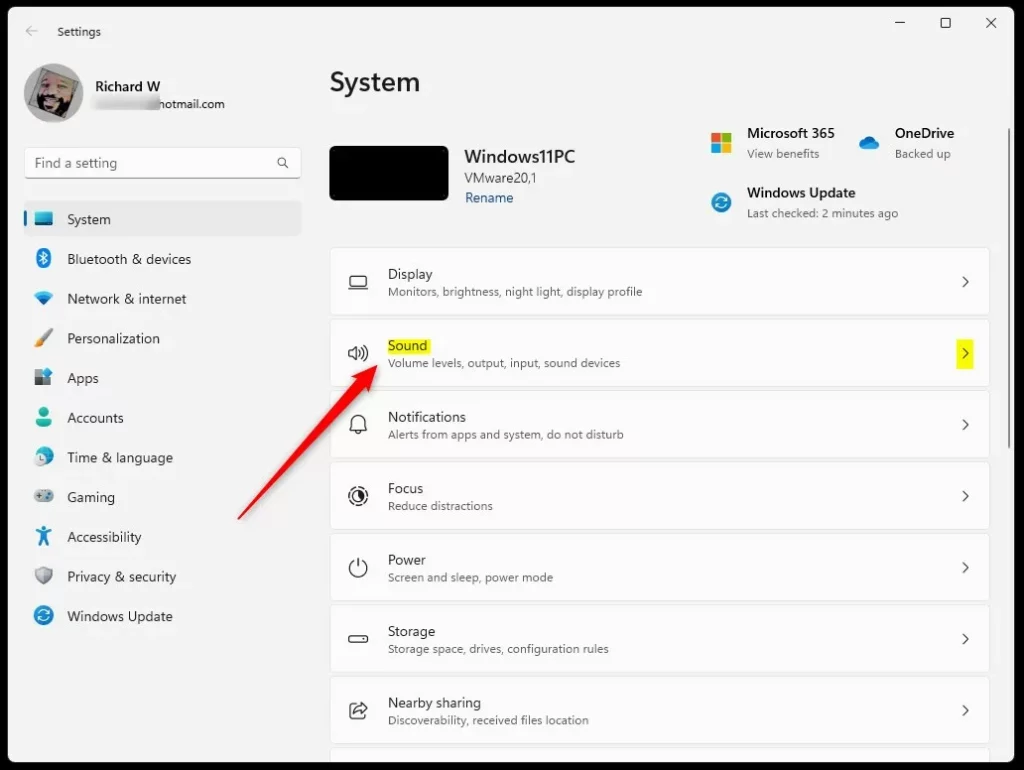
The Windows Settings pane should appear similar to the image below. In Windows Settings, click on System and select Sound from the right pane.
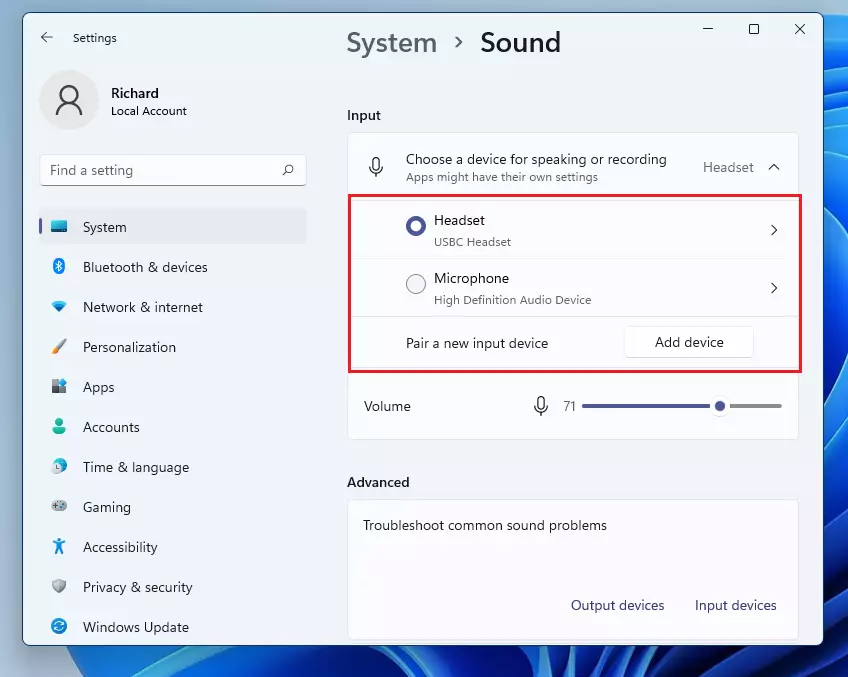
In the Sound settings pane, under Input, select the desired input device from the “Choose your input device” menu to set it as the default for playing sound.
In the highlighted image below, you can select a Headset or Microphone as your input device, and Windows will also use the selected device to record sounds.
The adjustments you make will affect all applications. However, specific apps can be configured to override this setting, enabling users to select a different input device.
How to switch Input devices in Windows 11
Another way to quickly switch Windows input devices is via the taskbar. To choose between sound devices quickly, right-click the speaker’s icon in the taskbar and select Open volume mixer.
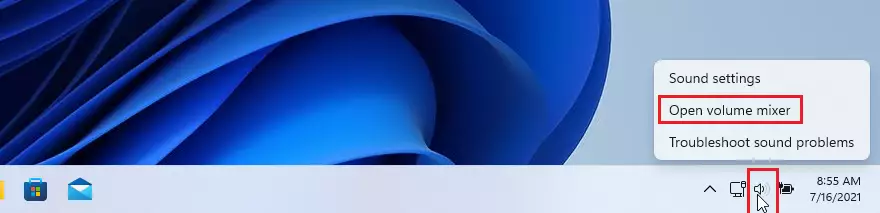
On the Volume mixer settings panel, switch between the Input devices you choose and exit.
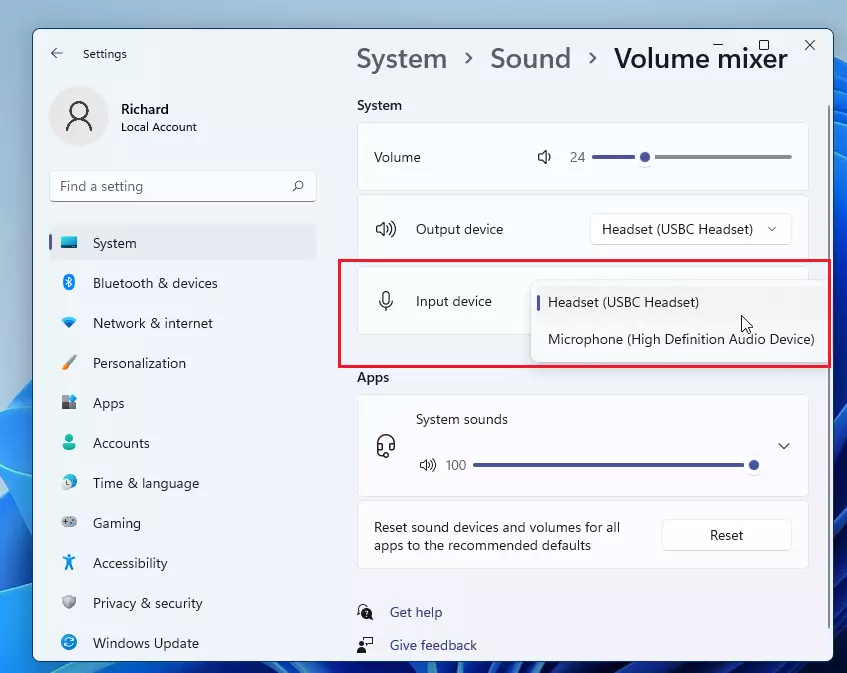
If you don’t see the connected mic device on the list, it may be that it is not recognized in Windows.
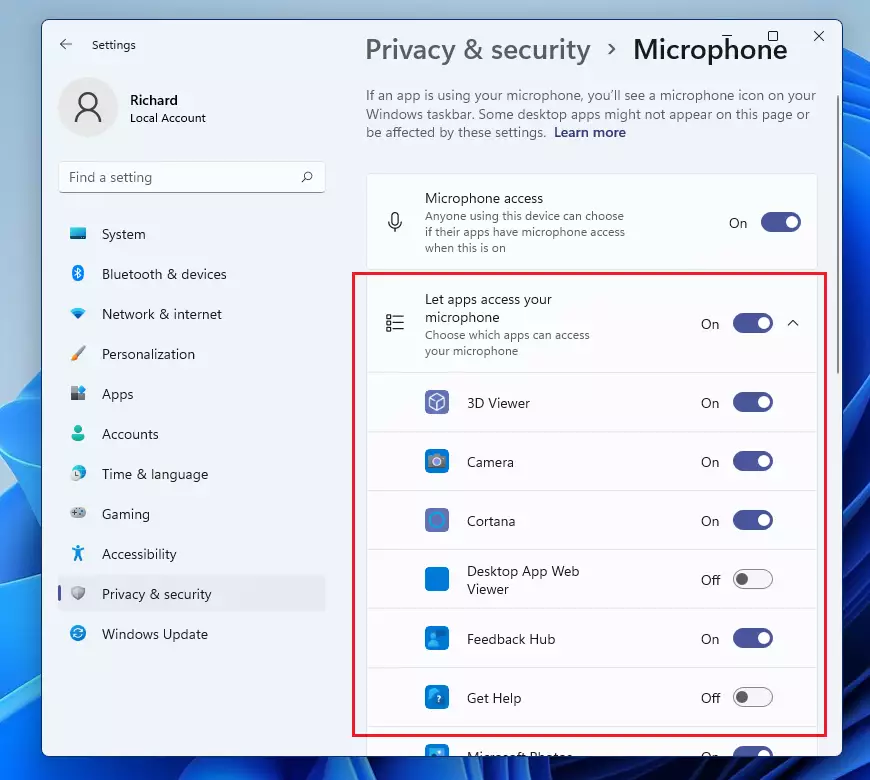
Allow Microphone access in Windows 11
Windows 11 also comes with a Mic control that allows you to approve apps that can access the microphone on the computer. If you’re having trouble recording Sound or cannot communicate through the Mic, you should ensure the app can use the microphone.
Go to Settings –> System –> Privacy & Security –> Microphone
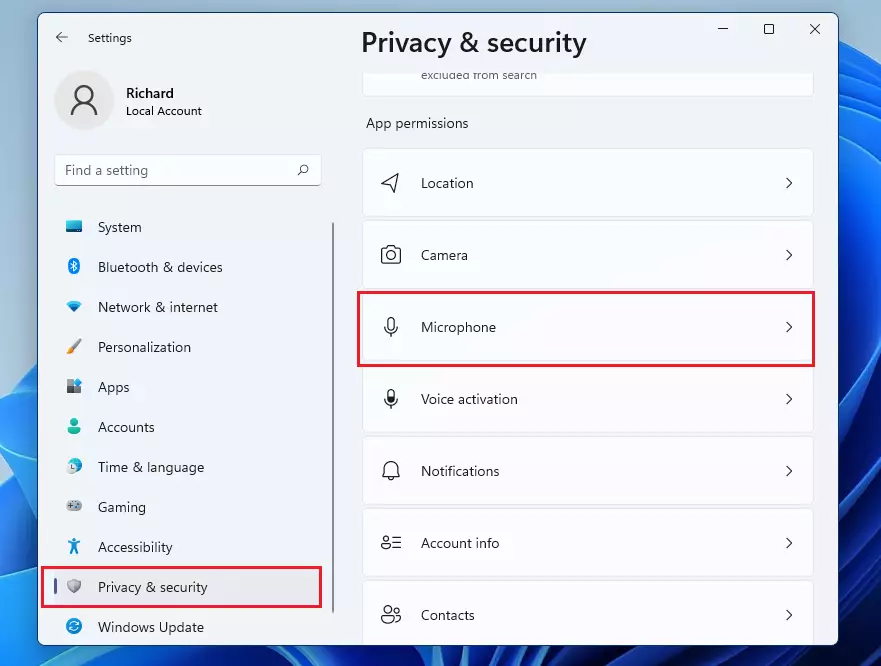
Manage which apps are allowed to access the microphone. If your app isn’t granted permission to use the system microphone, you can enable it here.
Exit and test, and hopefully, things should work for you.
Conclusion:
- Setting a default microphone in Windows 11 simplifies the process of using audio applications by ensuring all apps utilize the same input device.
- You can quickly access and change input settings through the System Settings or the taskbar volume mixer.
- It’s important to allow specific applications access to your microphone for optimal functionality.
- Regularly check your input device settings to ensure smooth communication and recording experiences across different applications.
- If an input device is not recognized, further troubleshooting may be required to identify connection issues.
Leave a Reply Cancel reply