
This post shows students and new users the steps to remove a PIN from an account in Windows 11.
Windows 11 has a Windows Hello fingerprint sign-in.
With Windows Hello, one can use a PIN, facial recognition, or fingerprint to sign into their devices. You’ll also need to set up a PIN when setting up facial recognition or fingerprint to sign into Windows. A PIN can also be used independently to sign into Windows 11.
A good reason one should use a PIN with their Windows 11 device is that it helps make it easier and safer to sign into your PC because a PIN is associated with one device and backed up for recovery with their Microsoft account.
When a password is used with an account, it can be intercepted in transmission or stolen from the cache or a password manager. A PIN is local to the device; it cannot be used remotely to access an account or stolen from a cache or password manager and used on other devices.
Hello, the PIN is backed by a Trusted Platform Module (TPM) chip and integrated with the hardware, making it more secure than a password.
If you set up a PIN with your Windows account and want to remove it, the steps below show you how.
How to Remove PIN Button in Windows 11
With all the benefits and security of using a PIN with your Windows account still not good for you, you can remove it anytime. However, removing the PIN from your account will also remove any facial recognition or fingerprint login since a PIN is required for all Windows Hello sign-in options.
Removing the PIN from a Microsoft account will also turn off Account protection in Windows Security.
To remove a PIN from your account in Windows 11, use the steps below:
Windows 11 has a centralized location for the majority of its settings. Everything can be done, from system configurations to creating new users and updating Windows from its System Settings pane.
To get to System Settings, you can use the Windows key + I shortcut or click on Start ==> Settings, as shown in the image below:

Alternatively, you can use the search box on the taskbar and search for Settings. Then select to open it.
In Windows Settings, click Accounts, then select the Sign-in options tile on the right pane of your screen, shown in the image below.

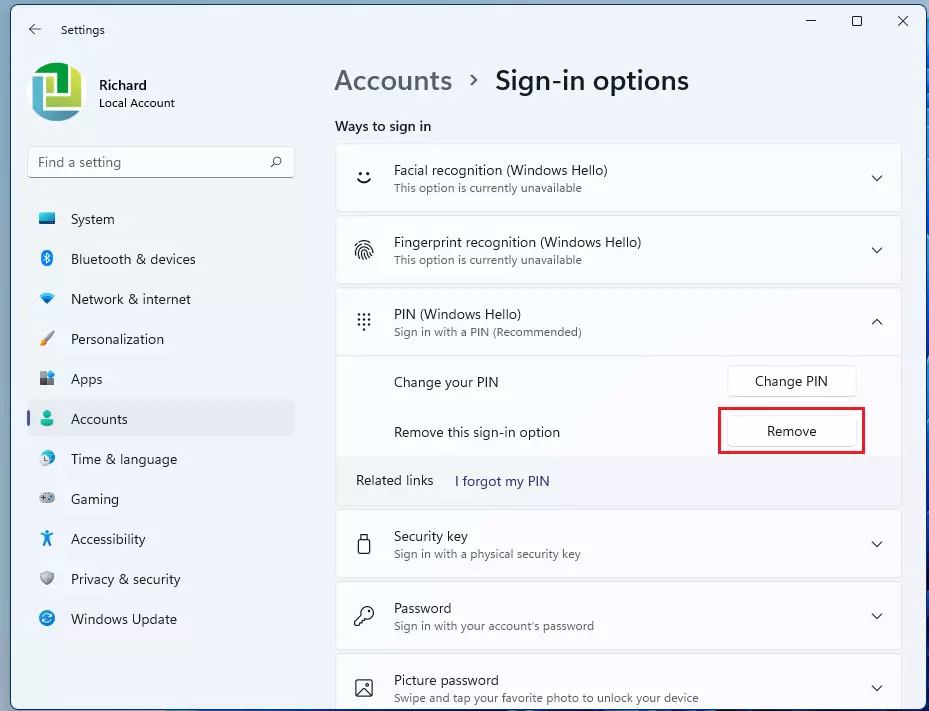
On the Sign-in options settings pane, under Ways to sign in, click on the PIN (Windows Hello) tile to expand it.
Then click the Remove button for the PIN sign-in option to remove the PIN from your account.
Under Additional settings, ensure that the option “For improved security, only allow Windows Hello sign-in for Microsoft accounts on this device (Recommended)” is disabled.
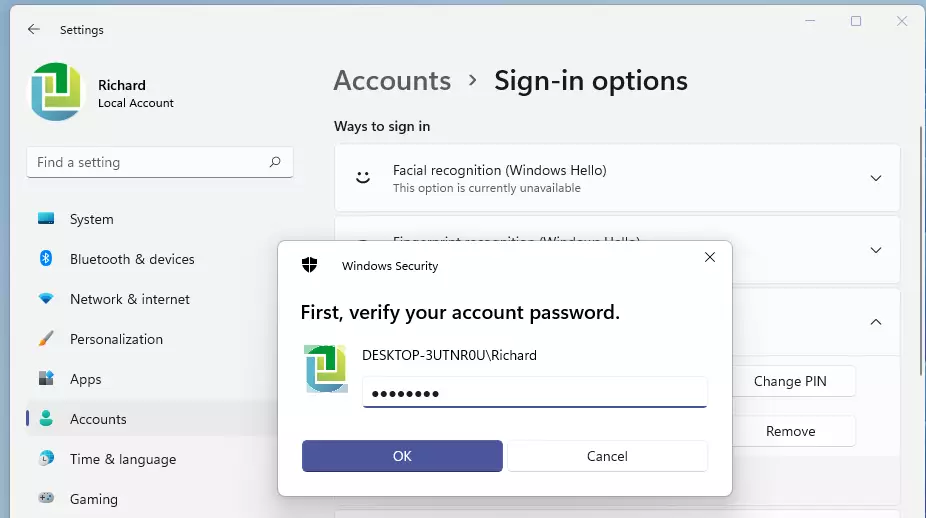
Click Remove to confirm.

Enter your Windows account password (not PIN) to verify, and click and select OK.
That should do it!
You can close the Windows Settings app.
Conclusion:
- Removing the PIN from your Windows 11 account is a straightforward process.
- It is important to remember that this action will disable all Windows Hello sign-in options, including facial recognition and fingerprint login.
- A PIN offers added security and convenience for signing into your device, so consider the implications before removing it.
- If you decide to remove the PIN, ensure that you have an alternative secure sign-in method in place.
- For additional guidance on using Windows 11 features, refer to other resources for best practices and security tips.

Leave a Reply Cancel reply