

This article explains how to set up Windows Hello facial recognition to sign in with your face in Windows 11.
Windows 11 has a Windows Hello feature that provides a more personal and secure way to sign into Windows.
With Windows Hello, one can use a PIN, facial recognition, or fingerprint to sign into their devices. Windows Hello features several ways to ditch passwords, such as using a more secure and personal authentication method.
To set up facial recognition authentication with Windows Hello, you’ll need a computer with special hardware that supports these features. For instance, you’ll need a fingerprint reader to authenticate with your finger, and facial recognition authentication requires an infrared or Intel RealSense camera.
Without these hardware options, you may be unable to use Windows Hello secure login options.
If your device has these hardware features, continue below to set up a facial recognition authentication to log in with your face in Windows 11.
How to sign into Windows 11 with your face
As mentioned above, the Windows Hello feature provides a more personal and secure way to sign into Windows without a password.
If your device has a camera that allows facial recognition, follow the steps below to set it up in Windows 11.
Windows 11 has a centralized location for the majority of its settings. Everything can be done, from system configurations to creating new users and updating Windows from its System Settings pane.
To get to System Settings, you can use the Windows key + I shortcut or click on Start ==> Settings, as shown in the image below:

Alternatively, you can use the search box on the taskbar and search for Settings. Then select to open it.
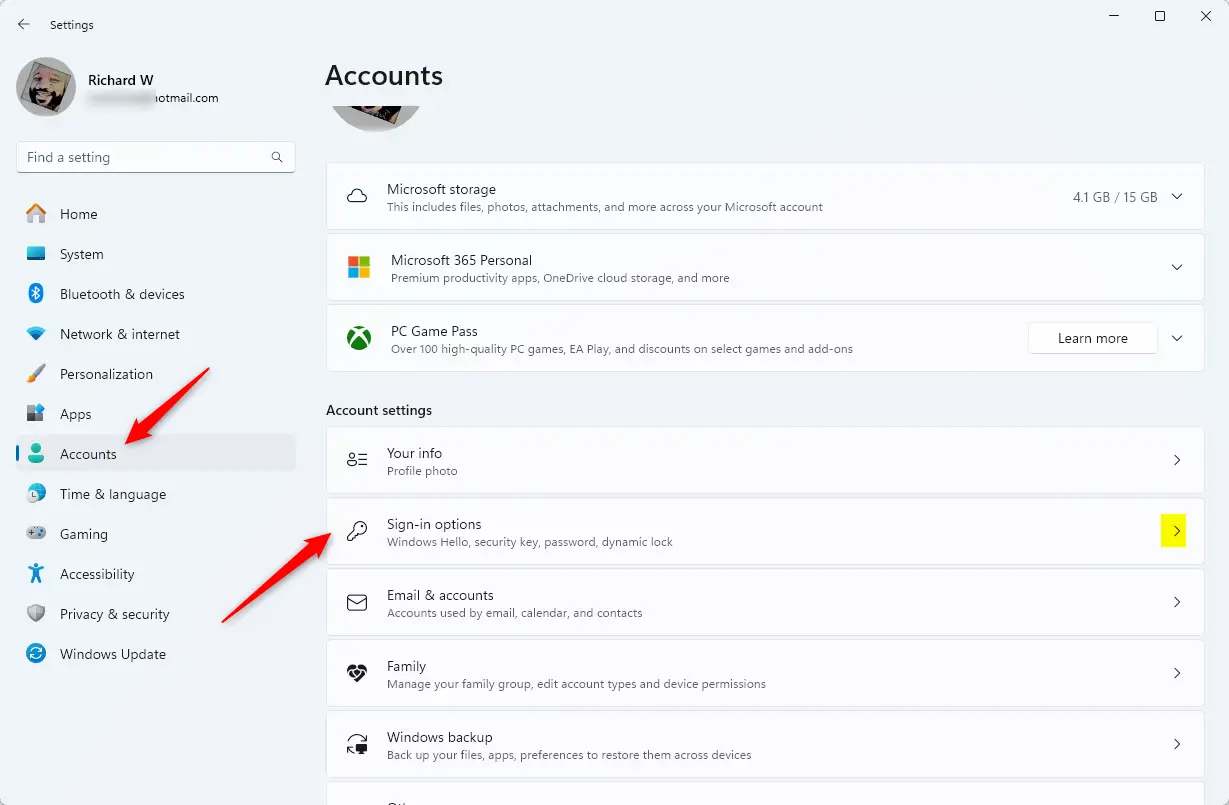
In Windows Settings, click Accounts, then select the Sign-in options tile on the right pane of your screen, shown in the image below.
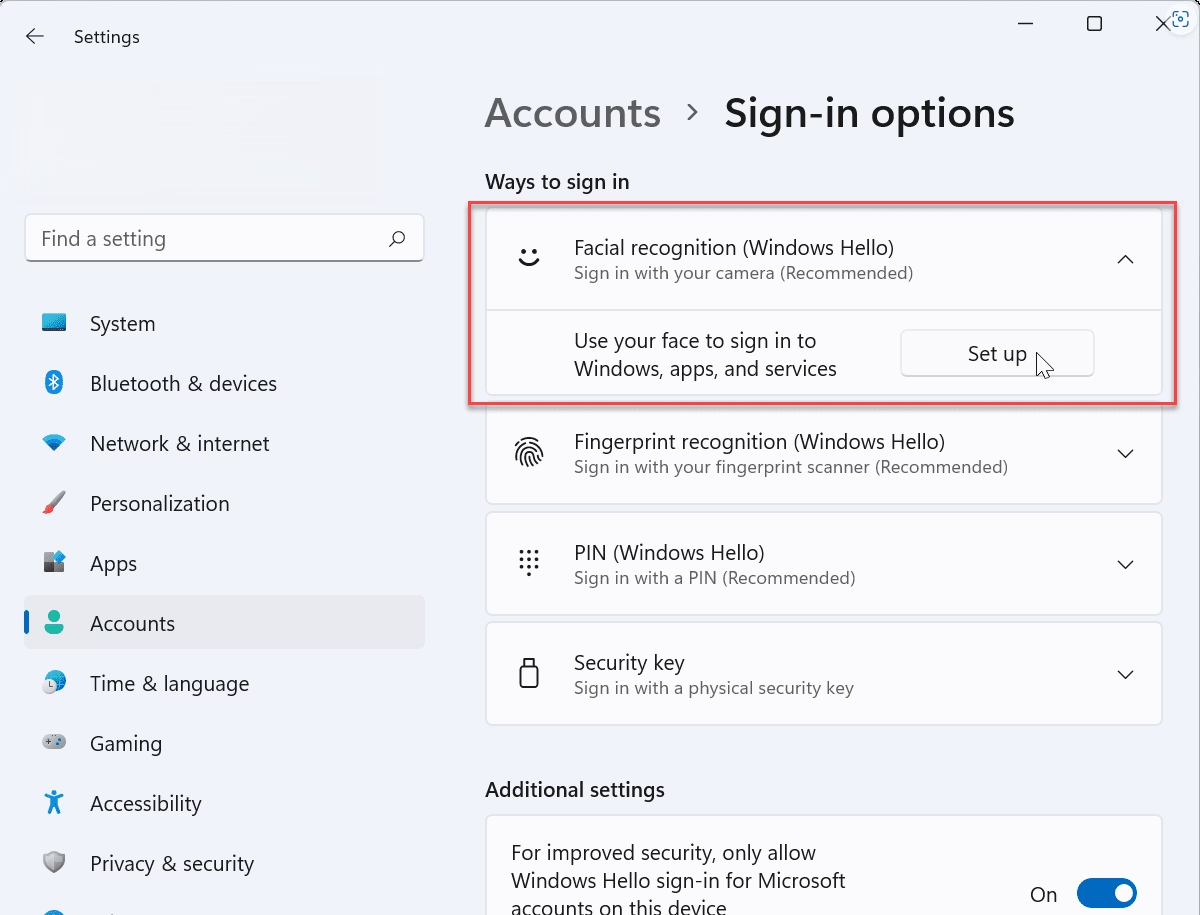
On the Sign-in options settings pane, under Ways to sign in, click on the Facial recognition (Windows Hello) tile to expand it.
Then click the Set up button for the facial recognition authentication method.
Next, click Get Started to begin capturing your face to log in.

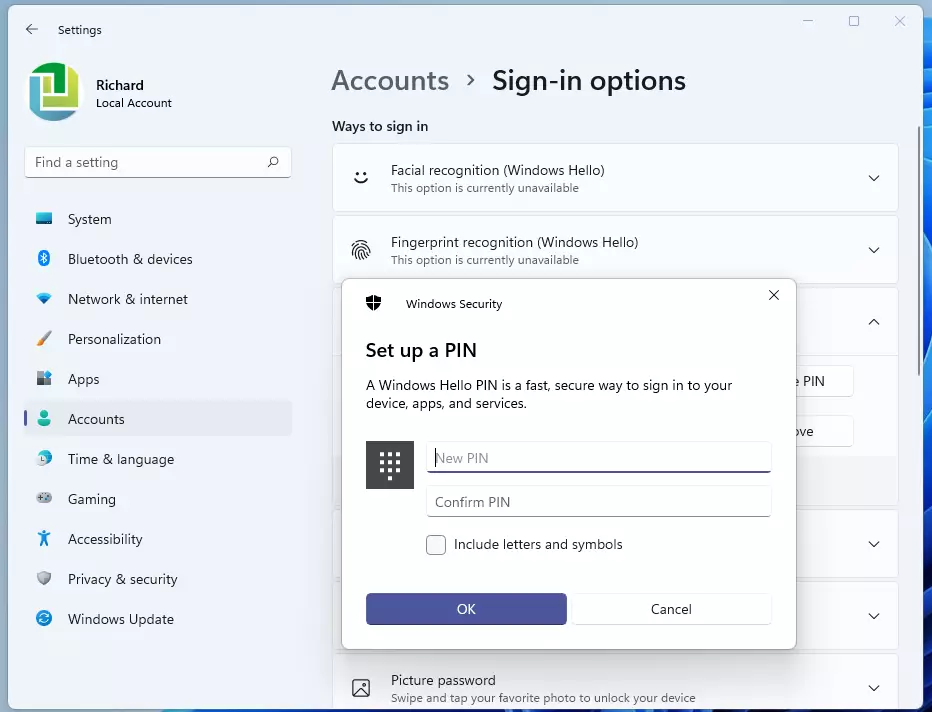
After that, a pop-up window will appear to create your PIN. Enter and confirm your PIN, and your camera will begin enrolling your face.
Once your face is captured and stored, you can log in with your face the next time you want to sign into your computer.

That should do it!
Conclusion:
- Windows Hello offers a secure and convenient way to sign into Windows 11 using facial recognition.
- The setup process is straightforward, requiring just a compatible camera and a few simple steps.
- Once configured, you can enjoy password-free sign-ins, enhancing your overall user experience.
- Facial recognition adds layer of security, making unauthorized access more difficult.
- Always ensure your hardware is compatible to take full advantage of this feature.

Leave a Reply Cancel reply