
This guide shows students and new users how to install Windows Subsystem for Linux (WSL) 2 on Windows 10 and set up Ubuntu.
Why Use WSL 2 and Ubuntu?
Installing Ubuntu on Windows 10 using WSL allows you to use Ubuntu Terminal and run Linux command line tools. These tools include bash, ssh, git, apt, and many more. This is helpful if you’re a developer who needs Linux tools but likes using Windows. WSL 2 is faster than the original version and works better with Linux programs.
Windows first released WSL in 2017. WSL 2 is newer and faster. It has better performance and works more like real Linux. It’s a great way to run a Linux environment on your Windows 10 computer.
What You Need Before Starting
Before you install WSL 2, make sure you have:
- Windows 10 May 2020 (version 2004) or later
- A computer that supports Hyper-V Virtualization
Step 1: Turn On WSL in Windows
⚙️ This step requires admin privileges.
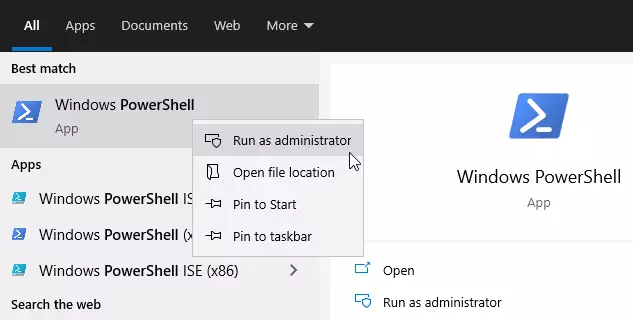
First, open PowerShell as an administrator. Click the Start button and type “PowerShell.”
Right-click the Windows PowerShell app and choose “Run as administrator.”
When the window opens, copy and paste this command:
dism.exe /online /enable-feature /featurename:Microsoft-Windows-Subsystem-Linux /all /norestartPress Enter. You should see a success message that looks like this:
Deployment Image Servicing and Management tool

Version: 10.0.19041.844
Image Version: 10.0.19042.844
Enabling feature(s)

[==========================100.0%==========================]

The operation completed successfully.
Step 2: Turn On Virtual Machine Platform
⚙️ This step requires admin privileges.
WSL 2 needs the Virtual Machine Platform to work. This is different from Hyper-V. In the same PowerShell admin window, run this command:
dism.exe /online /enable-feature /featurename:VirtualMachinePlatform /all /norestartIf you have an older version of Windows 10 (before version 2004), use this command instead:
Enable-WindowsOptionalFeature -Online -FeatureName VirtualMachinePlatform -NoRestartAfter running these commands, restart your computer. This lets all the changes take effect. If you don’t restart, the next command won’t work.
After your computer restarts, log back in and open PowerShell as administrator again. Then run this command to set WSL 2 as the default:
wsl --set-default-version 2Step 3: Install Ubuntu on Windows 10
Now that WSL 2 is ready, you can install Ubuntu. Open this link to go to the Windows Store:
Get Ubuntu 20.04 LTS – Microsoft Store
Ubuntu 20.04 LTS lets you use Ubuntu Terminal and run Linux command line tools like bash, ssh, git, and apt.
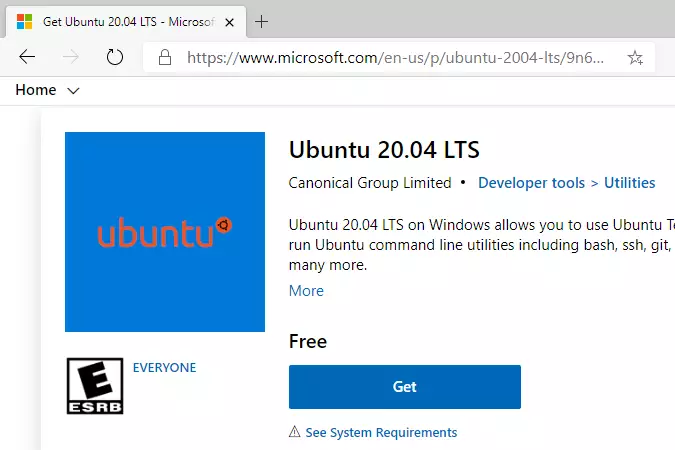
Click the “Get” button to install. After Ubuntu downloads, click “Launch” to start it.
Step 4: Create Your Ubuntu Account
When Ubuntu opens for the first time, it will ask you to create a user account. This may take a few minutes to install. Follow these prompts:
Please create a default UNIX user account. The username does not need to match your Windows username.

For more information visit: https://aka.ms/wslusers

Enter new UNIX username: user

New password:

Retype new password:

passwd: password updated successfully

Installation successful!

To run a command as administrator (user "root"), use "sudo <command>".

See "man sudo_root" for details.
Welcome to Ubuntu 20.04.2 LTS (GNU/Linux 4.4.0-19041-Microsoft x86_64)
 * Documentation:  https://help.ubuntu.com

 * Management:     https://landscape.canonical.com

 * Support:        https://ubuntu.com/advantage
  System information as of Mon Apr 12 17:57:37 CDT 2021
  System load:    0.52      Processes:             7

  Usage of /home: unknown   Users logged in:       0

  Memory usage:   26%       IPv4 address for eth0: 192.168.1.50

  Swap usage:     0%
1 update can be installed immediately.

0 of these updates are security updates.

To see these additional updates run: apt list --upgradable
That’s it! Ubuntu is now installed and ready to use.
Troubleshooting Commands
If you run into problems, try these commands:
wsl --set-default-version 1
bcdedit /set hypervisorlaunchtype auto start
Summary
This guide showed you how to install WSL 2 on Windows 10 and set up Ubuntu 20.04. Here’s what you did:
- Enabled WSL on your Windows computer
- Turned on the Virtual Machine Platform
- Installed Ubuntu from the Windows Store
- Created a user account in Ubuntu
Now you can use Linux tools on your Windows computer. If you find any errors, please let us know in the comments below.


Leave a Reply