
This post shows students and new users how to download and install Ubuntu Linux on their desktop or laptop computers. Ubuntu is an open-source Linux operating system that runs on desktops, laptops, servers, and other devices.
Ubuntu Linux has two support flavors: Long Term Support (LTS) and Short Term Support (STS). Ubuntu LTS versions are typically supported for five ( 5 ) years, while the STS versions are supported for roughly 9 months.
Students and new users will find the easiest place to learn Linux on Ubuntu Linux OS. It’s a great Linux operating system for beginners.
While learning Ubuntu, you will also find out that Linux isn’t so different from Windows and other operating systems in so many ways, especially when using the system to get work done.
Ubuntu Linux is a great operating system for students and users who want to try something new.
To get started with installing Ubuntu Linux, follow the steps below:
How to download Ubuntu ISO image
The latest versions of Ubuntu Linux come only in 64-bit, so you’ll need a computer that supports that architecture. You’ll also want a computer or laptop that can boot from a CD/DVD or flash drive, as you will only download the ISO image.
There may be other means to get a physical disc or flash drive, but you may have to purchase it.
With your computer ready, download the Ubuntu Linux ISO image from the link below; if you don’t have physical media, burn the image onto a DVD or flash drive.
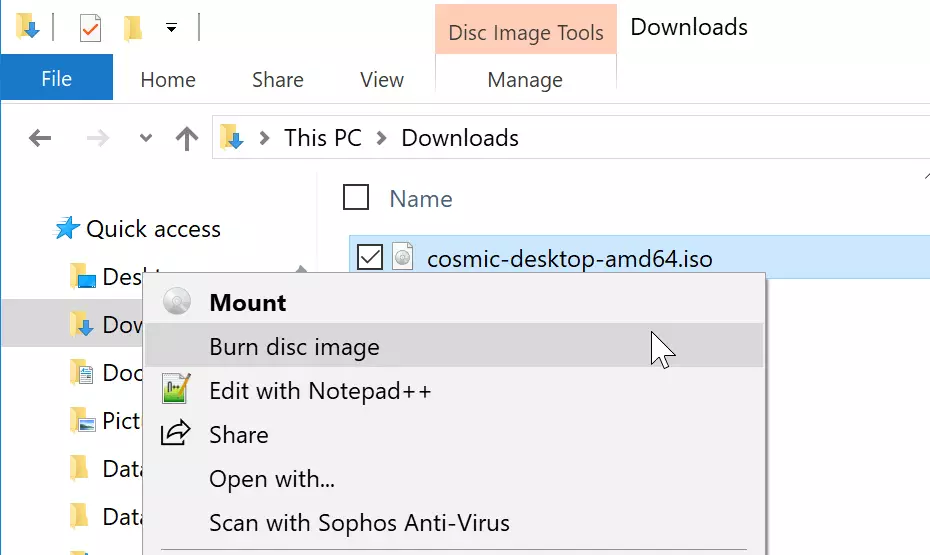
When using a Windows machine, you may right-click the ISO image and select Burn disc image, as shown in the image below.
Then choose the DVD drive with a blank DVD to burn to.
You may have to take a different path to burn to a Flash Drive. Some programs should be able to help you do that.
After burning the image, transfer the DVD or Flash Drive to the computer you want to install Ubuntu.
How to boot Ubuntu ISO disc to install
Now that the image is onto a DVD / Flash Drive insert it into the new computer and boot from it. Different computers have different ways of specifying where to boot from; find yours. Most likely, pressing a key when you turn your computer on. Esc, F2, F9, F12 , etc.
You should see a similar screen below when the computer is booted from the DVD or Flash Drive.
Click the Install Ubuntu button to begin the installation. You could Try Ubuntu without making changes to your computer, but our goal is to install Ubuntu, so click Install Ubuntu to continue.

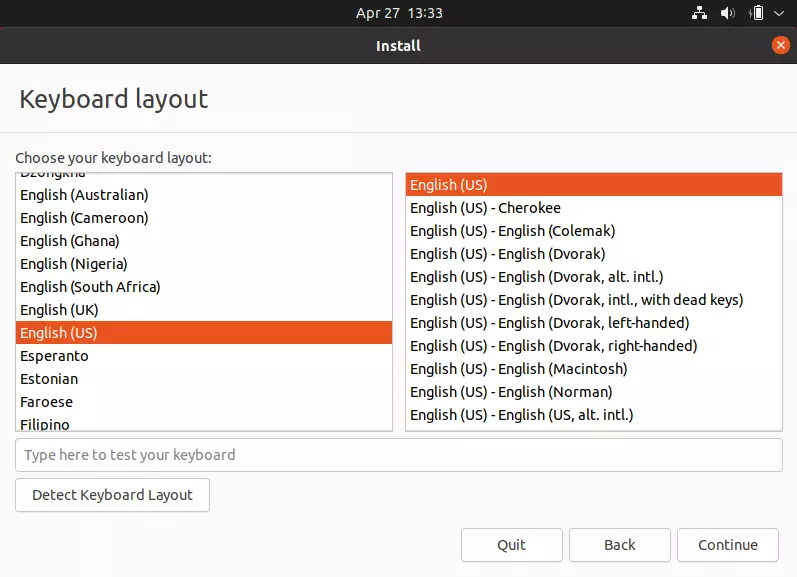
Next, select your Keyboard layout. Ubuntu installation picks the US English Keyboard layout by default. This is a good place to change it if it’s not your default. Click Continue to move on with the installation.
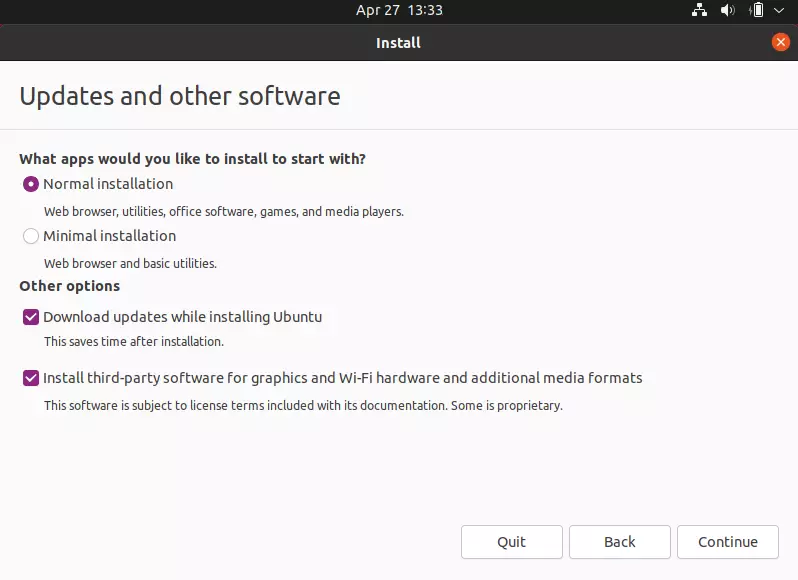
The installation should be prepared to install Ubuntu packages. On the screen below, you can Download updates while installing Ubuntu, saving time after the installation. And to install third-party software for graphics WiFi devices and media codes.
You do not have to select these boxes. However, if you have a stable and reliable Internet connection, you may want to select these options to download important packages while Ubuntu is installed.
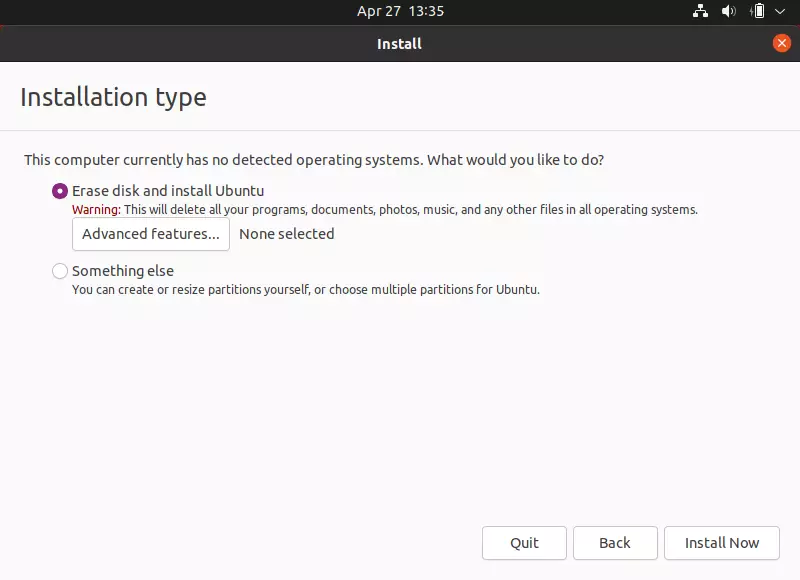
On this screen is where you select the installation type. The first option to Erase the disk and install Ubuntu is the easiest of them. This option deletes everything on the hard drive and installs Ubuntu on it.
Option #2 Something else — is to perform a custom installation for advanced users.
You can encrypt Ubuntu and use other advanced settings, but for new users and students, select the first option to [ Erase disk and install Ubuntu ] and continue.
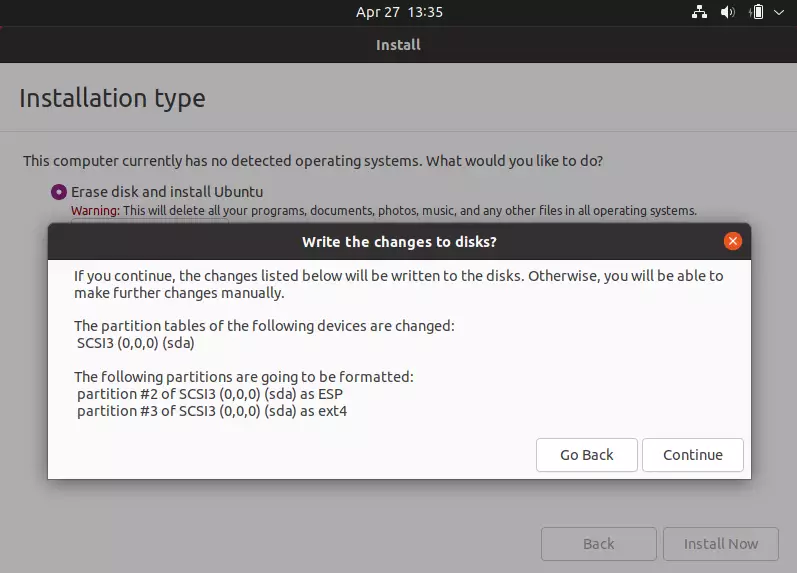
Click Install Now to begin installing Ubuntu.
Accept that the installation will erase the hard drive and install Ubuntu. Click Continue to move on.
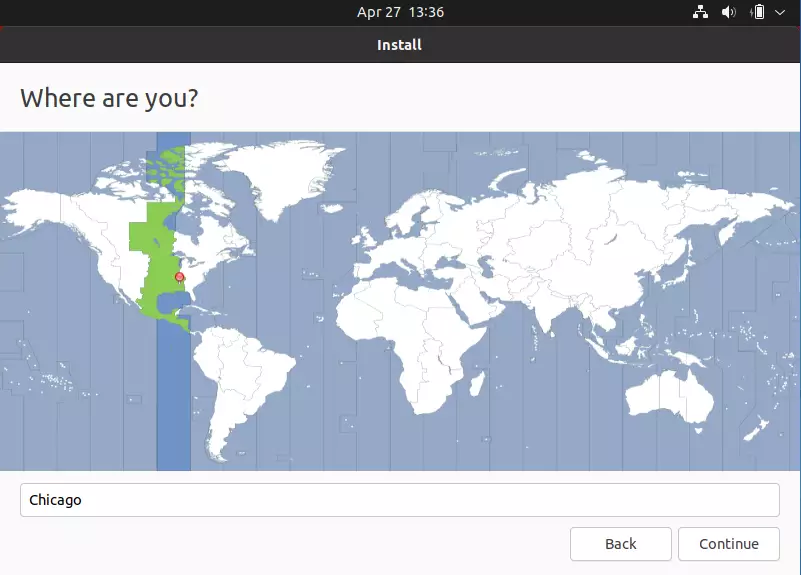
On this screen is where you choose your time zone. Type a city name you live in and click Continue.
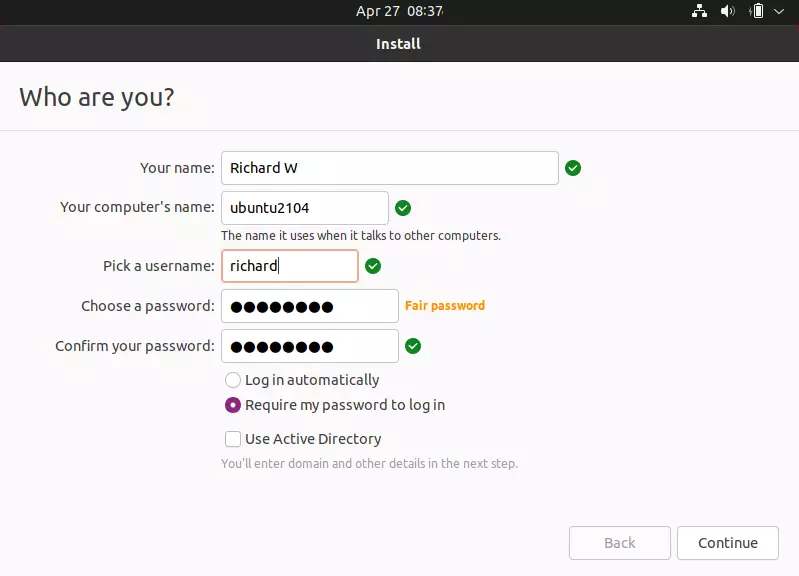
The next screen is where you type the first user account and create a name for the computer. Type your name, username, and password, and choose whether you always want to type a password to sign in. When you’re done, click Continue.
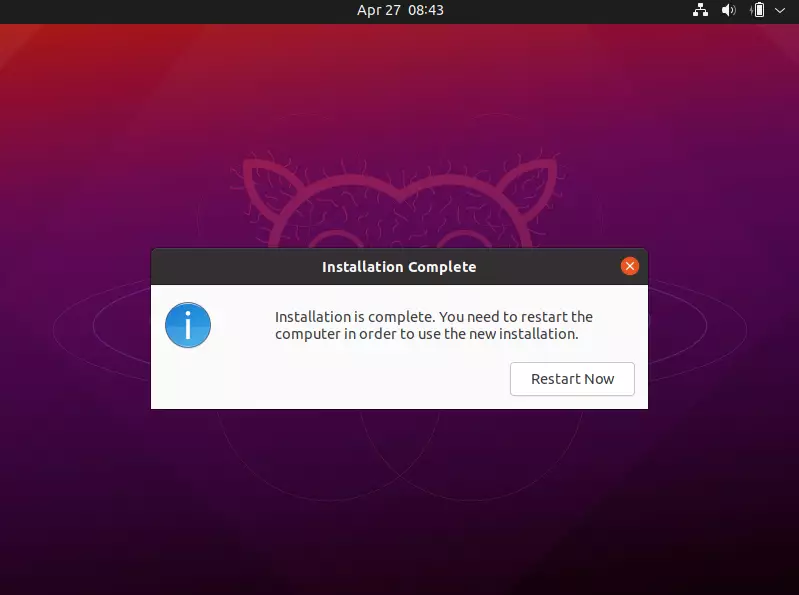
Wait for the installation to complete. This should take about 7 mins, depending on the computer’s speed. When the installation is done, you’ll be prompted to restart.
This is the last screen, and the installation is complete. You must restart your computer, remove the disc from the drive, and log back in.
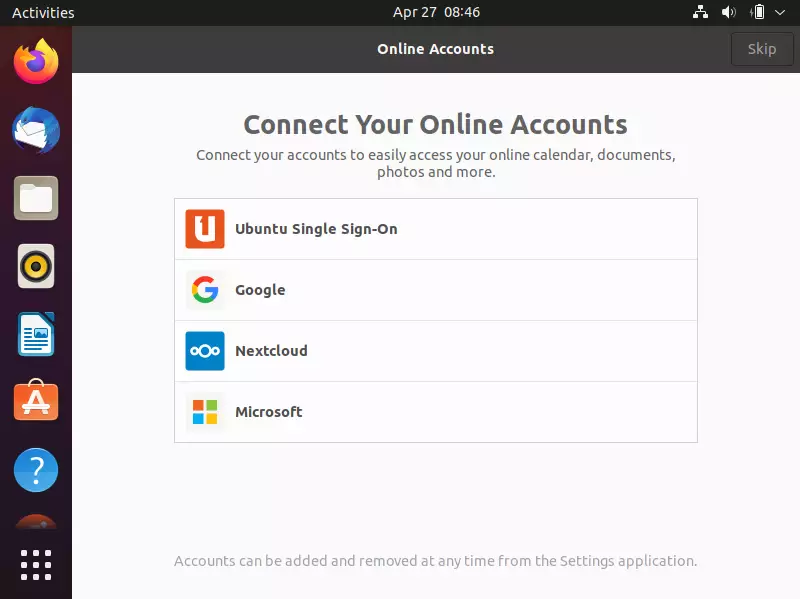
You’ll be prompted with the login screen after rebooting—log in with the credentials created above.

You will have an opportunity to set up online accounts if you have any.
After logging back into Ubuntu, your first task should be to update Ubuntu. After logging in, you may see a prompt to install available updates.
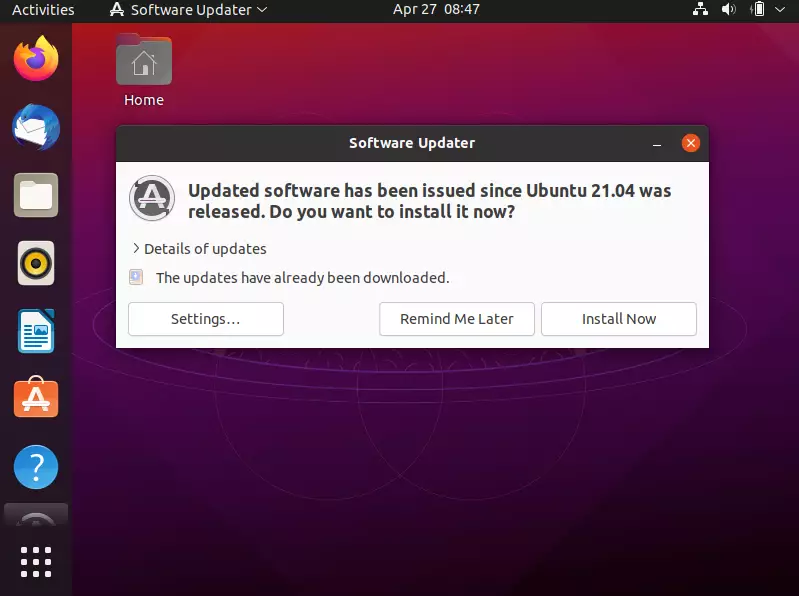
If you do see a prompt, continue the below update from the command line.
Press Ctrl - Alt - T on your keyboard to open the terminal. Then run the commands below to update Ubuntu.
sudo apt update && sudo apt dist-upgrade && sudo apt autoremove
Restart once more, and you should be set.
Conclusion:
This post showed you how to install Ubuntu Linux. Please use the comment form below if you find any errors above or have something to add.


Leave a Reply Cancel reply