This brief tutorial shows students and new users how to install the Pritunl VPN server on Ubuntu 20.04 | 18.04.
Pritunl VPN server is a free, open-source enterprise VPN server that anyone can use to set up a secure VPN tunnel across networks.
Pritunl comes with a simple yet powerful web interface that works with other open-source VPN servers like OpenVPN, IPsec, WireGuard, and others across distributed cloud services.
Pritunl VPN server allows complex site-to-site and gateway links and provides local network access to remote users.
To get started with installing Pritunl on Ubuntu, follow the steps below:
Prepare Ubuntu
Before installing the Pritunl VPN server, ensure these packages are installed to allow seamless installation.
sudo apt update
sudo apt install curl gnupg2 wget unzip
Install Pritunl VPN Server
After installing the packages above, follow the steps below to install Pritunl. First, add its repository key and file to Ubuntu since Pritunl packages are unavailable by default.
sudo apt-key adv --keyserver hkp://keyserver.ubuntu.com --recv E162F504A20CDF15827F718D4B7C549A058F8B6B
sudo apt-key adv --keyserver hkp://keyserver.ubuntu.com --recv 7568D9BB55FF9E5287D586017AE645C0CF8E292A
Next, run the commands below to add its repository file.
echo "deb http://repo.pritunl.com/stable/apt focal main" | sudo tee /etc/apt/sources.list.d/pritunl.list
After that, run the commands below to install Pritunl.
sudo apt update
sudo apt install pritunl
After installation, these commands can start, stop, and enable the Pritunl VPN server to start up when the server boots automatically.
sudo systemctl stop pritunl
sudo systemctl start pritunl
sudo systemctl enable pritunl
To verify if the server is installed and ready, run the commands below:
sudo systemctl status pritunl
That should display similar lines as shown below:
 pritunl.service - Pritunl Daemon
     Loaded: loaded (/etc/systemd/system/pritunl.service; enabled; vendor prese>
     Active: active (running) since Wed 2021-03-03 21:39:45 CST; 13s ago
   Main PID: 4149 (pritunl)
      Tasks: 19 (limit: 4654)
     Memory: 159.2M
     CGroup: /system.slice/pritunl.service
             ├─4149 /usr/lib/pritunl/bin/python /usr/lib/pritunl/bin/pritunl st>
             └─4173 pritunl-web
Install MongoDB
Pritunl relies on the MongoDB database server. Because MongoDB packages are unavailable in Ubuntu, you’ll also have to add its repository.
Run the commands below to add its repository key and file.
curl -fsSL https://www.mongodb.org/static/pgp/server-4.4.asc | sudo apt-key add -
Next, add its repository file.
echo "deb [ arch=amd64,arm64 ] https://repo.mongodb.org/apt/ubuntu focal/mongodb-org/4.4 multiverse" | sudo tee /etc/apt/sources.list.d/mongodb-org-4.4.list
Finally, run the commands below to install.
sudo apt update
sudo apt-get install mongodb-server
Access Pritunl Portal
At this point, Pritunl is installed and ready. Go to the server’s hostname or IP address.
http://localhost
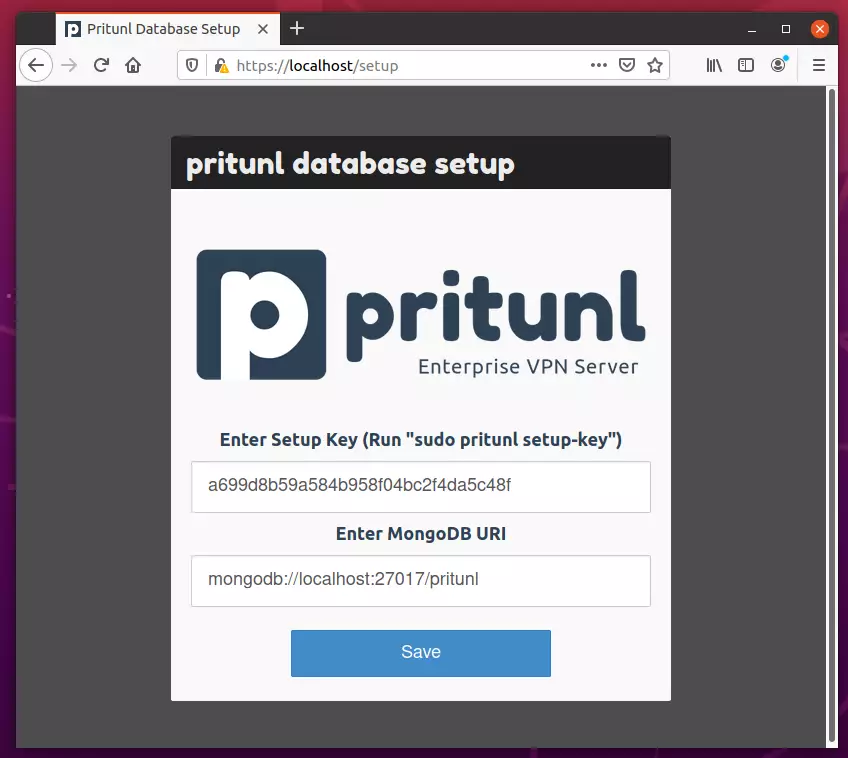
Before you can log in, you’ll need to generate a setup key. Run the commands below to do that.
sudo pritunl setup-key
That should display lines similar to the one below with a setup key.
  from cryptography import x509
a699d8b59a584b958f04bc2f4da5c48f
Copy the key and enter it into the setup wizard, then click Save.
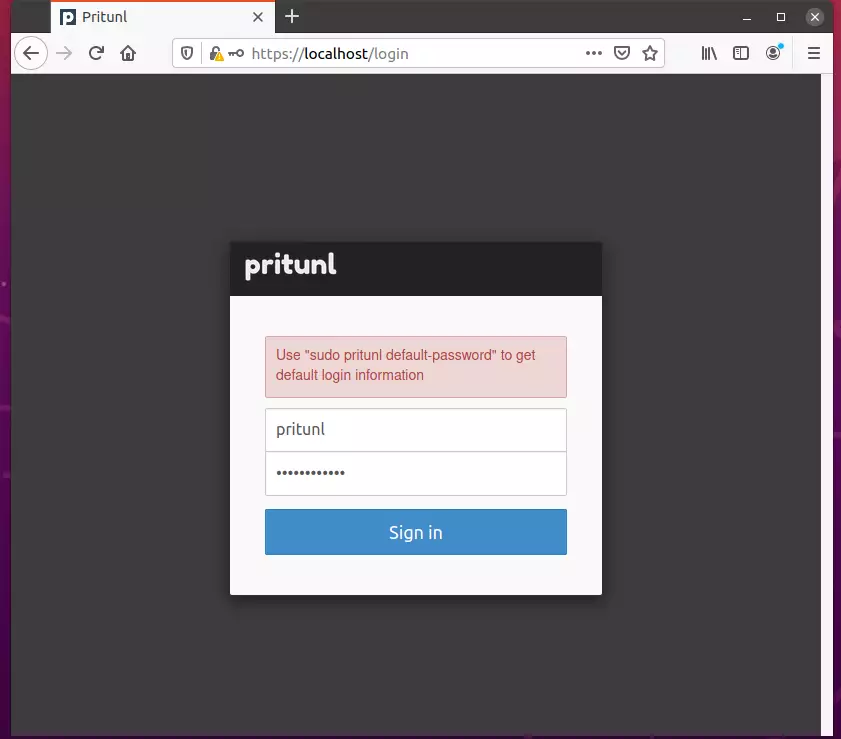
Next, run the commands below to generate a password to sign in.
sudo pritunl default-password
You should see similar lines as below. Use the credentials to sign in.
Administrator default password:
  username: "pritunl"
  password: "jI2XnSWLLcU4"
Log in and begin setting up your environment.
That should display the Pritunl dashboard. From there, you can set up your environment.
Go to the server tab and create a new VPN server. The user tab allows you to create users that will connect to the VPN.
The steps to get a VPN up are creating an organization and creating a user. Next, create a VPN server and attach the server to an organization.
To improve performance, run the commands below to increase the open file limit on the server. This will prevent connection issues on servers with high loads.
sudo sh -c 'echo "* hard nofile 64000" >> /etc/security/limits.conf'
sudo sh -c 'echo "* soft nofile 64000" >> /etc/security/limits.conf'
sudo sh -c 'echo "root hard nofile 64000" >> /etc/security/limits.conf'
sudo sh -c 'echo "root soft nofile 64000" >> /etc/security/limits.conf'
Conclusion:
This post showed you how to install the Pritunl VPN server on Ubuntu 20.04 | 18.04. If you find any error above, please use the form below to report.


Leave a Reply Cancel reply