
Cody CMS is an open-source, light, fast content management system (CMS) that runs on top of Node.js. It uses a database to store its content. It allows users and web admins to create websites without needing to be developers or designers.
Cody CMS offers features that may not be available to other PHP-based CMS, like WordPress, Joomla, or Drupal.
Cody is written from the ground up in JavaScript and runs on top of Node.js, a platform. It has an SEO-friendly design, a flexible CSS framework, and more.
For more about Cody CMS, please check its homepage.
This brief tutorial shows students and new users how to install Cody CMS on Ubuntu 16.04, 18.04, and 18.10. To get started with installing Cody CMS, please continue below:
Install Node.js
Cody CMS runs on Node.js, a javascript runtime, and framework. To install Node.js on Ubuntu from its LTS repository, run the commands below to install:
sudo apt update
sudo apt install curl
curl -sL https://deb.nodesource.com/setup_8.x | sudo -E bash -
sudo apt install -y nodejs
After that, Node.js should be installed and ready to use as well.
Install PM2 Process Manager
Another requirement for Cody CMS is a PM2 process manager. To install the PM2 package on Ubuntu, run the commands below:
sudo npm install pm2 -g
After that, your system should be ready for Cody CMS.
Install MariaDB Database Server
MariaDB database server is a great place to start when looking at open-source database servers with Cody CMS. To install MariaDB run the commands below.
sudo apt-get install mariadb-server mariadb-client
After installing MariaDB, the commands below can stop, start and enable the MariaDB service to start up when the server boots.
Run these on Ubuntu 16.04 LTS
sudo systemctl stop mysql.service
sudo systemctl start mysql.service
sudo systemctl enable mysql.service
Run these on Ubuntu 18.04 and 18.10 LTS
sudo systemctl stop mariadb.service
sudo systemctl start mariadb.service
sudo systemctl enable mariadb.service
After that, run the commands below to secure the MariaDB server by creating a root password and disallowing remote root access.
sudo mysql_secure_installation
When prompted, answer the questions below by following the guide.
- Enter current password for root (enter for none): Press the Enter
- Set root password? [Y/n]: Y
- New password: Enter the password
- Re-enter new password: Repeat password
- Remove anonymous users? [Y/n]: Y
- Disallow root login remotely? [Y/n]: Y
- Remove the test database and access to it? [Y/n]: Y
- Reload privilege tables now? [Y/n]: Y
Next, run the commands below to log on to the MariaDB server. When prompted for a password, use the one created above.
sudo mysql -u root -p
In Ubuntu systems running MySQL 5.7 (and later) or MariaDB 10 and up, the root user is set to use the auth_socket authentication method by default.
The auth_socket plugin authenticates users that connect from the local host through the Unix socket file. Unfortunately, you can’t authenticate as a root by providing a password.
Run the commands below to enable the MariaDB root user to use password authentication.
use mysql;
update user set plugin='' where User='root';
flush privileges;
exit
Restart and run the commands below to set a new password.
sudo systemctl restart mariadb.service
Install Cody CMS
To get Cody CMS, you’ll want to clone it from GitHub to your home directory. To do that, run the commands below.
cd ~/
mkdir codycms
After that, change into the Raneto folder by running the commands below.
cd codycms
Next, install NPM from the folder by running the commands below.
npm install cody
You may get an error message like the one below. Just do what was mentioned in the error message:
┌───────────────────────────────────────────────────────────┐
│                  npm update check failed                  │
│            Try running with sudo or get access            │
│           to the local update config store via            │
│ sudo chown -R $USER:$(id -gn $USER) /home/richard/.config │
└───────────────────────────────────────────────────────────┘
After running the commands above, you may get a message to resolve some vulnerabilities. If not, then you’re ready to use Cody CMS.
Next, run the commands below to create Cody’s CMS database for MariaDB.
nodejs ./node_modules/cody/bin/create_site.js
The guide below would be best to configure your new site when you run the commands above.
Creating project in  /home/richard/codycms/

1) Enter projectname: CodyCMS
Note: also using CodyCmS as database name.
Note: by default the mysql root user has no password so you can just hit enter, if you forgot the root password http://dev.mysql.com/doc/refman/5.0/en/resetting-permissions.html

2) Enter root password for mysql so we can create a new database and user: wisdom24

3) Enter site database user: codycmsuser

4) Enter site database password: create_user_password_here

5) Enter hostname for site: example.com

6) Enter a location for storing documents: codydata

mkdir /home/richard/codycms/CodyCmS/controllers
mkdir /home/richard/codycms/CodyCmS/locales
mkdir /home/richard/codycms/CodyCmS/static
mkdir /home/richard/codycms/CodyCmS/static/css
mkdir /home/richard/codycms/CodyCmS/static/images
mkdir /home/richard/codycms/CodyCmS/static/js
mkdir /home/richard/codycms/CodyCmS/views
created codydata/CodyCmS/
created codydata/CodyCmS/images
created codydata/CodyCmS/files
---
Site 'CodyCmS' has been prepared.

Please create DNS entries, or add to /etc/hosts:
127.0.0.1     example.com
Also check index.js and config.json to fine-tune extra parameters, encryption key, .
---
Start your site using:
$ forever start CodyCmS.js
    or
$ node CodyCmS.js
-
surf to http://localhost:3001
    or manage your site at
http://localhost:3001/en/dashboard
You can start Cody CMS by running the commands below:
$ forever start CodyCmS.js
or
$ node CodyCmS.js
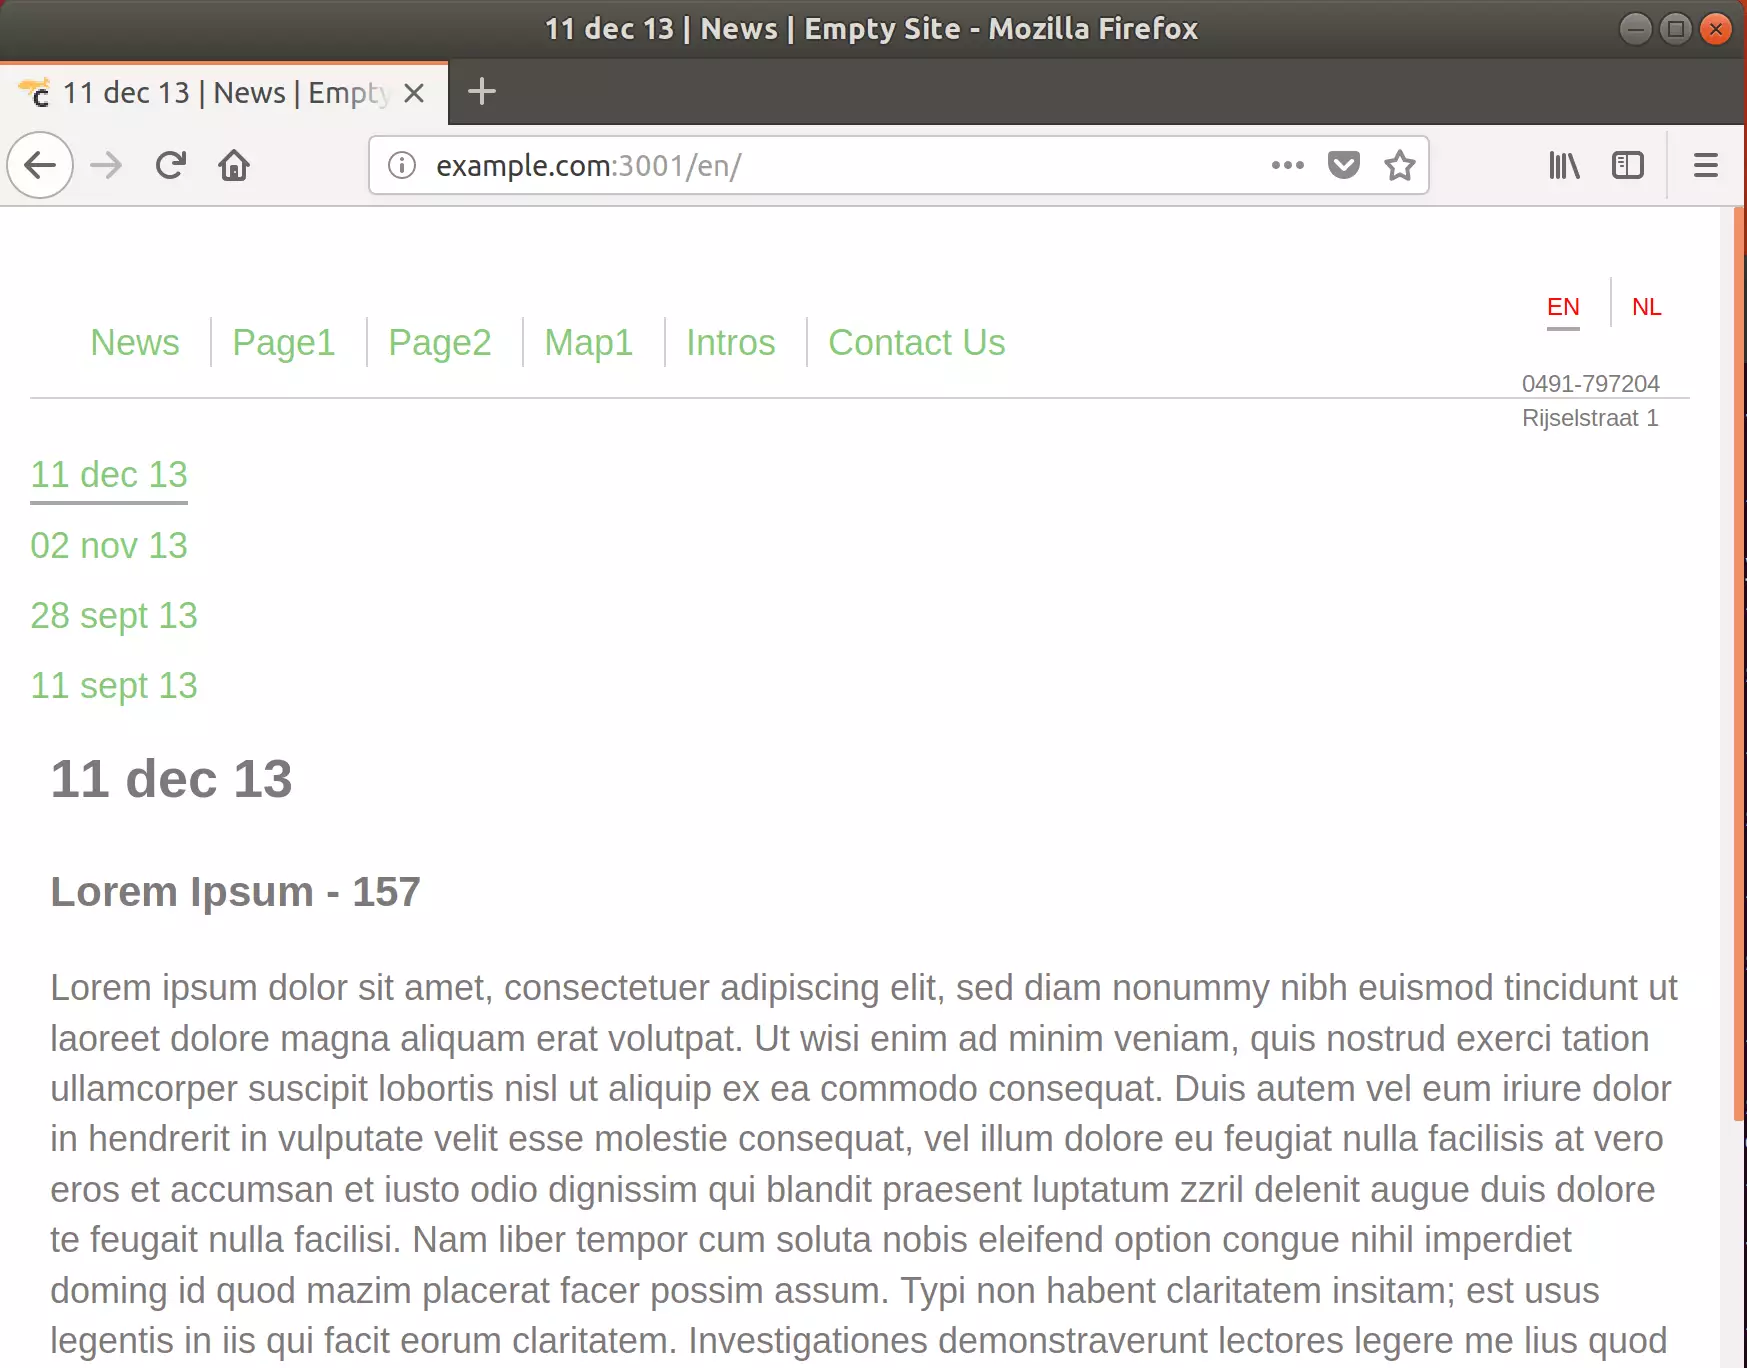
You can now access your new Cody CMS installation by navigating to http://example.com:3001.
Open your browser and browse to the server hostname or IP address followed by port # 3001
To login to the backend, use the URL below:
http://example.com/en/dashboard
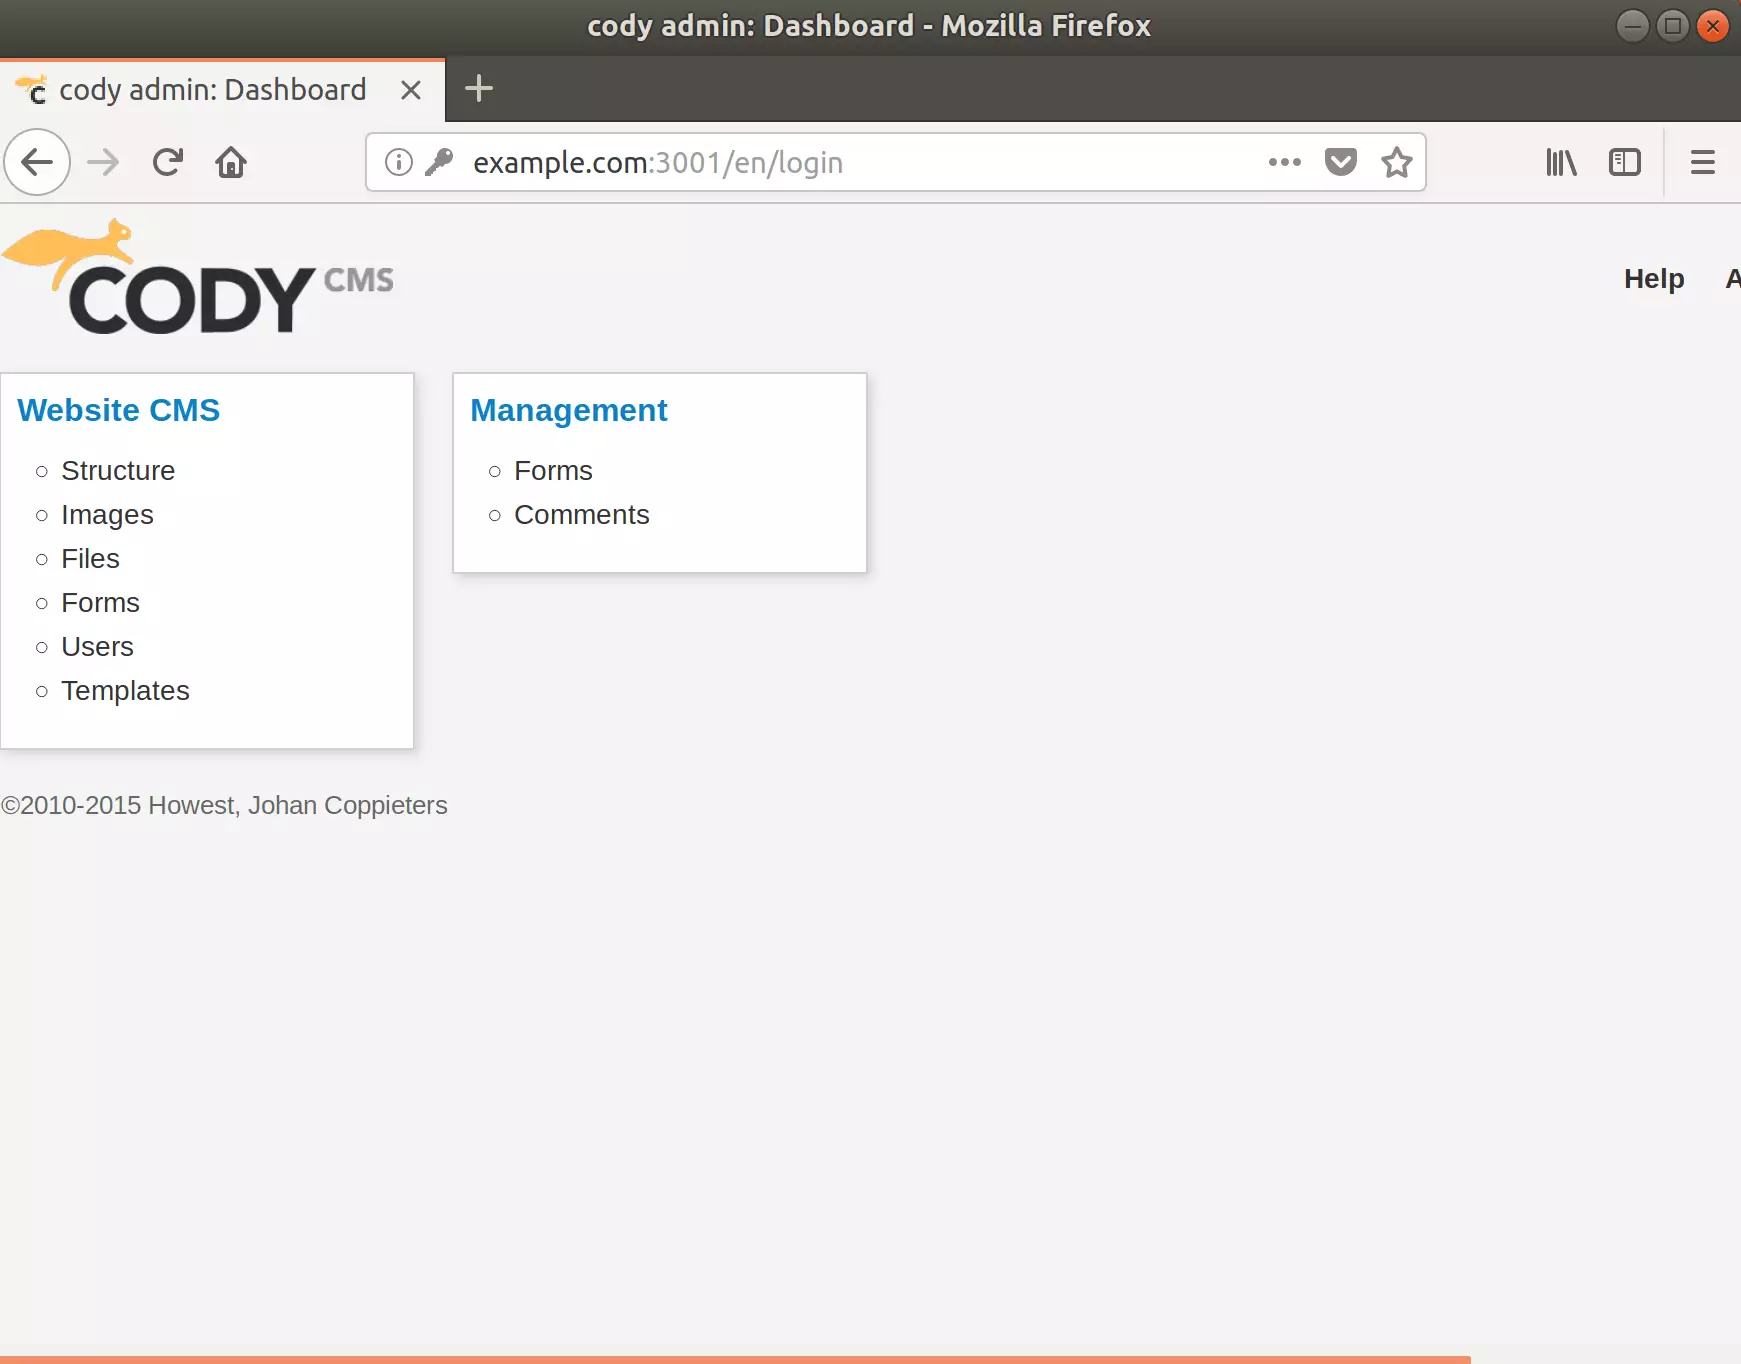
The default users are ‘super,’ ‘admin,’ ‘test,’ and ‘user’ which all have password ’empty’ you can use.
Username: super
Password: empty
You may also like the post below:
Leave a Reply