This brief tutorial shows students and new users how to install Chef automated server on Ubuntu 20.04 | 18.04.
Chef is a popular configuration management tool that allows IT admins to automate the deployment, management, and secure maintenance of IT resources across an environment.
Chef has three components: Chef Workstation or Desktop, Chef Server, and Chef Client/Node.
Installing Chef Server on Ubuntu Linux allows IT admins to automate IT resource deployment, management, and secure maintenance across an environment. Chef Server is the central repository that manages all the components, and it stores, manages, and provides configuration settings to all Chef components.
Installing Chef Server on Ubuntu Linux allows you to streamline the process of managing and deploying IT resources, making it easier and more efficient for IT admins to maintain and secure their infrastructure.
Additionally, Ubuntu Linux is a popular and widely-used server operating system, so installing Chef Server on it ensures compatibility and ease of use.
We discussed how to install the Check Workstation here.
To get started with installing the Chef server, follow the steps below:
Prepare Ubuntu
Before installing the Chef server, you’ll want to update Ubuntu and install some essential tools to download Chef packages. To do that, run the commands below:
sudo apt update
sudo apt install curl wget
After that, set the Ubuntu server hostname. For this post, we will use chef.example.com as the server hostname.
Run the commands below to set it.
sudo hostnamectl set-hostname chef.example.com
You may also configure its host record in the /etc/hosts file.
sudo nano /etc/hosts
Then, add a line to reference the server IP.
192.168.1.1 chef.example.com
Save the file and exit.
Download and Install Chef Automate
Now that the Ubuntu server is prepared, use the commands below to download the Chef server packages. You can visit this download site to find the latest version to download.
cd /tmp
wget https://packages.chef.io/files/stable/chef-server/13.0.17/ubuntu/18.04/chef-server-core_13.0.17-1_amd64.deb
After downloading the server packages, run the commands below to install.
sudo apt install ./chef-server-core_13.0.17-1_amd64.deb
Wait for the installation to complete. Once done, run the commands below to accept its licensing terms and configure the server’s services.
sudo chef-server-ctl reconfigure
You should see something similar to the lines below:
---------------------------------------------+
            Chef License Acceptance

Before you can continue, 3 product licenses
must be accepted. View the license at

Licenses that need accepting:
  * Chef Infra Server
  * Chef Infra Client
  * Chef InSpec

Do you accept the 3 product licenses (yes/no)?

> yes
The chef has the utility to manage basic tasks like creating the admin account, organization, etc. To create an admin account, use the comment format:
sudo chef-server-ctl user-create USER_NAME FIRST_NAME LAST_NAME EMAIL 'PASSWORD' --filename FILE_NAME
An RSA key will be generated in the filename specified.
For example, to create a new admin account with the full name Super Admin and store it in your home folder, run the commands below:
sudo chef-server-ctl user-create chefadmin Super Admin chefadmin@example.com 'type_strong_password' --filename ~/chefadmin.pemAfter that, you’ll also want to create an organization. Run the commands below to create an organization.
sudo chef-server-ctl org-create example "Example INC." --association_user chefadmin --filename ~/example-org.pem
Full details of the option above
- example – Organization short name. It must begin with a non-whitespace character.
- “Example INC.” – Organization full name
- –association_user – the admin account created earlier
- –filename – filename to store the RSA key for validation
Install Chef Manage
Chef Mange is a premium add-on that allows you to use a web interface to manage Chef tasks. If accessible, up to 25 nodes. To install Chef Manage, run the commands below:
sudo chef-server-ctl install chef-manage
sudo chef-server-ctl reconfigure
sudo chef-manage-ctl reconfigure
sudo chef-manage-ctl reconfigure --accept-license
Log in to the web interface using the server hostname or IP address when finished.
http://chef.example.com/login
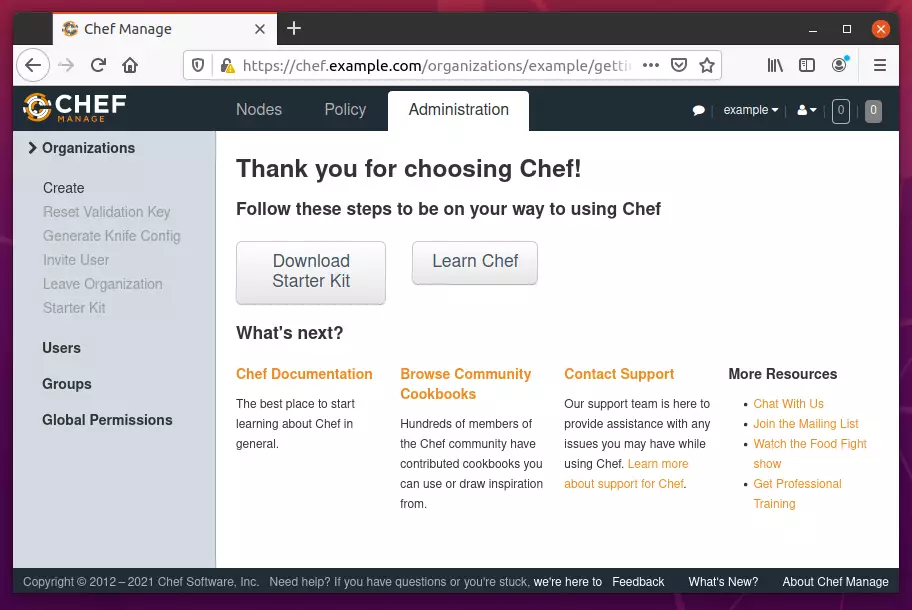
That should bring up the Chef Mange web portal.
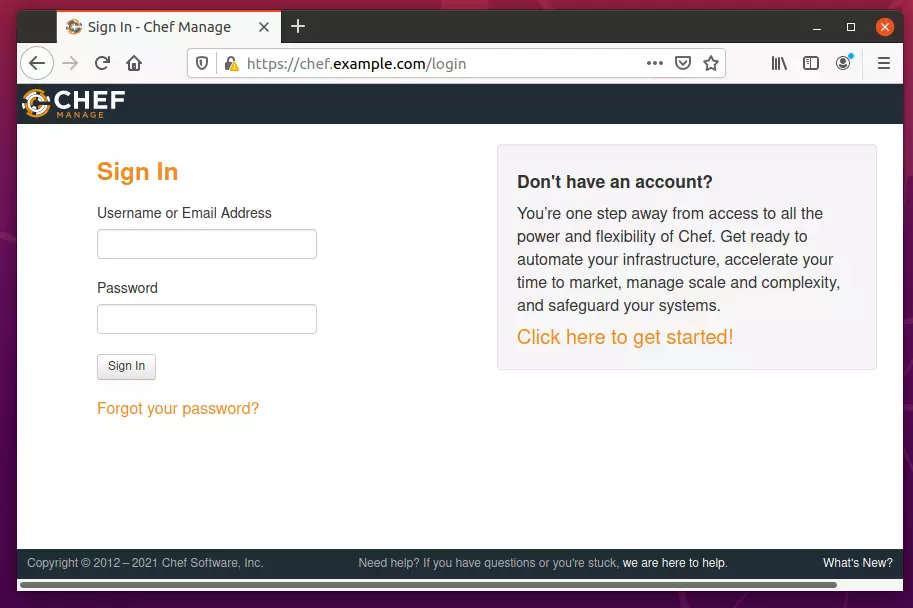
Login with the admin account created above and set up some basic tasks.
Conclusion:
This post showed you how to install the Chef Server on Ubuntu 20.04 | 18.04. If you find any error above, please use the form below to report.
You may also like the post below:

Leave a Reply Cancel reply