

This brief tutorial shows students and new users how to install Askbot on Ubuntu 20.04 | 18.04.
Askbot is an open-source question-and-answer (Q&A) platform built on Python and Django. With Askbot, you can create your Q&A platform similar to StackOverflow and a few others.
You can build an efficient question-and-answer knowledge forum with the best answers being shown first, categorized by tags, and user control with reward systems that give users karma for posting excellent and relevant information.
For individuals and businesses looking to provide a Q&A forum, Askbot should come in handy. When you are ready to install, follow the steps below.
To get started with installing Askbot on Ubuntu, use the guide below.
Install required packages
To install Askbot, these packages will need to be installed on Ubuntu. To install, run the commands below.
sudo apt update
sudo apt install python-dev python-setuptools python3-pip python3-psycopg2 libpq-dev
Install PostgreSQL
Now that you’ve installed the packages above go and install PostgreSQL. To do that, run the commands below.
sudo apt install postgresql postgresql-client
After installing PostgreSQL, the commands below can be used to stop, start, enable, and check its status.
sudo systemctl stop postgresql.service
sudo systemctl start postgresql.service
sudo systemctl enable postgresql.service
sudo systemctl status postgresql.service
This is what the status command shows
● postgresql.service - PostgreSQL RDBMS
   Loaded: loaded (/lib/systemd/system/postgresql.service; enabled; vendor prese
   Active: active (exited) since Wed 2018-10-31 11:58:09 CDT; 12s ago
 Main PID: 7930 (code=exited, status=0/SUCCESS)
    Tasks: 0 (limit: 4663)
   CGroup: /system.slice/postgresql.service

Oct 31 11:58:09 ubuntu1804 systemd[1]: Starting PostgreSQL RDBMS.
Oct 31 11:58:09 ubuntu1804 systemd[1]: Started PostgreSQL RDBMS.
Create PostgreSQL Linux User Password
After installing PostgreSQL, it’s a good idea to create/change the default PostgreSQL user password. Run the below commands to create/change the user password in the bash shell, not the PostgreSQL interactive shell.
Set password for Linux user (Postgres)
sudo passwd postgres
It would be best if you were prompted to create a new Linux password for Postgres users.
Enter new UNIX password:
Retype new UNIX password:
passwd: password updated successfully
After setting a new password, whenever you want to access PostgreSQL interactive shell, you’ll be prompted to confirm the password you created after running the above commands.
Create PostgreSQL database
Now that PostgreSQL is installed, use the commands below to connect to its shell console. You’ll be prompted to type the password you entered above.
su - postgres
psql
On the shell console, type the commands below to create a new askbot database.
create database askbot;
Then create a database user named askbotuser with a new password.
create user askbotuser with password 'type_password_here';
Next, grant askbotuser full access to the askbot database and exit
grant all privileges on database askbot to askbotuser;
q
exit
After creating the database and user above, run the commands below to edit the PostgreSQL configuration file and enable md5 authentication.
sudo nano /etc/postgresql/12/main/pg_hba.conf
Then at the end of the file, edit the highlighted lines to reference md5.
"local" is for Unix domain socket connections only
 local   all             all                                     md5
 IPv4 local connections:
 host    all             all             127.0.0.1/32            md5
 IPv6 local connections:
 host    all             all             ::1/128                 md5
 Allow replication connections from localhost, by a user with the
After editing the above file, restart PostgreSQL
sudo systemctl restart postgresql
Install Askbot
To install Askbot, we’ll need to create a dedicated user account. You can run the commands below to create a new askbot account.
They create a new password for the account.
sudo useradd -m -s /bin/bash askbot
sudo passwd askbot
Next, make sure the command can run sudo as root.
sudo usermod -a -G sudo askbot
When you’re done, run the commands below to install Python virtual environment (virtualenv).
sudo pip install virtualenv six
After installing, switch to the askbot account using the commands below. Then create a new virtual environment for Askbot.
su - askbot
virtualenv askbot
Change into the virtual environment and activate it.
cd askbot
source bin/activate
Next, install Askbot, Six, and PostgreSQL modules.
pip install --upgrade pip
pip install six==1.10.0
pip install askbot==0.11.1 psycopg2
Next, create a directory for Askbot and set it up.
mkdir myapp
cd myapp
askbot-setup
The setup command will prompt for environment details. Use this guide to answer;
Deploying Askbot - Django Q&A forum application
Problems installing? -> please email [email protected]

To CANCEL - press Ctr-C.

Enter the Root directory path (relative or absolute).
This directory will contain the Django project's manage.py file.
Press ENTER to use ./askbot_site.
>
Enter the Project directory name.
Will be a subdirectory within the Root for the settings.py, urls.py files.
Press ENTER to use askbot_site.
>
Select the database engine: 1 - postgresql, 2 - sqlite, 3 - mysql, 4 - oracle.
Type 1/2/3/4, press ENTER to select sqlite
> 1
Enter the database host name
Press ENTER to use empty string (default value).
>
Enter database name. (required)
> askbot
Enter database password. (required)
> type_password_here
Enter database user name. (required)
> askbotuser
Enter the database port
Press ENTER to use empty string (default value).
>
Enter email of the site admin (required)
> [email protected]
Enter name of the site admin (required)
> superadmin
Enter the default from email
Press ENTER to use [email protected].
>
Enter the server email
Press ENTER to use [email protected].
Next, complete the setup by running the commands below:
cd askbot_site/
python manage.py collectstatic
python manage.py migrate
Start the application
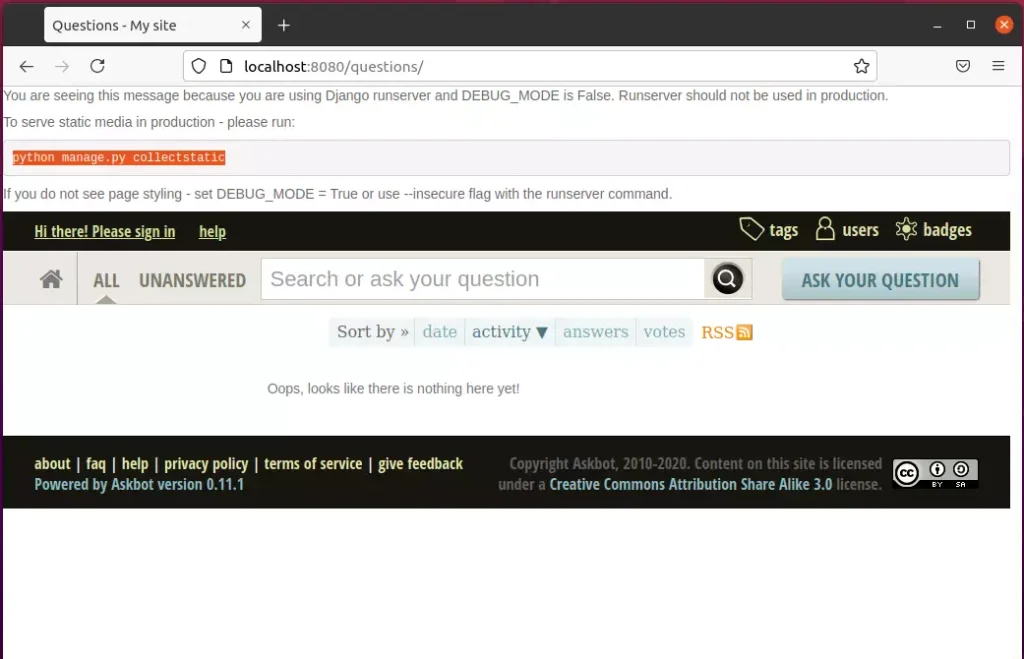
python manage.py runserver --insecure 0.0.0.0:8080
You should now be able to access your app via the URL
http://localhost:8080
Login to the backend as admin
http://localhost:8080/admin
If you can’t log in, create a super admin account by running the commands below:
python manage.py createsuperuser
That’s it!
Conclusion:
This post showed you how to install Askbot on Ubuntu. If you find any error above, please use the form below to report.
Frequently Asked Questions
What is Askbot and how does it work?
What are the system requirements for installing Askbot on Ubuntu?
How do I install PostgreSQL on Ubuntu for Askbot?
How can I create a PostgreSQL user for Askbot?
What commands do I need to manage the PostgreSQL service?


Leave a Reply