This post shows students and new users how to install VirtualBox Guest Additions software on Ubuntu Linux.
Suppose you’re running VirtualBox virtualization software with Ubuntu as a guest machine. In that case, the first thing they’ll want to do after installing the Ubuntu guest operating system (OS) is to install VirtualBox guest addition software.
VirtualBox Guest Addition Software enhances the virtual guest machine and improves its management. When you install a new operating system on a VirtualBox virtual machine, your first task should be to install the Guest Addition Software.
Operating the guest machine without the guest addition software will perform poorly, and your experience with it will be limited.
The tool provides tight integration between the host and virtual machine operating systems, improvement to the VM graphics performance, shared folder between the host and guest machines, copying and pasting of text, images, and files between the host and guest machine as mouse improvement.
When you’re ready to install VirtualBox guest addition, run the commands below to update Ubuntu.
sudo apt update
sudo apt dist-upgrade
sudo apt autoremove
When you’re done, run the commands below to install the latest kernel header and dkms package to support VirtualBox.
sudo apt install build-essential linux-headers-$(uname -r)
After installing the packages above, restart your machine and continue below.
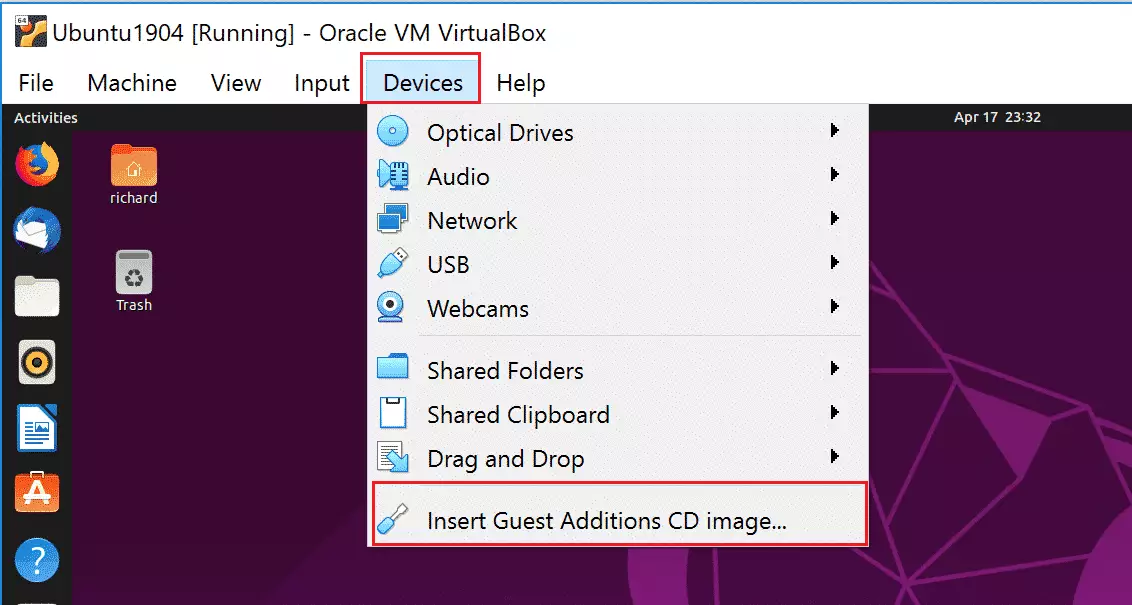
To install VirtualBox Guest Additions software on Ubuntu virtual machine operating systems, select the Devices from the VirtualBox host application menu and click Insert Guest Additions CD image.
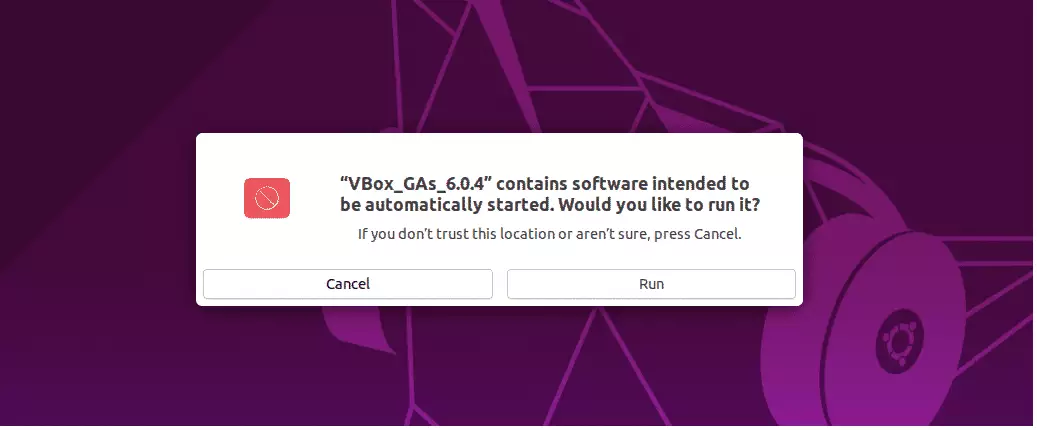
This should mount a virtual CD/DVD drive inside the Ubuntu guest machine. When that happens, you should get a prompt to run the software. Click Run to begin the installation.
You will have to type your password to install the software. If your account is not an administrative account, the installation will fail.
The Guest Additions suite of utilities is the official tool for VirtualBox virtual guest machines.
Run the installer from the command line
If the installation will not automatically start up and run, you can use the command below to install it.
Press the CTRL + ALT + T to open the command console. Then, run the command below.
sudo /media/$USER/VBox_GAs*/./VBoxLinuxAdditions.run
Restart the guest machine, and you’re set.
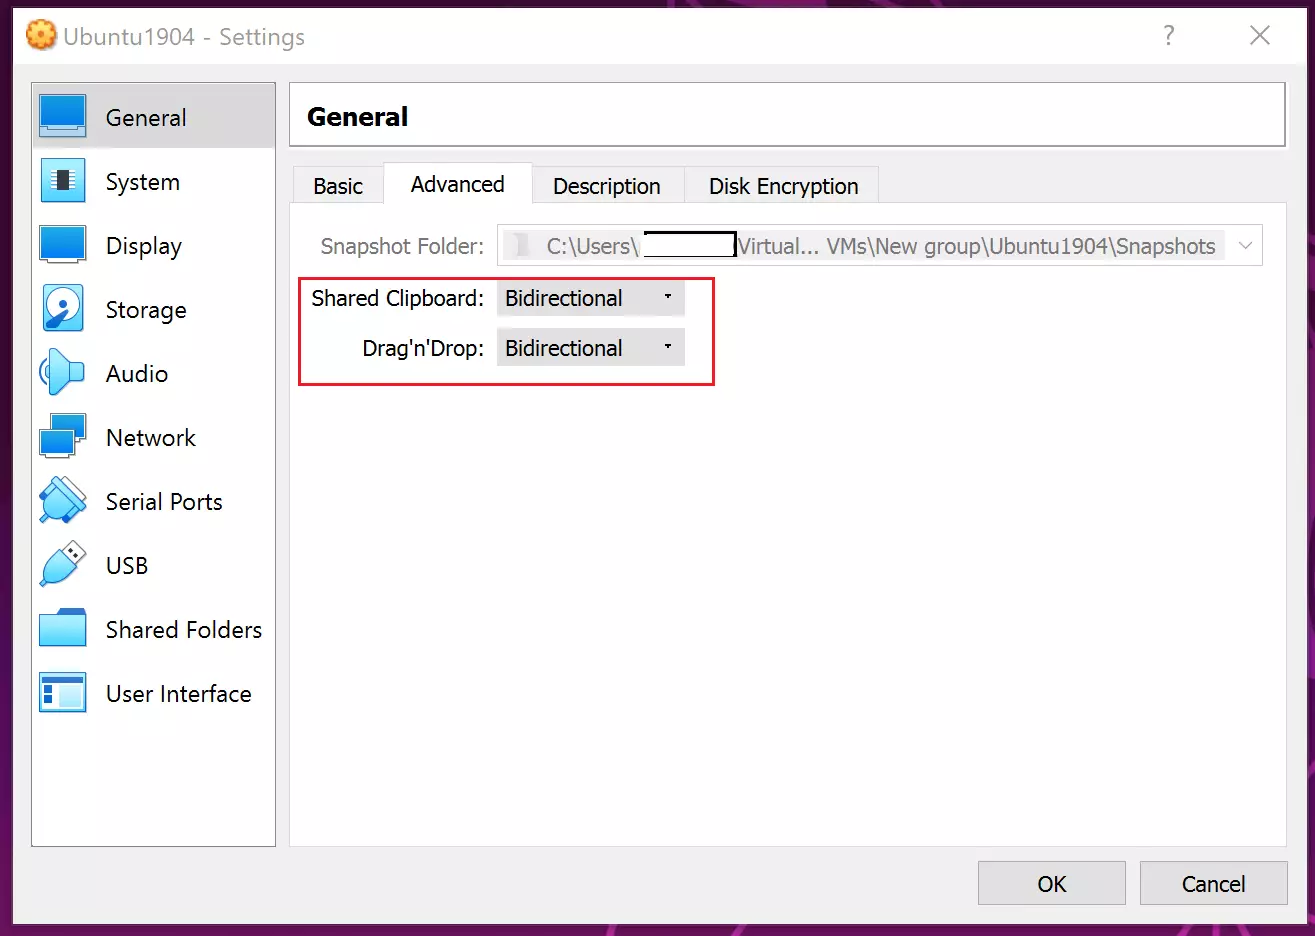
To enable copying and pasting between the guest machine and the host, go to the guest machines settings page (General –> Advanced) and enable it as shown below.
That’s it!
Conclusion:
This post showed you how to install VirtualBox Guest Additions software on Ubuntu guest machines. Please use the comment form below if you find any errors above or have something to add.

Leave a Reply to Buntu Brother Cancel reply