
This article explains how to install custom fonts when using Windows 11.
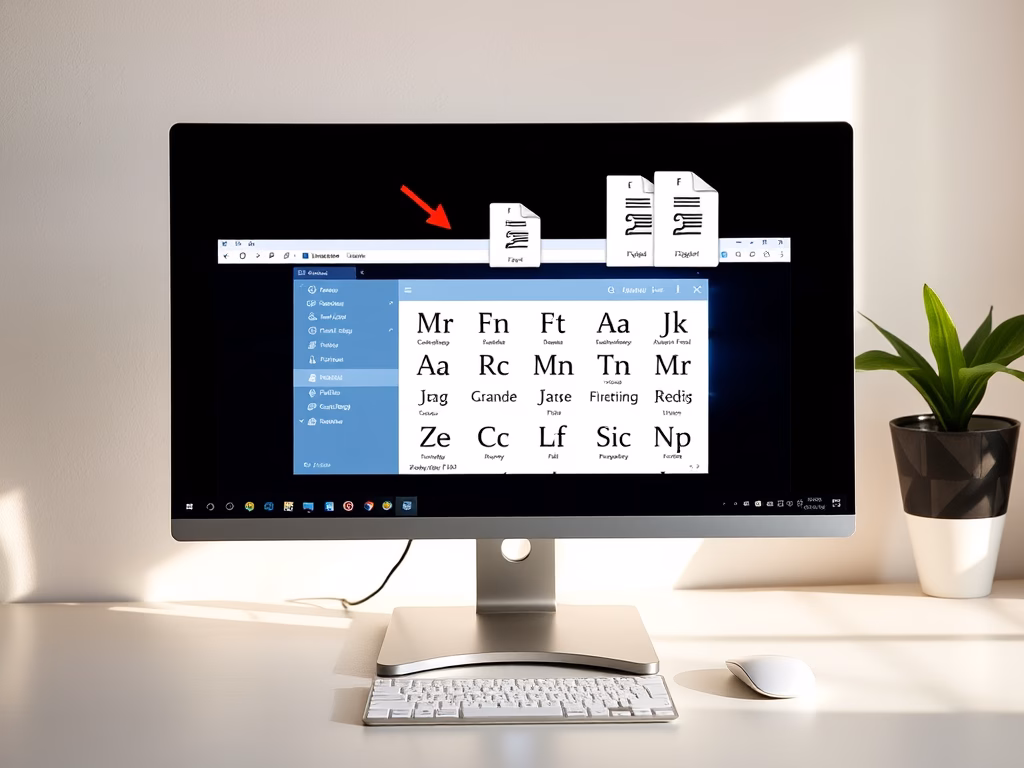
Windows allows users to install and manage custom fonts and use them to format their documents. You can download and install a new font in Windows, which will become available to the system and Office applications.
Fonts come as files that can be installed on Windows, and there are many sites on the internet where you can download free fonts, including Google fonts. Typically, these fonts are packaged in a zipped file. If you download a .zip file, unzip it before installing it.
All fonts are stored in the C:\Windows\Fonts folder. You can also add fonts by dragging font files from the extracted files folder into this folder. Windows will automatically install them.
Below, we’ll show you how to download custom fonts on Windows 11 from the internet and install them to use them in your applications or documents. It should only take a few clicks to do this in Windows 11.
Install or uninstall fonts on Windows 11
As mentioned above, one can download and install custom fonts from the internet on Windows 11. This process takes a few clicks.
To install a font, go online and download it. For this post, we got our custom font from fonts.google.com.
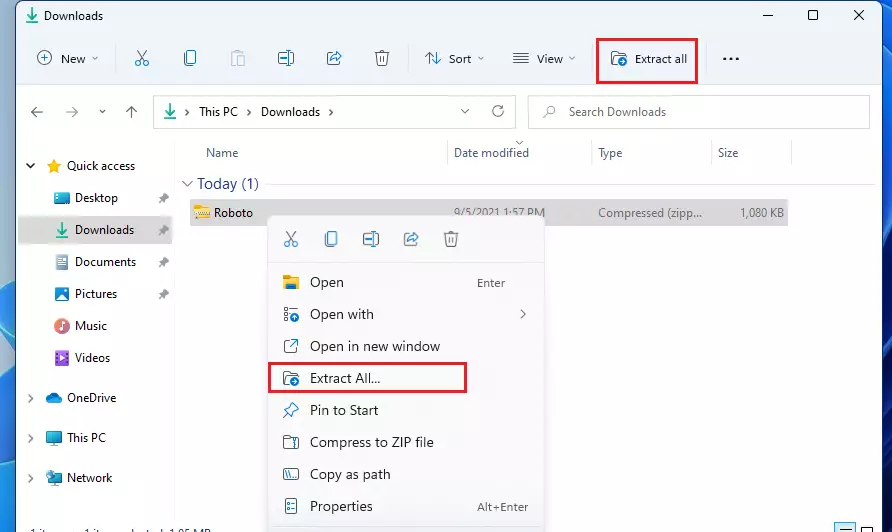
Once the font is downloaded, select the zipped file in your Downloads folder in File Explorer. Then right-click and select Extract All on the context menu, or use the toolbar to extract it as highlighted below.
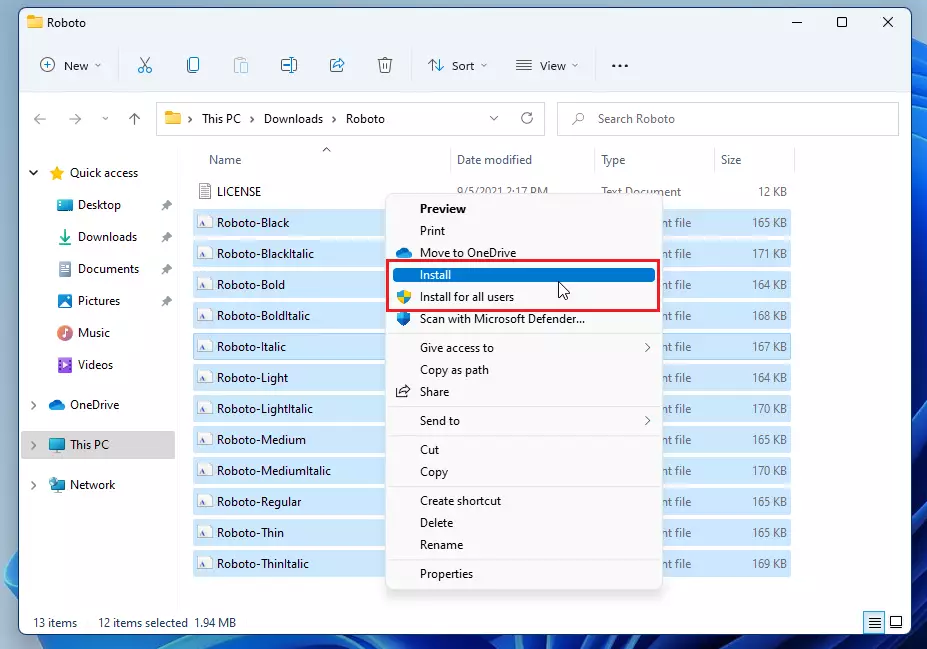
After extracting the zipped file, go into the extracted folder and select all the font files. Then right-click and select the Show more option on the context menu, as shown below.

On the following context menu, choose to install it for yourself or all users on the system. If you install it yourself, the fonts will only be available.
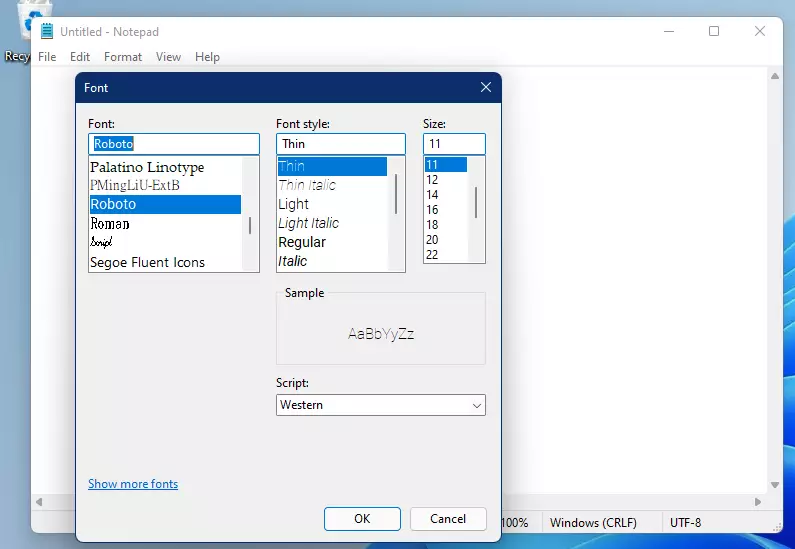
After installing the fonts, they should be available in your applications and when formatting documents.
Manage and delete fonts on Windows 11
Now that you have installed a custom font, you can always manage it by going to the System settings.
Windows 11 has a centralized location for the majority of its settings. From system configurations to creating new users and updating Windows, all can be done from the System Settings pane.
To get to System Settings, you can use the Windows key + I shortcut or click on Start ==> Settings, as shown in the image below:

Alternatively, you can use the search box on the taskbar to search for Settings. Then select to open it.
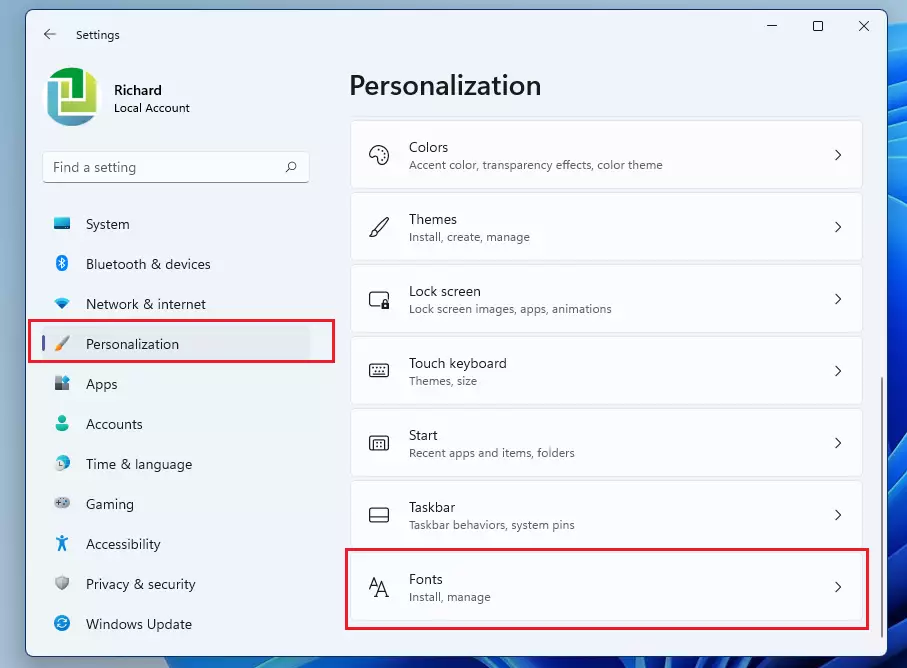
In Windows Settings, click Personalization, then select Fonts on the right pane of your screen, as shown in the image below.
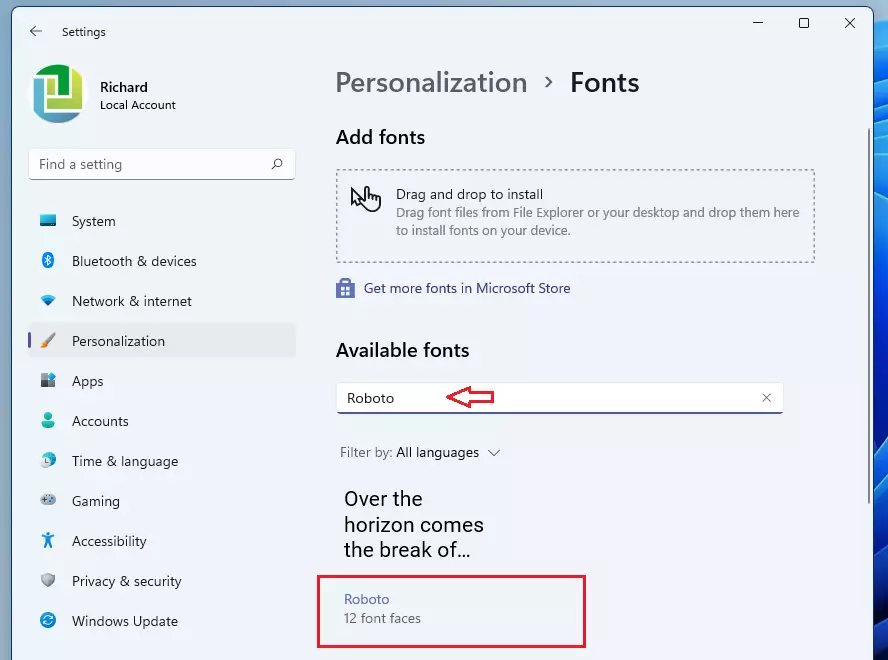
On the Fonts settings pane, you can search for the installed fonts and select them.
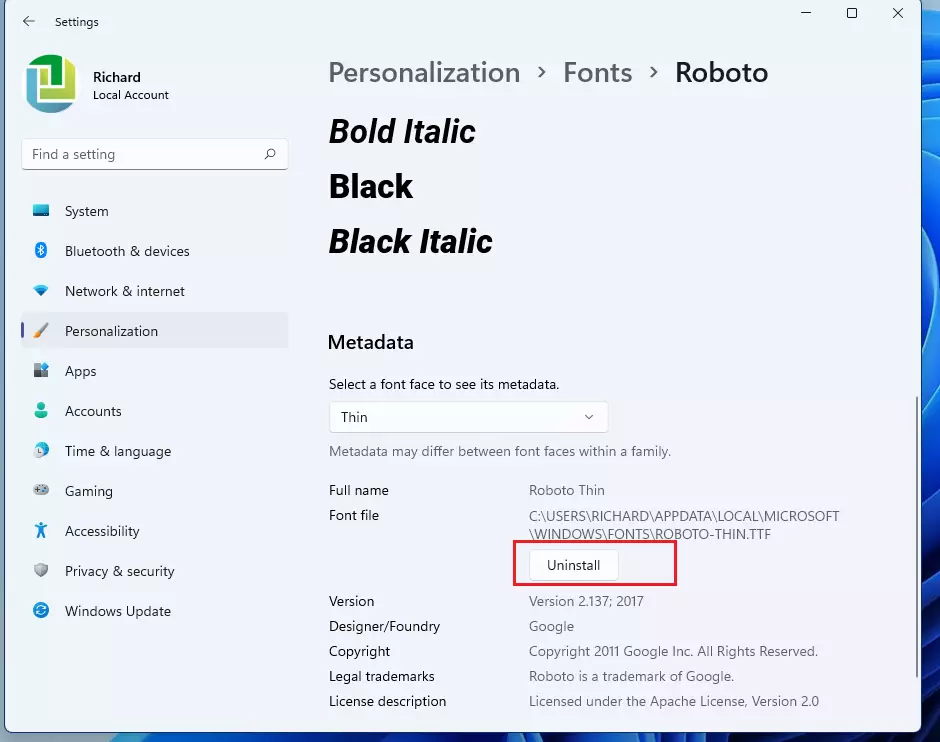
There, you can manage and uninstall the installed fonts.
That should do it!
Conclusion:
- Custom fonts enhance the visual appeal of documents and applications in Windows 11.
- Installing fonts is a straightforward process that only requires a few clicks.
- Users can manage and uninstall fonts easily through the System Settings.
- Utilizing diverse fonts can improve creativity and personalization in digital projects.
- Regularly explore new font options from websites like Google Fonts to keep your typography fresh.


Leave a Reply Cancel reply