
This article discusses disabling the new Snap layouts feature on Windows 11 desktops.
The Snap layouts feature allows you to view and access multiple windows simultaneously by arranging them on your screen. To use Snap layouts, hover your mouse over the top edge of your app windows, specifically over the maximize button.
This action will display a fly-out menu with various snap layouts that you can select to reorganize the windows.
The steps below guide you through disabling the Snap layout feature in Windows 11.
Turn off layouts in Windows from System Settings
To disable Snap Layout via Settings, go to the Settings panel using the Start menu.
There are multiple ways to select Windows 11 as the default speaker. One can quickly select the system-wide speakers for all apps using Windows system settings.
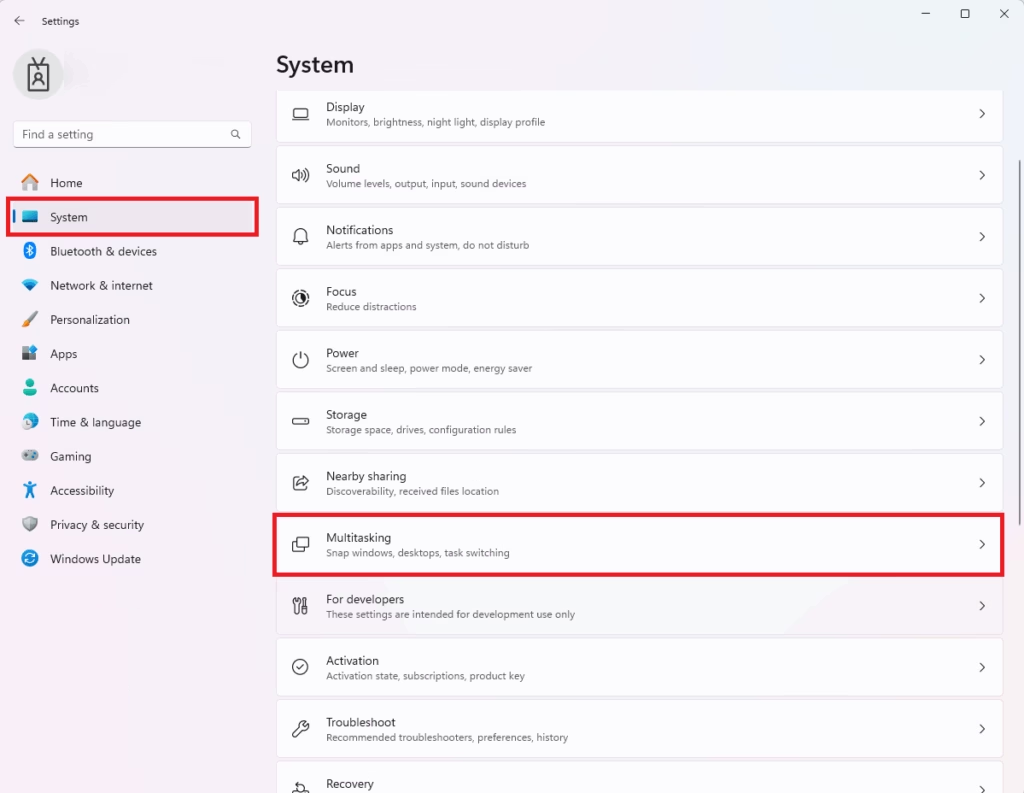
Windows 11 has a centralized location for the majority of its settings. Everything can be done, from system configurations to creating new users and updating Windows from its System Settings pane.
To get to System Settings, you can use the Windows key + I shortcut or click on Start ==> Settings, as shown in the image below:

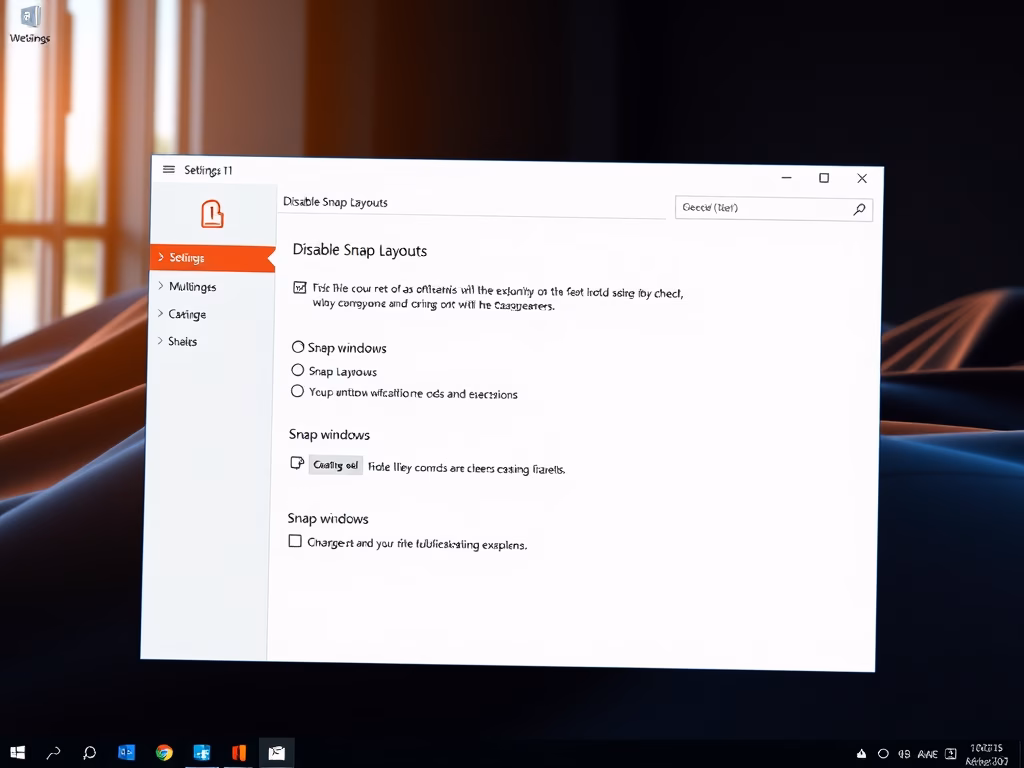
Windows Settings pane should look similar to the image below. In Windows Settings, click System, and select Multitasking on the right pane of your screen, as shown in the image below.
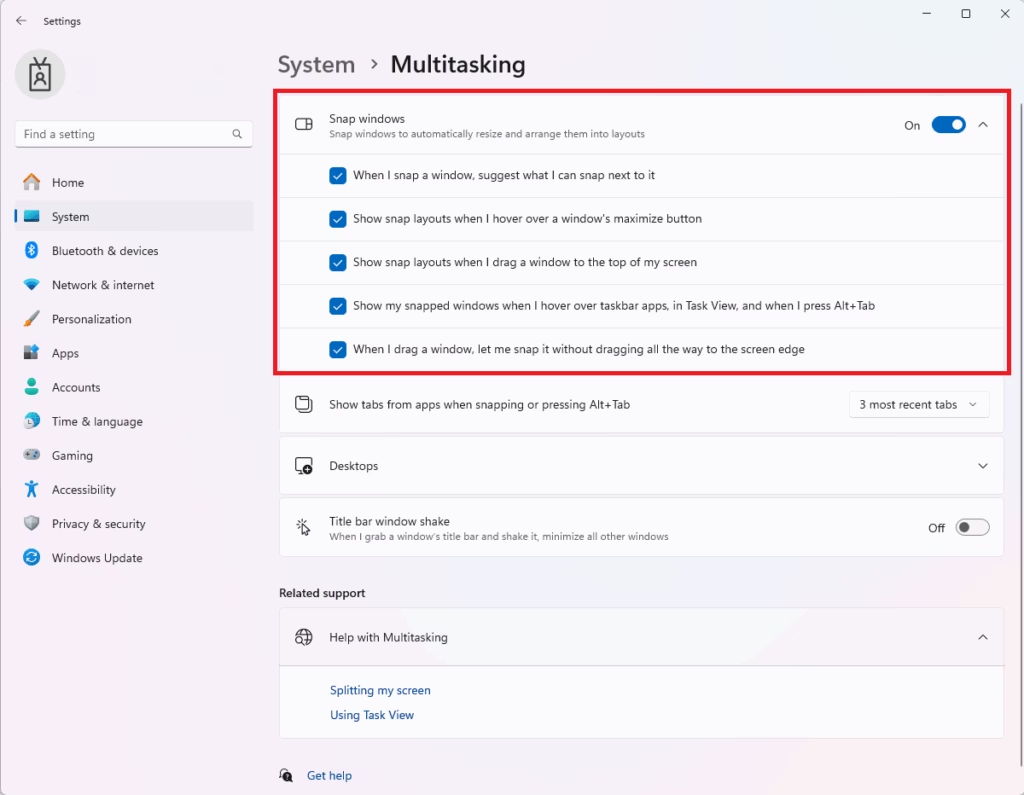
To access more Snap options, expand the button next to “Snap windows” in the Multitasking settings panel.
Then, in the list of Snap layout options, uncheck the box next to “Show Snap layouts when I hover over the window’s maximize button.”
That will do it!
Disable Snap layouts from the registry in Windows 11
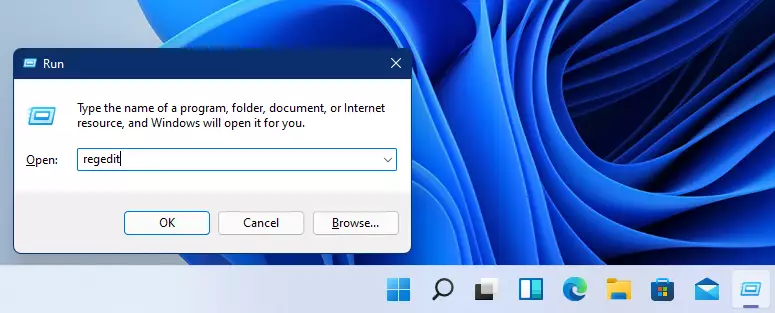
If you want to use the Windows registry to turn off Snap layouts, simply press the Windows key + R on your keyboard to open the Run app.
In the Run app box, type the commands below:
regedit
When the Windows registry opens, navigate to the path below:
HKEY_CURRENT_USER\Software\Microsoft\Windows\CurrentVersion\Explorer\Advanced
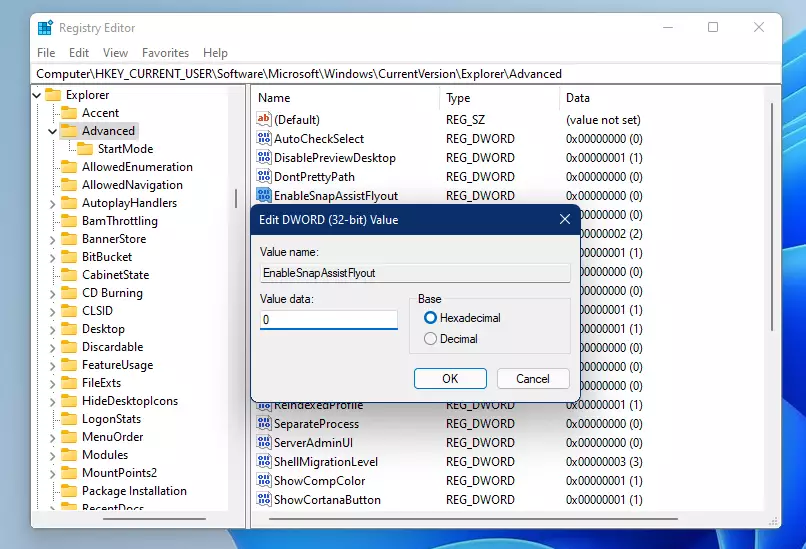
You can simply copy the path above and paste it into the box. When you’re there, locate ‘EnableSnapAssistFlyout‘ in the DWORDs on the right.
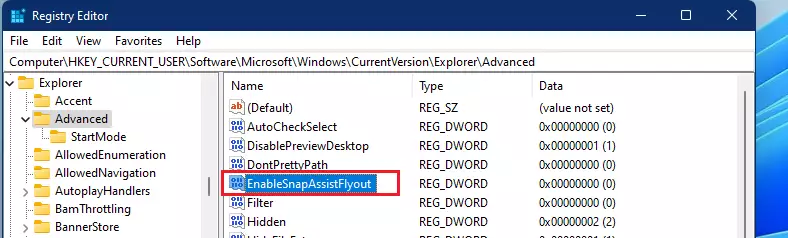
Double-click or right-click and modify EnableSnapAssistFlyout and change the data value to 0 to disable.
That should do it!
Disable Snap Windows Entirely in Windows 11
You can disable Snap entirely by disabling Snap altogether. Go to Start ==> Settings ==> System ==> Multitasking ==> Snap Windows and toggle the button to the Off position.
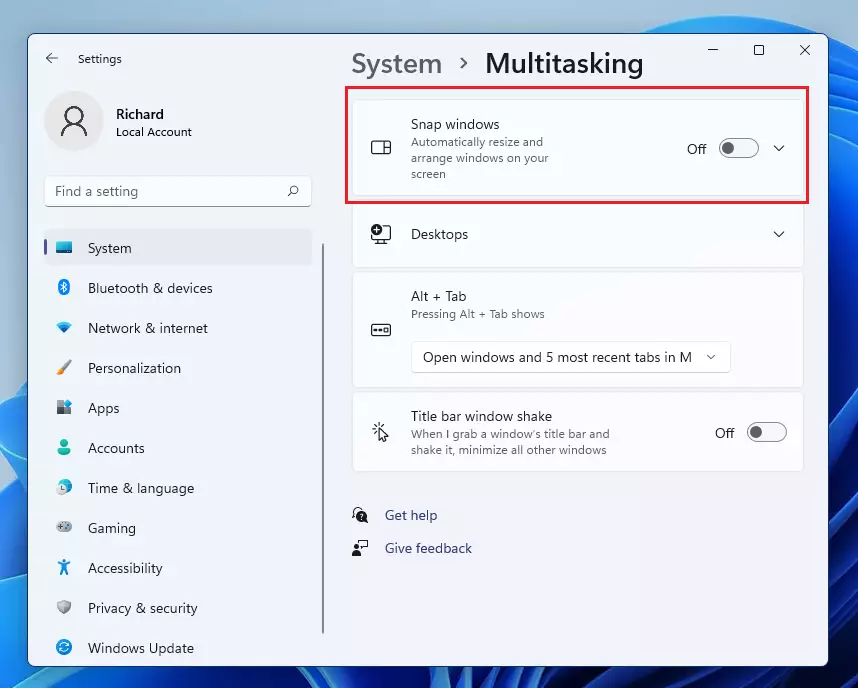
That will turn off Snap windows and everything related to Snap.
Conclusion:
- Disabling Snap layouts in Windows 11 can enhance productivity for users who prefer manual window management.
- It may also improve performance on older or low-end devices that struggle with resource-intensive features.
- Securing sensitive information by avoiding accidental data arrangements is another valid reason for disabling Snap layouts.
- Depending on their comfort level, users can easily turn off Snap layouts through System Settings or the Windows Registry.
- With just a few steps, you can customize your Windows 11 experience to suit your workflow and preferences better.


Leave a Reply Cancel reply