
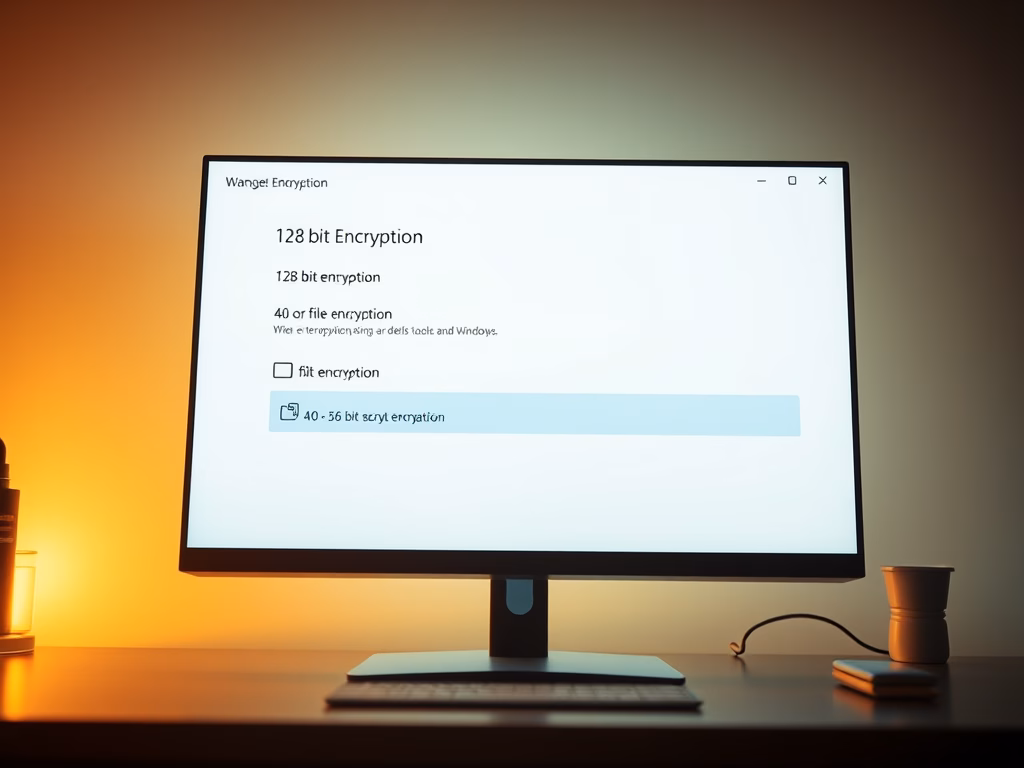
This tutorial will show you how to change file sharing encryption in Windows 11. You can use 128-bit encryption or 40- or 56-bit encryption.
What is File and Printer Sharing?
File and printer sharing lets your Windows computer share folders and printers with other computers on your network.
File sharing means you can let others on your network view, copy, or edit files in a shared folder.
Printer sharing means you can let others on your network use a printer connected to your computer.
About Encryption Levels
Windows uses 128-bit encryption to protect file sharing by default. This is the strongest option. However, some older devices do not support 128-bit encryption. Those devices need 40- or 56-bit encryption instead.
Note: You must be signed in as an administrator to change these settings.
Option One: Use Settings
This option works on Windows 11 version 22H2 KB5030310 Build 22621.2361.1 and newer.
- Open Settings by pressing Win+I.
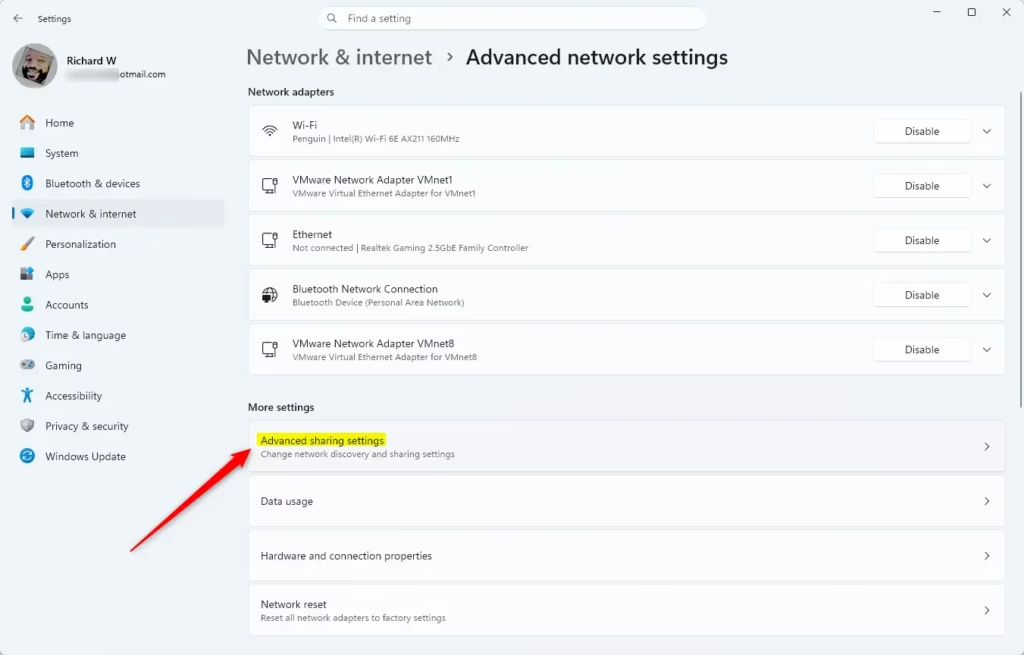
- Click Network & internet on the left side.
- Click Advanced network settings on the right side.
- Click Advanced sharing settings on the right side. Open Advanced sharing settings
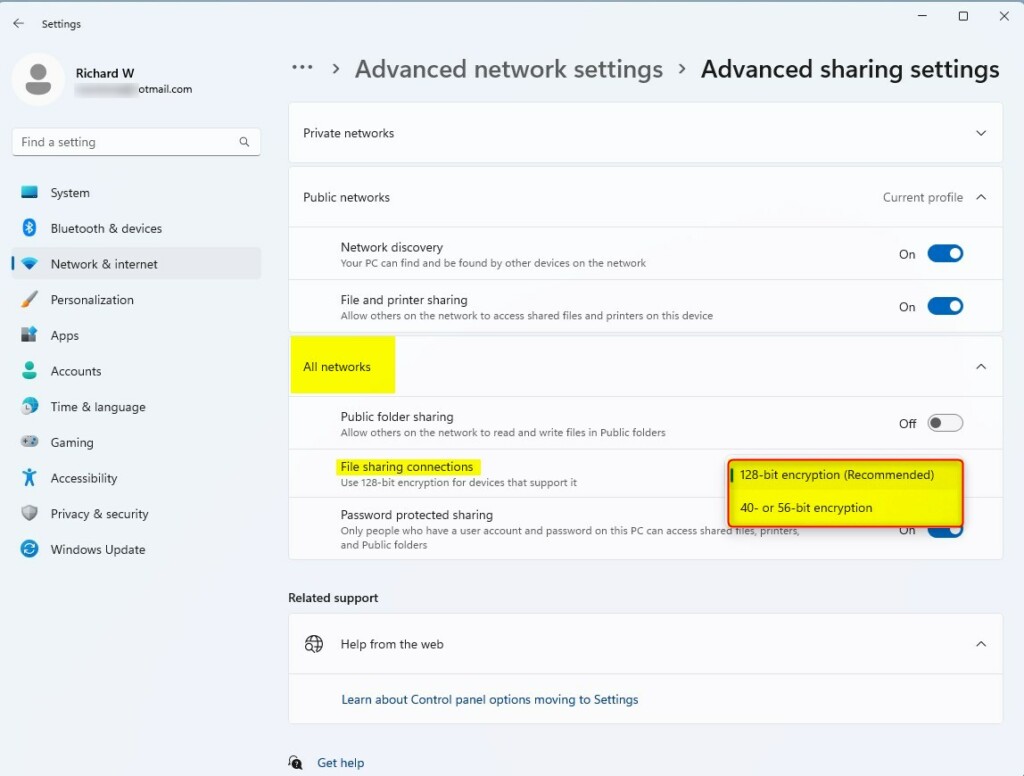
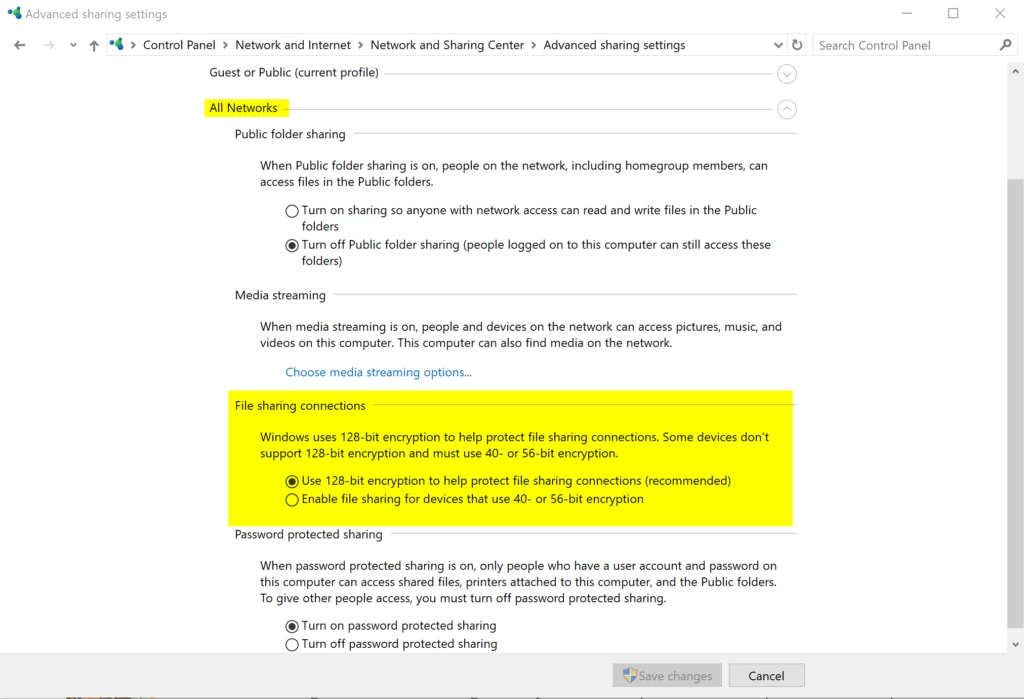
- Click All networks to expand it.
- Under File sharing connections, choose one of these options:
- 128-bit encryption (default) — Use this for most modern devices.
- 40- or 56-bit encryption — Use this only if you have older devices that need it.
- Close Settings when done.
Option Two: Use Control Panel
This option does not work on Windows 11 build 22509.1011.1 and newer. Use Option One instead.
- Open Control Panel and switch to icons view.
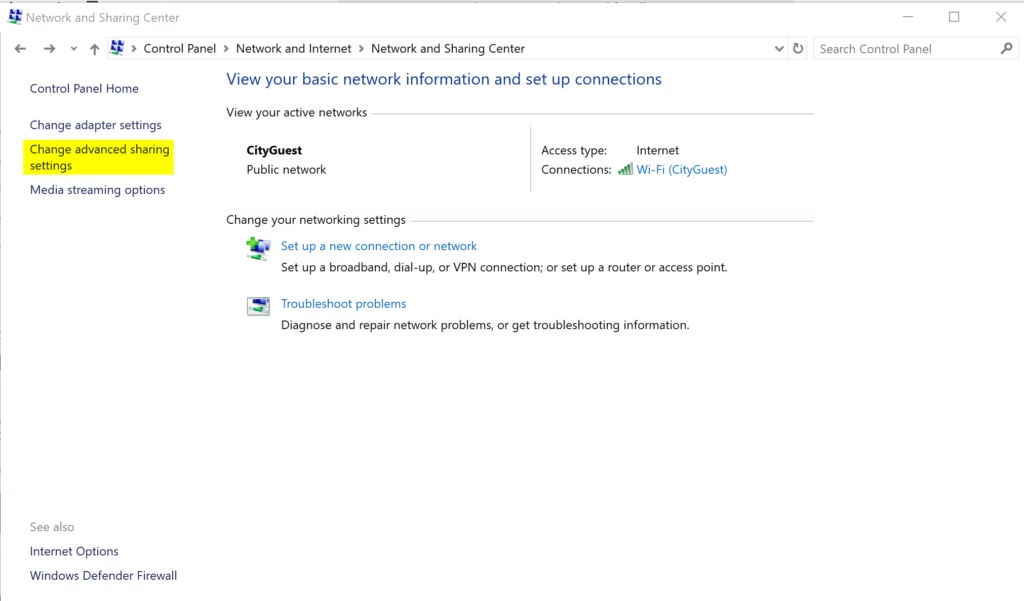
- Click the Network and Sharing Center icon.
- Click Change advanced sharing settings on the left side.
- Click to expand All networks.
- Under File sharing connections, choose one of these options:
- 128-bit encryption (default)
- 40- or 56-bit encryption
- Click Save changes.
- Close Control Panel when done.
Option Three: Use the Registry
⚠️ Admin privileges required.
You can also change encryption settings by editing the Windows Registry. Follow these steps:
For 128-bit Encryption (Default)
Add or modify these registry values:
reg add "HKLM\SYSTEM\CurrentControlSet\Control\Lsa\MSV1_0" /v NtlmMinClientSec /t REG_DWORD /d 0x20000000 /f
reg add "HKLM\SYSTEM\CurrentControlSet\Control\Lsa\MSV1_0" /v NtlmMinServerSec /t REG_DWORD /d 0x20000000 /f
For 40- or 56-bit Encryption
Add or modify these registry values:
reg add "HKLM\SYSTEM\CurrentControlSet\Control\Lsa\MSV1_0" /v NtlmMinClientSec /t REG_DWORD /d 0 /f
reg add "HKLM\SYSTEM\CurrentControlSet\Control\Lsa\MSV1_0" /v NtlmMinServerSec /t REG_DWORD /d 0 /f
Summary
Windows 11 lets you control the encryption level used for file sharing. The default is 128-bit encryption, which is the safest choice for modern devices. If you have older devices that cannot support 128-bit encryption, you can switch to 40- or 56-bit encryption instead. You can make this change using Settings, Control Panel, or the Registry. Remember that you need admin rights to make these changes.

Leave a Reply Cancel reply