This article explains how to lock your Windows 11 PCs automatically while away with Bluetooth access-enabled mobile phones or devices.
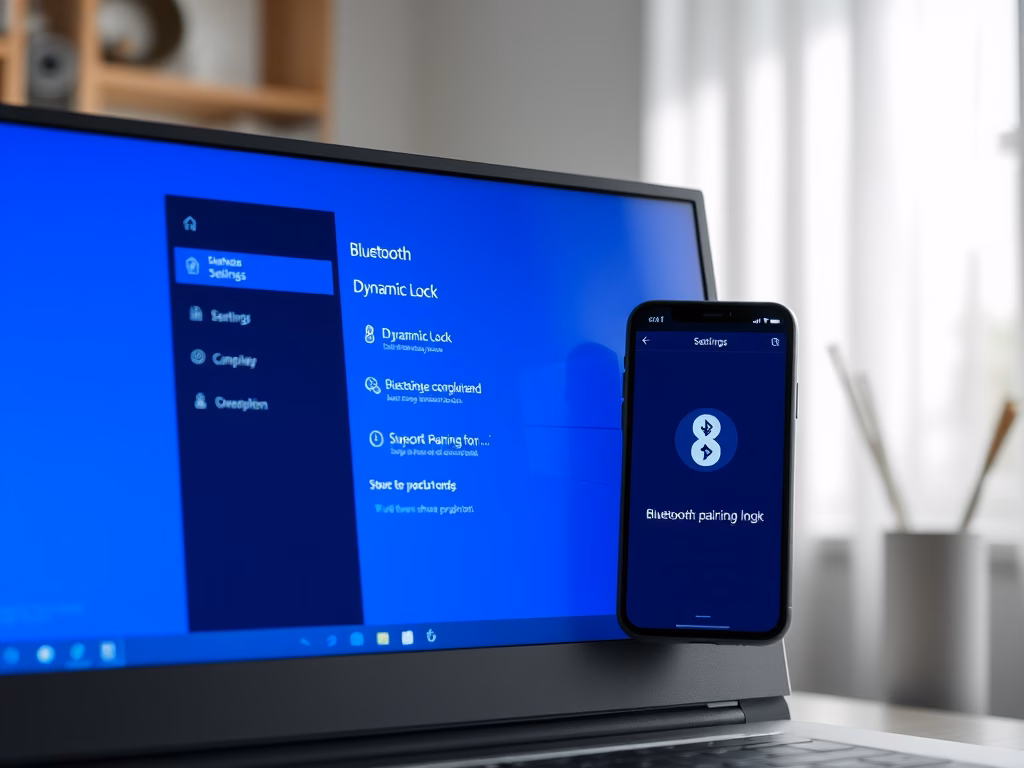
Dynamic Lock is a security feature in Windows that uses a Bluetooth device to automatically lock your Windows computer when the device is out of range.
This feature adds an extra layer of security to your computer, ensuring it is locked when you step away from it, preventing unauthorized access to your system.
When you enable Dynamic Lock, Windows 11 automatically locks itself when the paired Bluetooth device goes out of range, ensuring your system stays locked and secure when you’re not using it.
Wet up a dynamic lock to automatically lock Windows 11
As mentioned above, you can set up Dynamic Lock in Windows 11 with your Bluetooth-enabled mobile device and have Windows automatically lock itself when you’re away to prevent unauthorized access to your system.
However, before you can set up Dynamic Lock, you must first pair your device to Windows via Bluetooth.
Pair a mobile phone to Windows 11 via Bluetooth
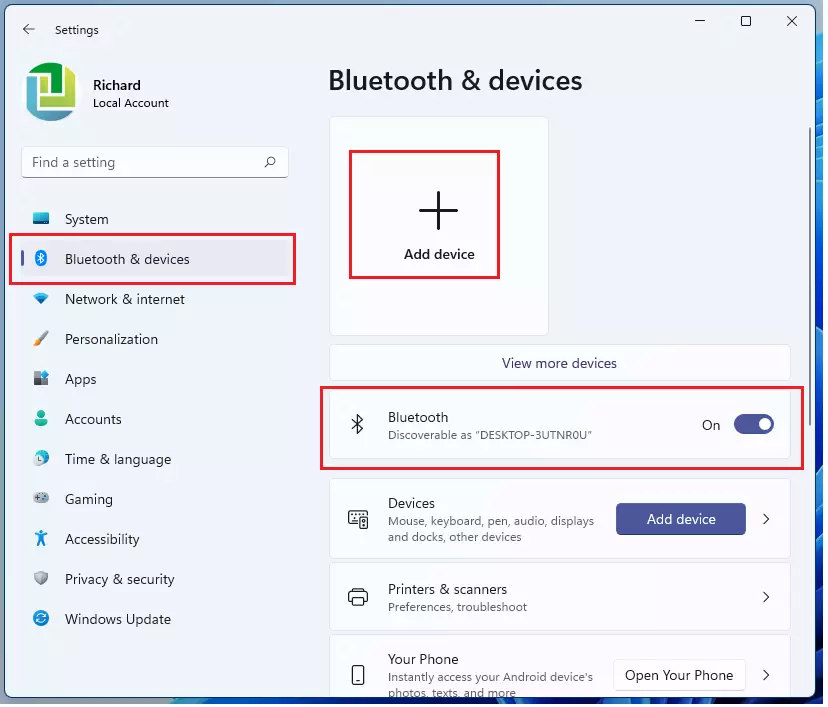
Pairing your mobile devices with Windows 11 is easy. Go to Windows Settings, under Bluetooth & devices, to do it.
Windows 11 has a centralized location for the majority of its settings. Everything can be done, from system configurations to creating new users and updating Windows from its System Settings pane.
To get to System Settings, you can use the Windows key + I shortcut or click on Start ==> Settings, as shown in the image below:

Alternatively, you can use the search box on the taskbar to search for Settings. Then select to open it.
On the Windows Settings, click Bluetooth & devices, and turn on Bluetooth on the right pane of your screen, as shown in the image below.
Then click the Add Device button to begin pairing your Bluetooth-enabled devices.
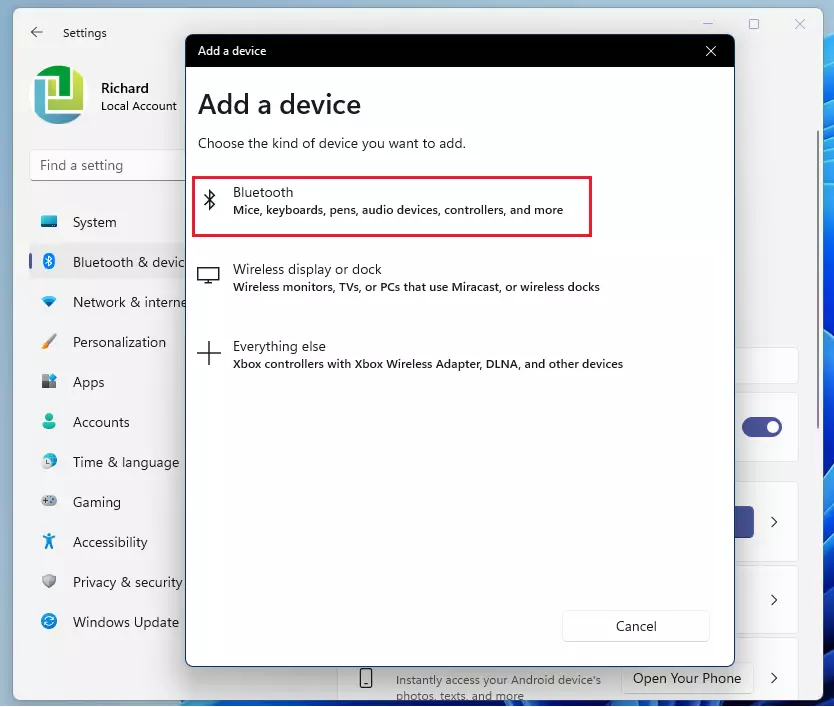
Next, select Bluetooth as the device you want to add or pair.
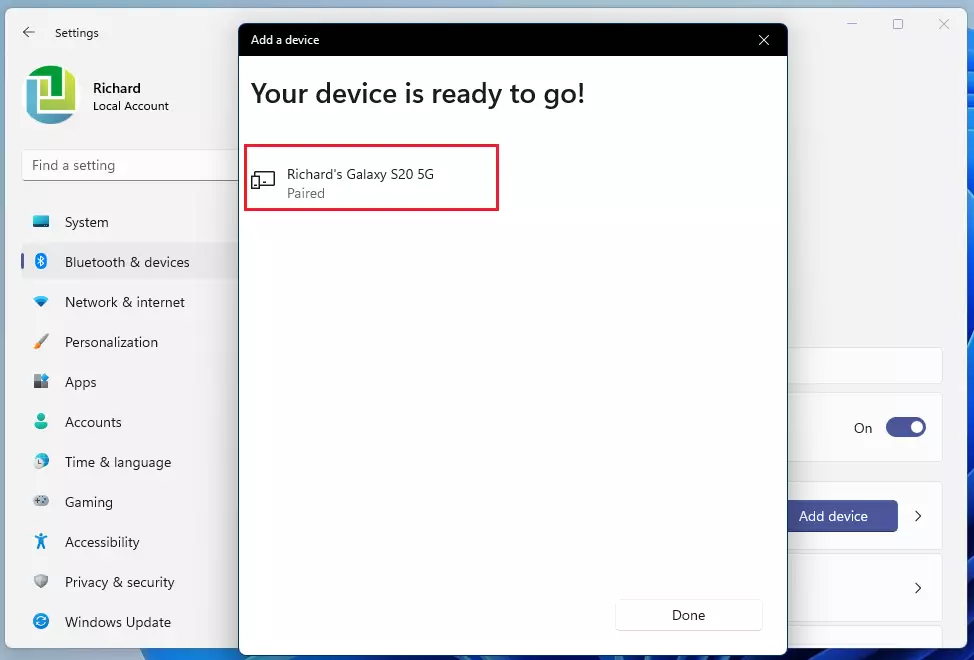
Then, select the device on the list that your computer finds.

Next, complete the pairing. Now, your mobile device and Windows 11 are paired.
Enable Dynamic Lock in Windows 11
Now that your device and Windows are paired, turn Dynamic Lock on. You can do that from the Accounts settings.
From the Settings pane, click on Accounts and select the Sign-in options tile to expand it.
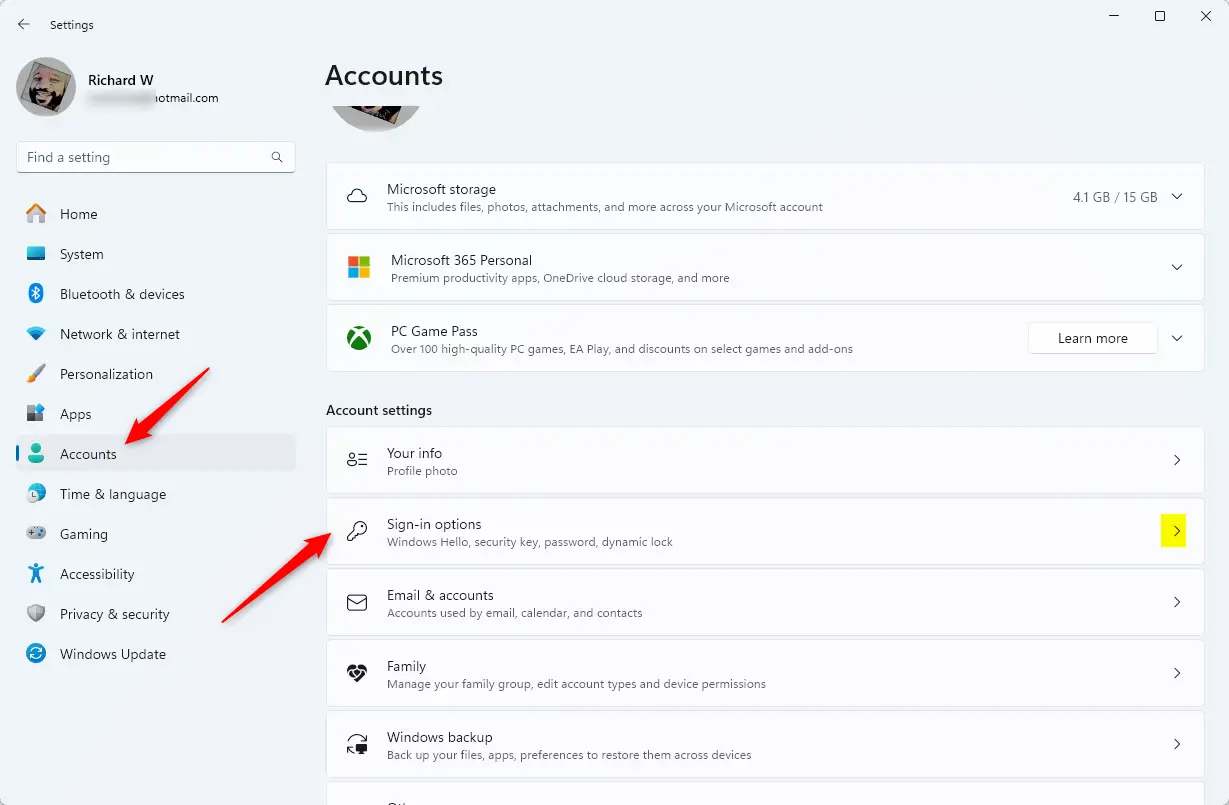
Under Additional settings, click Dynamic Lock on the Sign-in options, then select your mobile paired mobile device.
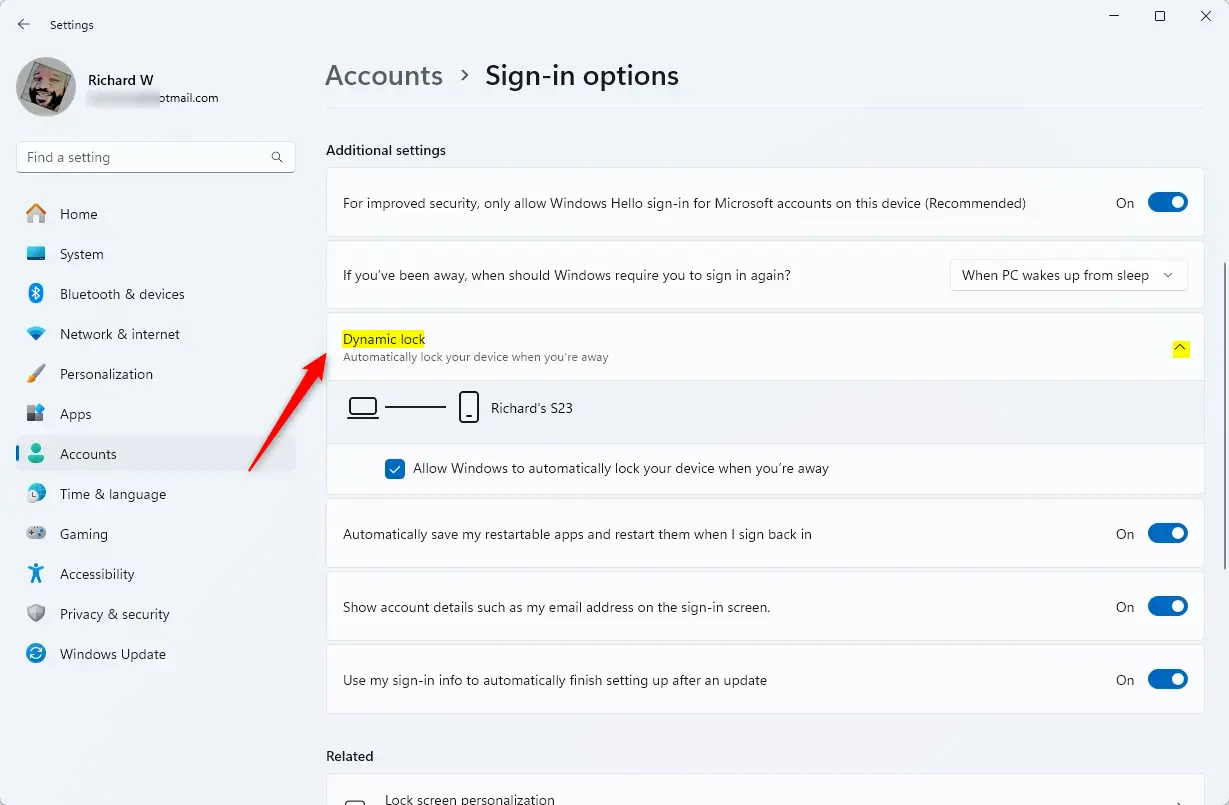
That should do it!
The next time your device is out of range, Windows will automatically lock itself.
Conclusion:
- Dynamic Lock enhances the security of your Windows 11 PC by automatically locking it when your Bluetooth-enabled device is out of range.
- The setup process is straightforward, requiring only a few steps to pair your mobile device and enable Dynamic Lock.
- This feature helps prevent unauthorized access, ensuring your data remains safe when you’re away from your computer.
- Regularly check and manage your paired devices for optimal security and functionality.
- Using Dynamic Lock, you can enjoy greater peace of mind while using your Windows 11 systems.

Leave a Reply to How to Manage Windows Security Notifications in Windows 11 – Geek Rewind Cancel reply