
This tutorial will show you how to add or remove the Bluetooth notification icon on the taskbar for your account in Windows 11.
What is Bluetooth?
Bluetooth is a wireless technology that lets devices talk to each other without cables. You can use it to connect many types of devices to your PC, such as:
- Mobile phones
- Wireless headsets
- Speakers
- Fitness trackers
- Mouse and keyboard
When Bluetooth is turned on, the Bluetooth icon appears in your taskbar corner. When you turn Bluetooth off, the icon disappears.
Option One: Remove the Icon Quickly
- Look for the Bluetooth icon in the taskbar corner (bottom right of your screen).
- Click on the Bluetooth icon.
- Click on Remove Icon.
Option Two: Add or Remove the Icon Using Settings
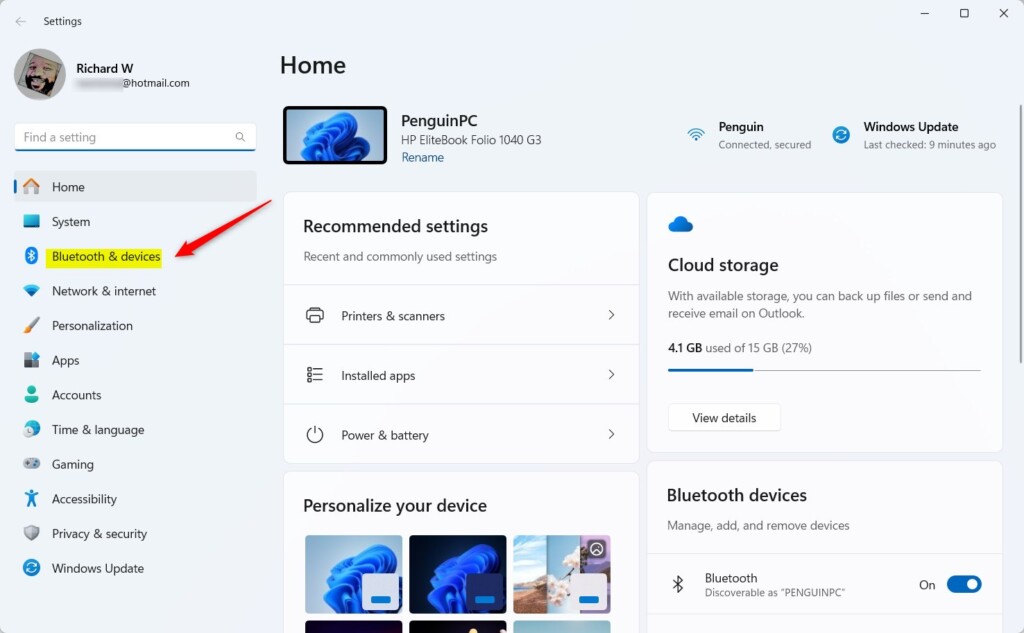
- Open Settings by pressing Win+I on your keyboard.
- Click on Bluetooth & devices on the left side.
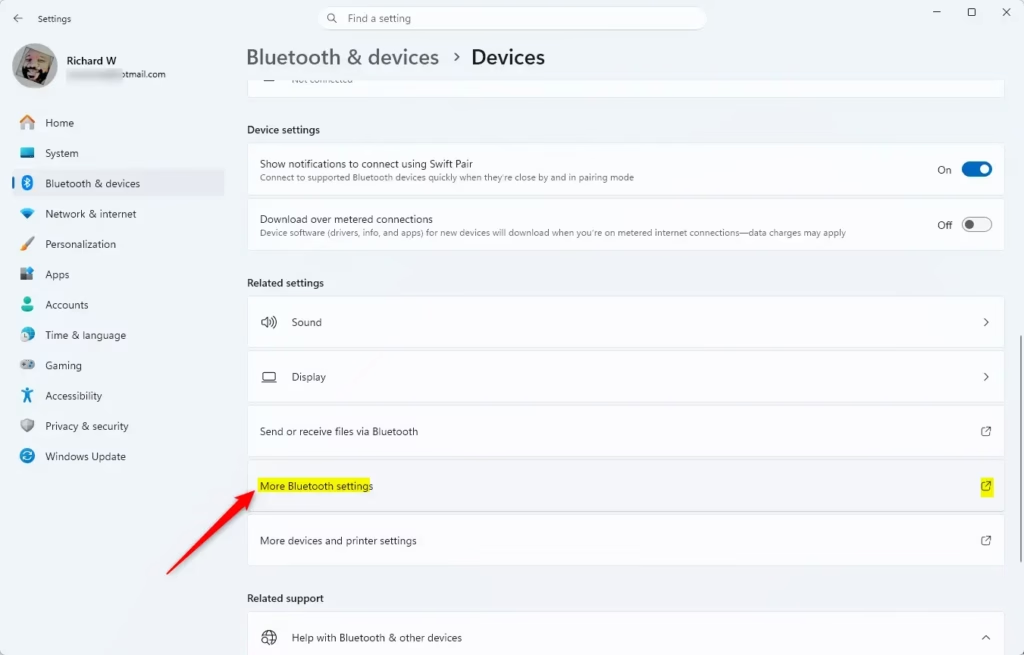
- Click on Devices on the right side.
- Click on More Bluetooth settings under Related settings.
- In the Options tab, check the box next to Show the Bluetooth icon in the notification area to add the icon. Uncheck it to remove the icon.
- Click OK.
- You can now close Settings.
Option Three: Add or Remove the Icon Using Registry Editor
⚠️ Admin privileges required
To add the Bluetooth icon:
reg add "HKEY_CURRENT_USER\Control Panel\Bluetooth" /v "Notification Area Icon" /t REG_DWORD /d 1 /fTo remove the Bluetooth icon:
reg add "HKEY_CURRENT_USER\Control Panel\Bluetooth" /v "Notification Area Icon" /t REG_DWORD /d 0 /fSummary
You now know three different ways to control the Bluetooth icon on your Windows 11 taskbar. Option One is the quickest if you just want to remove it. Option Two uses the Settings app and is easy to follow. Option Three uses the Registry Editor for advanced users. Choose the method that works best for you.


Leave a Reply Cancel reply