This article explains how to manually upgrade and update Drupal Core files on Ubuntu Linux.
Upgrading Drupal core files on Ubuntu Linux manually is necessary when a highly critical remote code execution vulnerability is discovered in the Drupal CMS core settings, as recent events have shown. Although Drupal users are encouraged to upgrade immediately, Drupal cannot update or upgrade from its admin dashboard.
Therefore, users must manually update or upgrade to the latest version from the command line console or via some hosting platform. This process involves backing up your content and database, maintaining your site, deleting the core and vendor folders, downloading Drupal’s latest content, restoring the files and folders with the latest versions, and finally updating the core database tables.
By following these steps, you can resolve the security vulnerability and ensure that your Drupal CMS is up to date with the latest features and security patches.
All previous versions of Drupal CMS are vulnerable. You can find out more about this vulnerability by going to this page.
To upgrade Drupal, continue with the steps below:
Backup and Put the Site in Maintenance Mode
Before upgrading your site, back up your content and database and put your site in maintenance mode. You can do that by going to the:
Log into the admin interface and go to Administration > Configuration > Development > Maintenance mode.
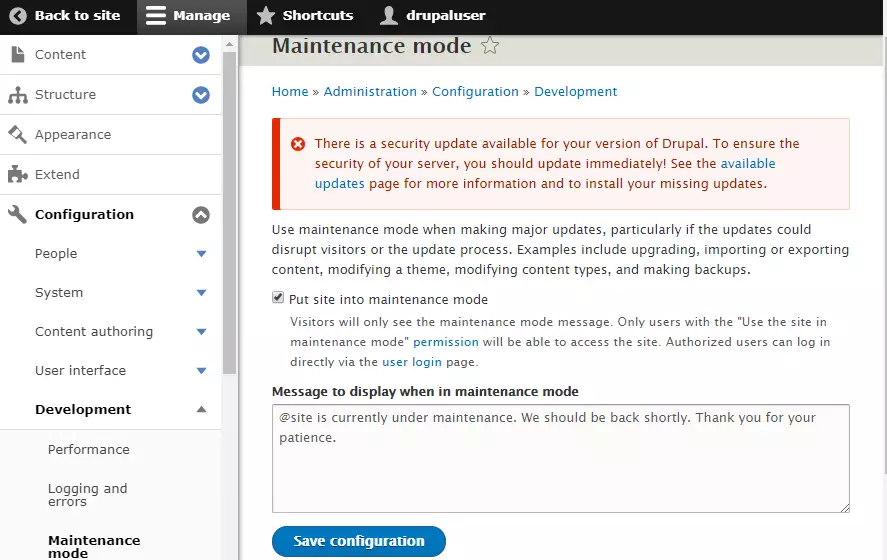
Then, put the site in maintenance mode and click Save.
You should always use maintenance mode when making significant updates, particularly if the updates could disrupt visitors or the update process.
Delete Drupal Core Files
Now that your site is in maintenance mode delete Drupal core directories by running the commands below.
Change into your Drupal root directory. Generally, in /var/www/html/drupal or where you installed it.
Then, run the commands below to delete the core and vendor folders or directories. And remove all the files in the root directory.
sudo rm -rf core vendor
sudo rm -f *.* .[a-z]*
Restore Drupal Core Files with the Latest
Now that you’ve deleted the core vendor folders and the file in the root directory, download Drupal’s latest content. Then, copy and restore the files and folders you delete.
cd /tmp && wget https://ftp.drupal.org/files/projects/drupal-x.x.x.tar.gz
tar -zxvf drupal-x.x.x.tar.gz
Next, copy the extracted files, particularly the core and vendor directories, and files in the root of the downloaded folders. The reverse of what you did to delete the content above. This should restore the files and folders with the latest versions.
cd drupal-x.x.x
sudo cp -R core vendor /var/www/html/drupal
sudo cp *.* .[a-z]* /var/www/html/drupal
You may have to change the directory file permissions again. Run the commands below.
sudo chown -R www-data:www-data /var/www/html/drupal
sudo chmod -R 755 /var/www/html/drupal
Update the Core Database Tables
Finally, open your browser and browse the site URL, followed by update.php.
ex. http://example.com/update.php
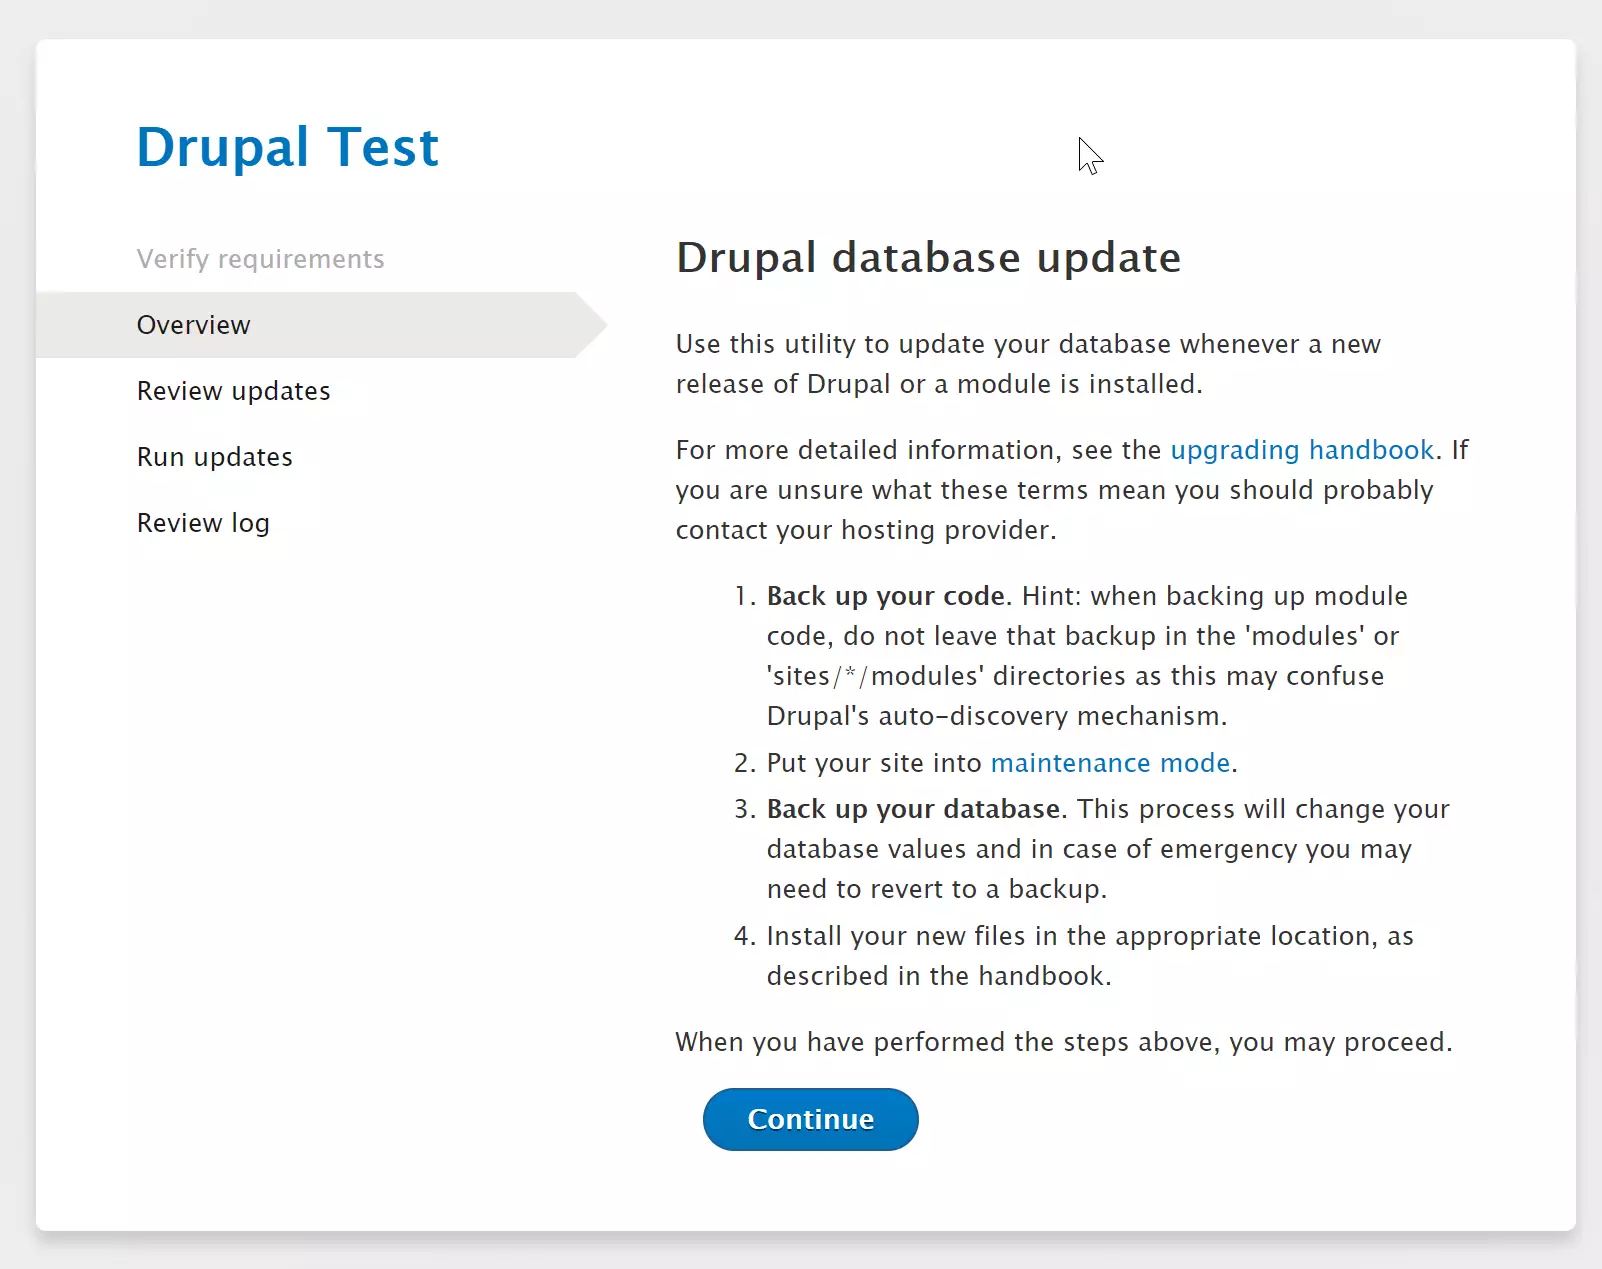
This will update the core database tables.
You should now be able to log on, go to your Drupal admin, and navigate to Administration > Reports > Status report. Verify that everything is working as expected. In addition, you should see that the site is updated.
You can now take the site from maintenance mode.
Enjoy!


Leave a Reply