
This article describes installing XWiki CMS on Ubuntu Linux with Tomcat.
XWiki is an open-source content management framework that is written and based on Java.
Installing XWiki CMS with Tomcat on Ubuntu Linux is a great way to create enterprise-class websites for personal or business use. XWiki CMS is a robust content management framework written in Java that allows you to build collaborative applications and projects using the wiki paradigm.
Its features include WYSIWYG editing, document import/export, tagging, and strong rights management. Tomcat is a popular and reliable web server compatible with XWiki CMS.
Combining these two technologies allows you to create a robust and scalable website that can be accessed on any device. Ubuntu Linux is a popular and secure operating system that is easy to use and highly customizable. It is also open-source, meaning it is free to use and distribute.
XWiki is a Java-based CMS, so you must install Java. To install Java JDK 8, follow the steps below:
Add A Third-Party PPA to Ubuntu
The easiest way to install Oracle Java JDK 8 on Ubuntu is via a third-party PPA. To add that PPA, run the commands below
sudo add-apt-repository ppa:webupd8team/java
After running the commands above, you should see a prompt to accept the PPA key onto Ubuntu. Accept and continue
Continue below to install Java 8.
Download Oracle Java 8 Installer
Now that the PPA repository has been added to Ubuntu run the commands below to download Oracle Java 8 installer. The installer should install the latest Java JDK 8 on your Ubuntu machines.
sudo apt update
sudo apt install oracle-java8-installer
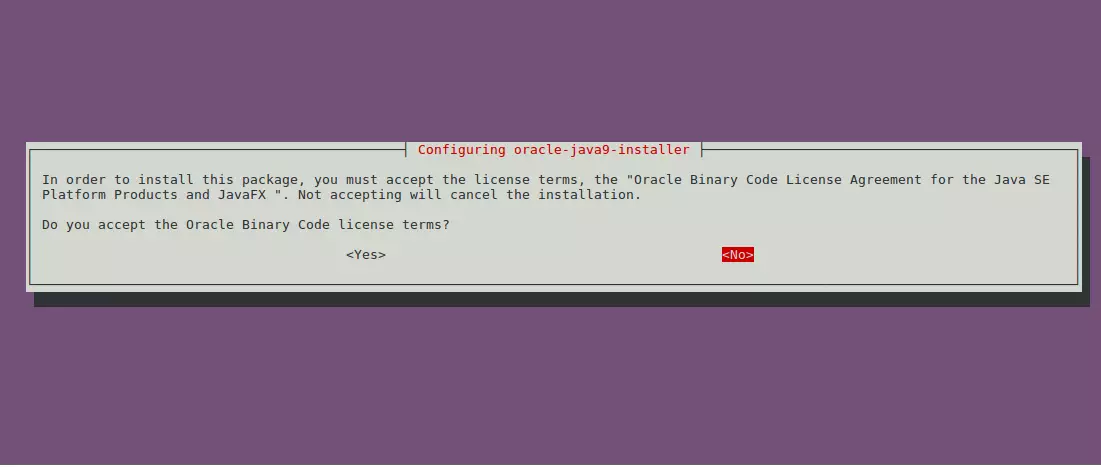
You’ll be prompted to access the software’s license terms when you run the commands above. Accept and continue.
Configure Oracle JDK8 as Default
Set Oracle JDK8 as default; install the oracle-java8-set-default package to do that. This will automatically set the JAVA env variable.
sudo apt install oracle-java8-set-default
The command above will automatically set Java 8 as the default. And that should complete your installation; you can check your Java version by running the following command.
javac -version
Download Tomcat Packages
XWiki also requires a Tomcat webserver. The steps below show you how to download and install the Tomcat web server on Ubuntu. Run the commands below to download Tomcat version 9.
cd /tmp && wget http://mirrors.ibiblio.org/apache/tomcat/tomcat-9/v9.0.10/bin/apache-tomcat-9.0.10.tar.gz
Next, run the commands below to extract the downloaded packages.
tar -xzf apache-tomcat-9.0.10.tar.gz
Create a directory for Tomcat files. And move the files there by running the commands below.
sudo mv apache-tomcat-9.0.10 /opt/tomcat9
Create Tomcat users by running the commands below. This user will own the Tomcat directory content.
sudo useradd -r tomcat9 --shell /bin/false
Then, give the user control of the directory.
sudo chown -R tomcat9 /opt/tomcat9
Configure Tomcat9 Service
After extracting the package, run the commands to open the Tomcat configuration file for its default user.
sudo nano /opt/tomcat9/conf/tomcat-users.xml
Then, create an account with a password for the user and save by copying and pasting the line below into the file. just before the </tomcat-users>
<role rolename="manager-gui"/>
<role rolename="admin-gui"/>
<user username="admin" password="password_here" roles="manager-gui,admin-gui"/>
Save the file and exit.
Next, run the commands below to create a server account for Tomcat
sudo nano /etc/systemd/system/tomcat.service
then copy and paste the lines below into the file and save
[Unit]
Description=Tomcat9
After=network.target
[Service]
Type=forking
User=tomcat9
Group=tomcat9
Environment=CATALINA_PID=/opt/tomcat9/tomcat9.pid
Environment=JAVA_HOME=/usr/lib/jvm/java-8-oracle/
Environment=CATALINA_HOME=/opt/tomcat9
Environment=CATALINA_BASE=/opt/tomcat9
Environment="CATALINA_OPTS=-Xms512m -Xmx512m"
Environment="JAVA_OPTS=-Dfile.encoding=UTF-8 -Dnet.sf.ehcache.skipUpdateCheck=true -XX:+UseConcMarkSweepGC -XX:+CMSClassUnloadingEnabled -XX:+UseParNewGC"
ExecStart=/opt/tomcat9/bin/startup.sh
ExecStop=/opt/tomcat9/bin/shutdown.sh
[Install]
WantedBy=multi-user.target
Save and exit.
sudo systemctl daemon-reload
sudo systemctl start tomcat.service
sudo systemctl restart tomcat.service
sudo systemctl enable tomcat.service
Install MariaDB Database Server
XWiki also requires a database server. And MariaDB database server is a great place to start. To install it, run the commands below.
sudo apt-get install mariadb-server mariadb-client
After installing MariaDB, the commands below can stop and start the service and enable it to start when the server boots.
Run these on Ubuntu 16.04 LTS
sudo systemctl stop mysql.service
sudo systemctl start mysql.service
sudo systemctl enable mysql.service
Run these on Ubuntu 17.10 and 18.04 LTS
sudo systemctl stop mariadb.service
sudo systemctl start mariadb.service
sudo systemctl enable mariadb.service
After that, run the commands below to secure the MariaDB server by creating a root password and disallowing remote root access.
sudo mysql_secure_installation
When prompted, answer the questions below by following the guide.
- Enter current password for root (enter for none): Just press the Enter
- Set root password? [Y/n]: Y
- New password: Enter password
- Re-enter new password: Repeat password
- Remove anonymous users? [Y/n]: Y
- Disallow root login remotely? [Y/n]: Y
- Remove test database and access to it? [Y/n]: Y
- Reload privilege tables now? [Y/n]: Y
Restart MariaDB server
sudo systemctl restart mysql.service
Next, run the commands below to log into the database server. When prompted for a password, type the root password you created above.
sudo mysql -u root -p
Then, create a database called XWiki.
CREATE DATABASE xwiki;
Create a database user called xwikiuser with a new password
CREATE USER 'xwikiuser'@'localhost' IDENTIFIED BY 'new_password_here';
Then, grant the user full access to the database.
GRANT ALL ON xwiki.* TO 'xwikiuser'@'localhost' IDENTIFIED BY 'user_password_here' WITH GRANT OPTION;
Finally, save your changes and exit.
FLUSH PRIVILEGES;
EXIT;
Download and Install XWiki
Now that Java is installed run the commands below to download XWiki content, then extract it to the /opt directory.
cd /tmp && wget http://download.forge.ow2.org/xwiki/xwiki-enterprise-web-8.4.6.war
Move the content to the /opt directory and install.
sudo mv xwiki-enterprise-web-8.4.6.war /opt/tomcat9/webapps/xwiki.war
Then, run the commands below to give the Tomcat user permission to access that file.
sudo chown tomcat9:tomcat9 /opt/tomcat9/webapps/xwiki.war
Restart the Tomcat server by running the commands below.
sudo systemctl restart tomcat.service
After this, you should be able to access the site content by going to the server hostname or IP address followed by port 8080.
ex. http://localhost:8080/xwiki
This should bring up the XWiki wizard.
If you get error 500, you should run the commands below to the commands:
sudo apt-get install libmysql-java
sudo ln -s /usr/share/java/mysql-connector-java.jar /opt/tomcat9/lib
sudo nano /opt/tomcat9/webapps/xwiki/WEB-INF/hibernate.cfg.xml
Then, make the highlighted changes to the file and save.
<!-- MySQL configuration. Uncomment if you want to use MySQL and comment out other database configurations.
 Notes: -
if you want the main wiki database to be different than "xwiki" you will also have to set the property xwiki.db in xwiki.cfg file
 -->
<property name="connection.url">jdbc:mysql://localhost/xwiki?useSSL=false</property>
<property name="connection.username">xwikiuser</property>
<property name="connection.password">new_password_here</property>
<property name="connection.driver_class">com.mysql.jdbc.Driver</property>
<property name="dialect">org.hibernate.dialect.MySQL5InnoDBDialect</property>
<property name="dbcp.poolPreparedStatements">true</property>
<property name="dbcp.maxOpenPreparedStatements">20</property>
<mapping resource="xwiki.hbm.xml"/>
<mapping resource="feeds.hbm.xml"/>
<mapping resource="activitystream.hbm.xml"/>
<mapping resource="instance.hbm.xml"/>
<mapping resource="mailsender.hbm.xml"/>
Restart Tomcat and try again.
http://localhost:8080/xwiki
Continue to the next page and validate that all requirements are met. Then go and enter the database info you created above.
After entering the database info, continue with the defaults until you’ve successfully set up XWiki.


Leave a Reply