PanoplyCMS is a light, ultra-fast, open-source content management system (CMS) based on a meteor framework with GUI to build highly safe, fast, and stylish HTML for blogs, portfolios, and company websites.
It has features such as a menu module, HTML blocks, and a slider module that can load at any given position. In addition, PanoplyCMS offers features that may not be available to other PHP-based CMS, like WordPress, Joomla, or Drupal.
If you’re looking for a Meteor-based CMS with SEO-friendly design, a flexible CSS framework, and a free, you might want to look at PanoplyCMS.
For more about PanoplyCMS, please check its homepage.
This brief tutorial shows students and new users how to install PanoplyCMS on Ubuntu 16.04, 18.04, and 18.10. To get started with installing PanoplyCMS, please continue below:
Install Node.Js
PanoplyCMS runs on Node.js and Meteor, javascript runtime, and frameworks. To install Node.js on Ubuntu from its LTS repository, run the commands below to install:
sudo apt update
sudo apt install curl git python
curl -sL https://deb.nodesource.com/setup_8.x | sudo -E bash -
sudo apt install -y nodejs
After that, Node.js should be installed and ready to use as well.
Install PM2 Process Manager
Another requirement for PanoplyCMS is the PM2 process manager. To install the PM2 package on Ubuntu, run the commands below:
sudo npm install pm2 -g
After that, your system should be ready for PanoplyCMS.
Install Meteor
Meteor is an open-source platform for developing web, mobile, and desktop JavaScript apps. You can easily install it using the commands below.
curl https://install.meteor.com/ | sh
Install PanoplyCMS
To get PanoplyCMS, you’ll want to clone it from GitHub to your home directory. To do that, run the commands below.
cd ~/
git clone https://github.com/DeligenceTechnologies/PanoplyCMS.git
After that, change into the PanoplyCMS folder by running the commands below.
cd PanoplyCMS
After changing into the PanoplyCMS folder above, run the commands below to install additional Meteor dependencies.
meteor add kadira:graphql
meteor add react
meteor add react-meteor-data
meteor npm install
Finally, set up PanoplyCMS by running the commands below from inside the PanoplyCMS folder.
meteor npm install
meteor npm install --save babel-runtime
meteor --settings settings.json
After that, wait for the server to get started. It will automatically install all dependencies and will start running. When all dependencies are downloaded and installed, you should then be able to open your browser and browse to the server hostname or IP address followed by port 3000
I20181113-10:05:02.764(-6)? ********************************************
I20181113-10:05:02.765(-6)? *                                          *
I20181113-10:05:02.767(-6)? *                                          *
I20181113-10:05:02.768(-6)? *     Username: [email protected]         *
I20181113-10:05:02.768(-6)? *     Password: Pass@123                   *
I20181113-10:05:02.768(-6)? *                                          *
I20181113-10:05:02.770(-6)? *                                          *
I20181113-10:05:02.772(-6)? ********************************************
=> Started your app.

=> App running at: http://localhost:3000/
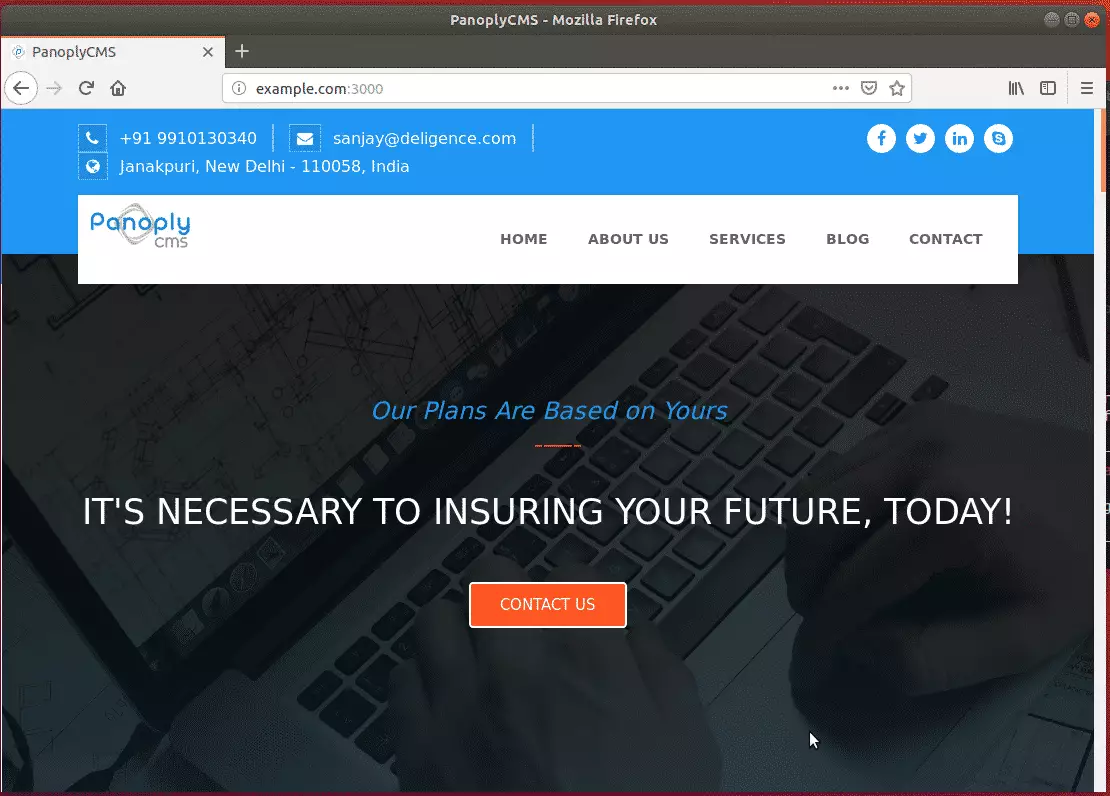
http://example.com:3000
You should see the PanoplyCMS home page.
That’s it!
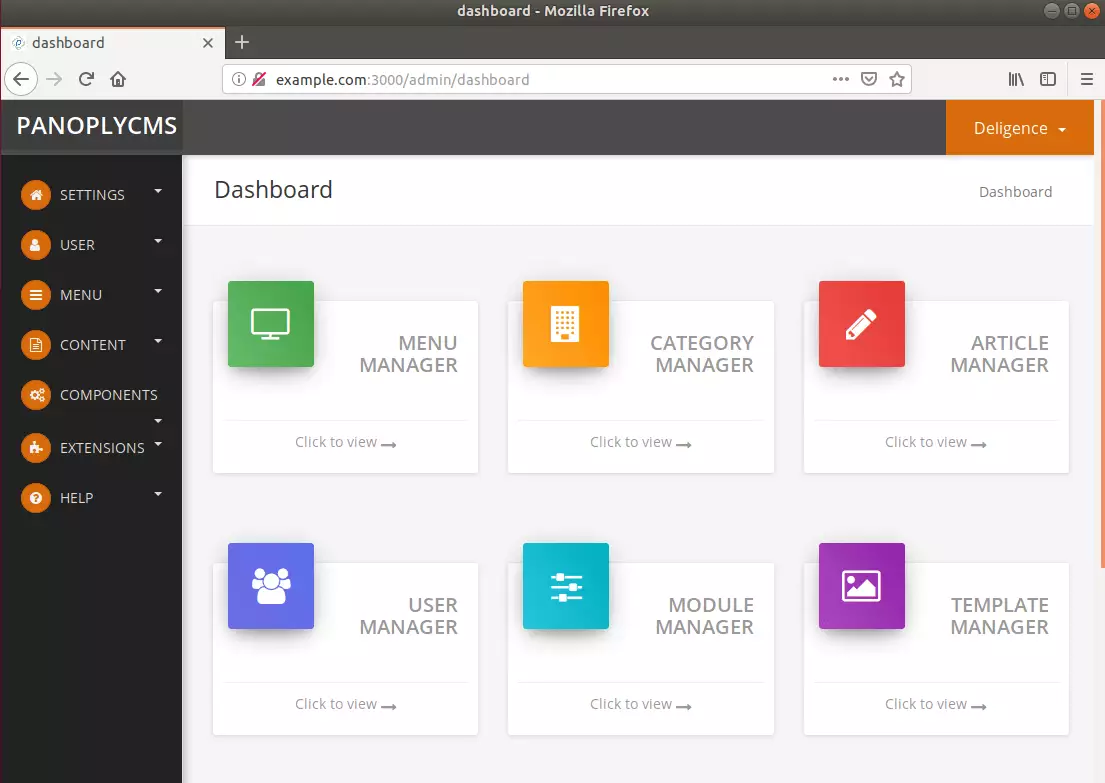
- Backend Link: http://localhost:3000/admin
- Initial Login Credentials of Backend:-
Email: [email protected]
Password: Pass@123
Now, go and create some categories, articles, and menus. Finally, look at the changes at your front end.
Congratulations! You have successfully installed PanoplyCMS on Ubuntu 16.04 | 18.04 | 18.10
You may also like the post below:


Leave a Reply