
This brief tutorial shows students and new users how to install and configure Icinga 2 monitoring and analytics platform on Ubuntu 16.04 | 18.04 LTS servers.
Icinga 2 is an open-source monitoring and analytics platform that allows you to monitor network systems in the data center and cloud platform. Installing Icinga 2 on your Ubuntu Linux system gives you a complete enterprise-grade server and logs monitoring platform.
You can view and analyze logs and data that are interpreted in a simple form. Additionally, metrics from Graphite are displayed directly in the Icinga web interface.
This makes it easy to monitor your network systems and identify any issues before they become major problems.
For more about Icinga 2, please visit its homepage.
When you’re ready, continue below with the steps:
Install Icinga 2 Package
To install Icinga 2, you can download its .deb package file and install it locally on the Ubuntu server. However, if you want to quickly and easily upgrade to newer software versions, you will want to add its official APT repository to Ubuntu.
To add its APT repository to Ubuntu, run the commands below to import its repository GPG key.
curl https://packages.icinga.com/icinga.key | sudo apt-key add -
After importing the repository key above, run the commands below to create a new repository file for Icinga 2. This file will contain Icinga’s repositories, where all packages and upgrades are available.
sudo nano /etc/apt/sources.list.d/icinga2.list
Then copy and paste the lines below into the file and save.
deb http://packages.icinga.com/ubuntu icinga-bionic main
deb-src http://packages.icinga.com/ubuntu icinga-bionic main
After adding the repository file above, run the commands below to update the APT package list and install Icinga 2 packages:
sudo apt update
sudo apt install icinga2 monitoring-plugins
Once installed, the commands below can stop and enable Icinga 2 to automatically start when the server boots up.
sudo systemctl stop icinga2.service
sudo systemctl start icinga2.service
sudo systemctl enable icinga2.service
To validate if Icinga 2 is installed, run the commands below:
systemctl status icinga2.service
You should see the Icinga 2 system status details as shown below:
icinga2.service - Icinga host/service/network monitoring system
   Loaded: loaded (/lib/systemd/system/icinga2.service; enabled; vendor preset: enabled)
  Drop-In: /etc/systemd/system/icinga2.service.d
           └─limits.conf
   Active: active (running) since Wed 2019-07-17 10:46:47 CDT; 16s ago
 Main PID: 13860 (icinga2)
    Tasks: 13
   CGroup: /system.slice/icinga2.service
           ├─13860 /usr/lib/x86_64-linux-gnu/icinga2/sbin/icinga2 --no-stack-rlimit daemon --clos
           └─13894 /usr/lib/x86_64-linux-gnu/icinga2/sbin/icinga2 --no-stack-rlimit daemon --clos

Jul 17 10:46:47 ubuntu1804 icinga2[13860]: [2019-07-17 10:46:47 -0500] information/ScriptGlobal:
Jul 17 10:46:47 ubuntu1804 icinga2[13860]: [2019-07-17 10:46:47 -0500]information/cli: Closing c
Jul 17 10:46:47 ubuntu1804 systemd[1]: Started Icinga host/service/network monitoring system.
Install MariaDB Database Server
Icinga 2 requires a database server to store its content. MariaDB is a great place to start if you want a genuinely open-source database server. To install MariaDB, run the commands below:
sudo apt-get install mariadb-server mariadb-client
After installing MariaDB, the commands below can stop, start, and enable the service to start when the server boots.
Run these on Ubuntu 16.04 LTS
sudo systemctl stop mysql.service
sudo systemctl start mysql.service
sudo systemctl enable mysql.service
Run these on Ubuntu 18.10 and 18.04 LTS
sudo systemctl stop mariadb.service
sudo systemctl start mariadb.service
sudo systemctl enable mariadb.service
Next, run the commands below to secure the database server with a root password if you were not prompted to do so during the installation.
sudo mysql_secure_installation
When prompted, answer the questions below by following the guide.
- Enter current password for root (enter for none): Just press the Enter
- Set root password? [Y/n]: Y
- New password: Enter the password
- Re-enter new password: Repeat password
- Remove anonymous users? [Y/n]: Y
- Disallow root login remotely? [Y/n]: Y
- Remove test database and access to it? [Y/n]: Y
- Reload privilege tables now? [Y/n]: Y
Once MariaDB is installed, run the commands below to test whether the database server was installed.
sudo mysql -u root -p
Type the root password when prompted.

The server was successfully installed if you see a similar screen.
After installing the MariaDB database server above, run the commands below to install the Icinga 2 database module. To do that, run the commands below:
sudo apt install icinga2-ido-mysql
During the installation, you’ll be prompted with a few questions. Choose Yes to enable the Icinga do-mysql module, agree to create a database, and create a password for the database.
After that, the Icinga 2 database module should be installed and configured.
Run the commands below to enable the module.
sudo icinga2 feature enable ido-mysql
sudo systemctl restart icinga2
That should be it.
Create Icinga 2 Database
When you finish the steps above, follow the guide below to create Icinga 2 blank database. The database will be used to store its content.
To log on to the MariaDB database server, run the commands below.
sudo mysql -u root -p
Then, create a database called icingaweb
CREATE DATABASE icingaweb;
Create a database user called icingawebuser with a new password
CREATE USER 'icingawebuser'@'localhost' IDENTIFIED BY 'new_password_here';
Then, grant the user full access to the database.
GRANT ALL ON icingaweb.* TO 'icingawebuser'@'localhost' WITH GRANT OPTION;
Finally, save your changes and exit.
FLUSH PRIVILEGES;
EXIT;
Access Icinga 2 Web Portal
Now that Icinga 2 server is installed run the commands below to install its web tool.
sudo apt install icingaweb2 icingacli php-gd
By default, the Apache2 web server and PHP will be installed.
After installing Apache2 and PHP, open the PHP default PHP config file and configure your server time zone. To do that, run the commands below.
sudo nano /etc/php/7.2/apache2/php.ini
Then, change the line below to include your timezone and save.
[Date]
; Defines the default timezone used by the date functions
; http://php.net/date.timezone
date.timezone = America/Chicago
Reload Apache2
sudo systemctl reload apache2
When you’re done, generate the icinga2 setup token using the icingacli command as below.
sudo icingacli setup token create
Take note of the token as displayed below.
The newly generated setup token is: 4d594e662b6dfd54
After that, open your browser and browse the server name to complete the setup.
http://localhost/icingaweb2/setup
Follow the installation wizard until you’re done. Type in the token generated above and continue.

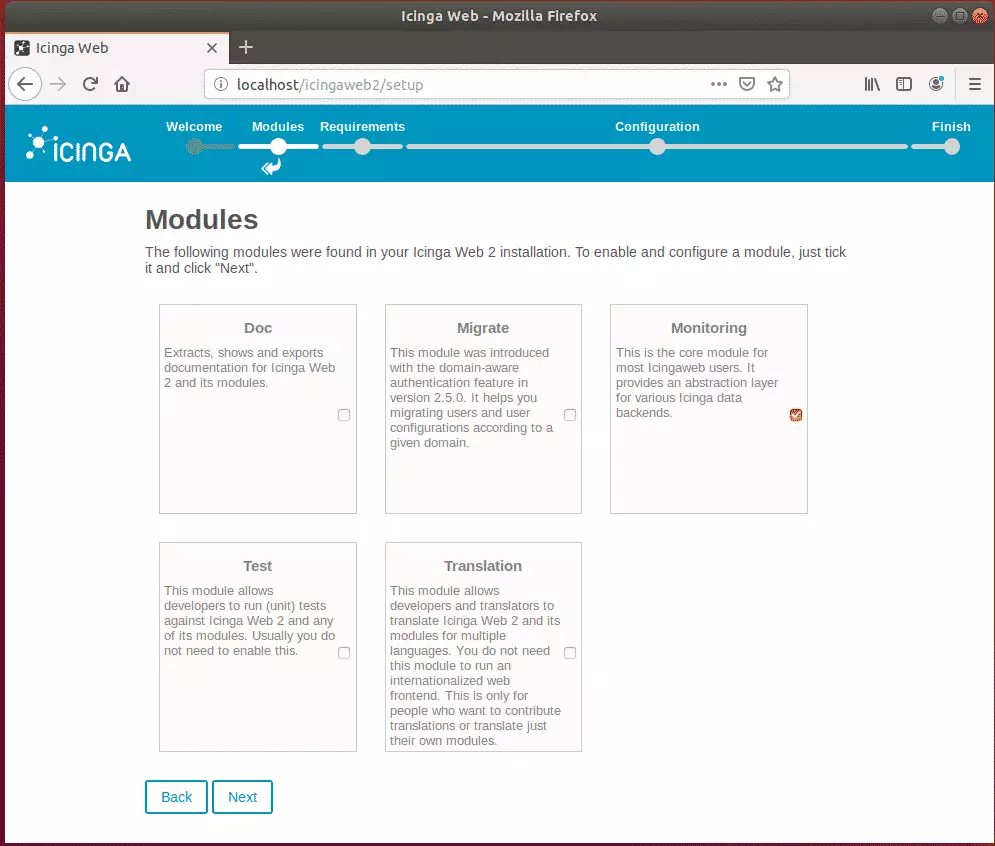
Then select the Monitoring module and continue
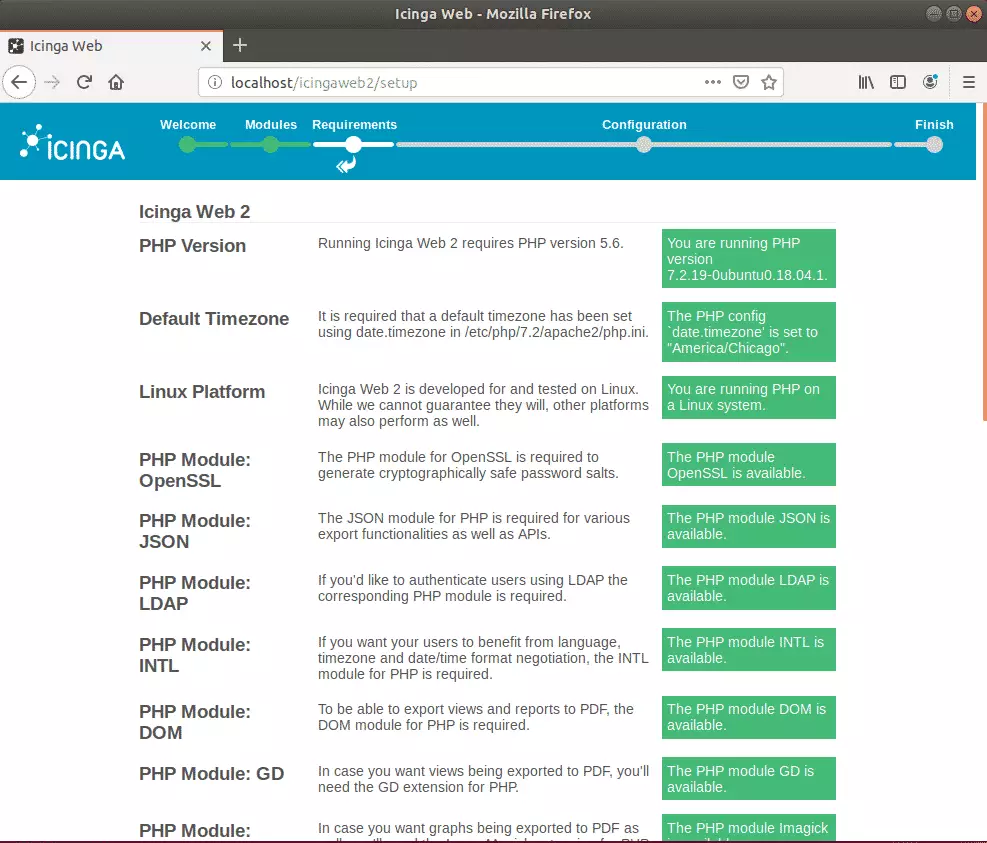
After that, all requirements are validated.
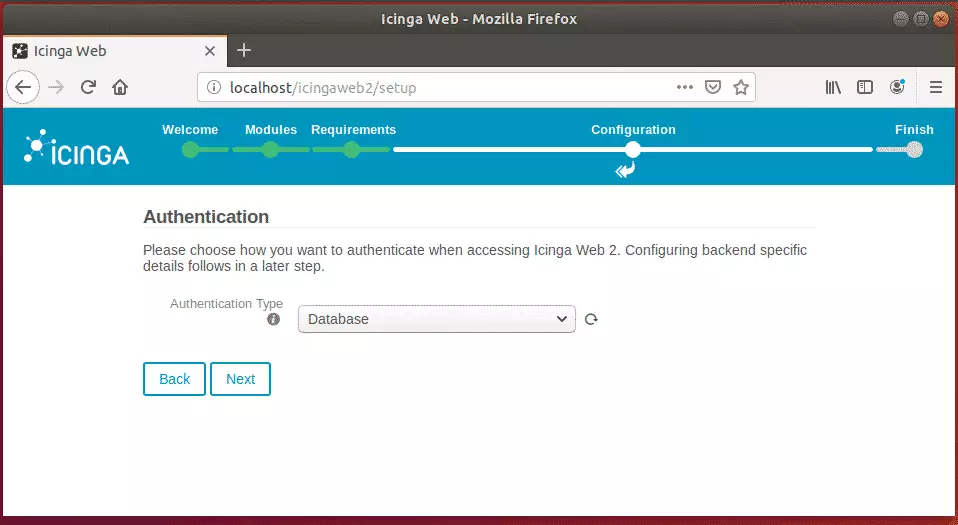
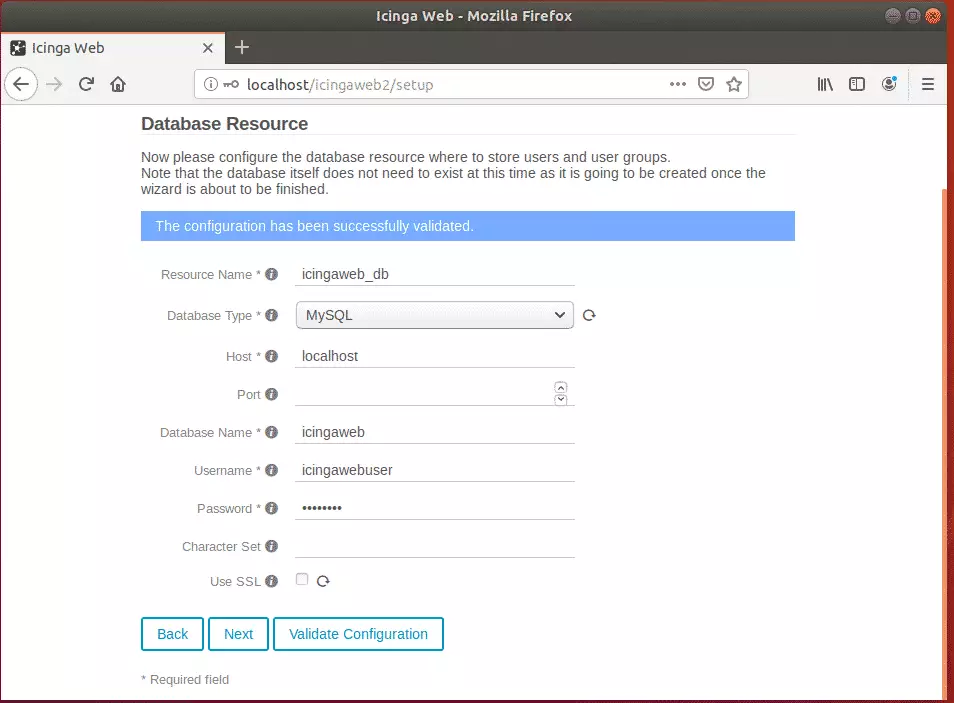
Select a database authentication type. Type in the database name, username, and password created above and continue.
Validate and continue
Please continue with the setup and complete it.
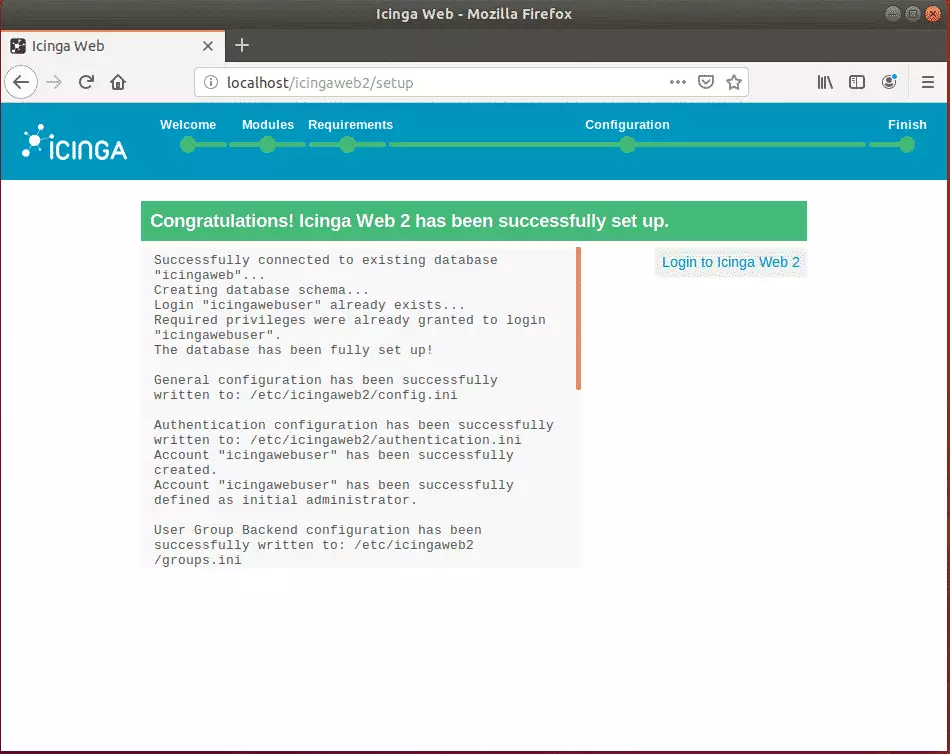
Login and enjoy!
Congratulations! You have learned how to install Icinga 2 monitoring and analytics platform on Ubuntu 16.04 | 18.04 LTS servers.
You may also like the post below:
Leave a Reply