
This brief tutorial shows students and new users how to install a Virtual Network Computing (VNC) server on Ubuntu 16.04 | 18.04 servers to allow remote connection via VNC protocol.
VNC is a graphical desktop sharing system that allows users to connect remotely to a system with keyboard and mouse access. This is an open-source alternative to Microsoft Remote Desktop Protocol.
When you’re ready to get started with installing and configuring the VNC server on Ubuntu, follow the steps below:
Install Desktop Environment
Ubuntu servers don’t have a desktop environment by default, and VNC requires the desktop environment to function.
Since we don’t want to install a full-blown desktop environment, a lightweight Xfce environment is a better alternative.
To install Xfce, run the commands below
sudo apt update
sudo apt install xfce4 xfce4-goodies xorg dbus-x11 x11-xserver-utils
Install VNC Server
Now that a lightweight desktop environment is installed run the commands below to install the VNC server. Many VNC servers are available, including TightVNC, x11vnc, and TigerVNC.
For this post, we will be using TigerVNC. To install TigerVNC, run the commands below:
sudo apt install tigervnc-standalone-server tigervnc-common
After installing TigerVNC, run the commands below to set up an initial setup, including creating a password to access the desktops.
vncserver
That should output a similar message as below:
You will require a password to access your desktops.

Password:
Verify:
Would you like to enter a view-only password (y/n)? n

New 'ubuntu1804:1 (richrd)' desktop at :1 on machine ubuntu1804

Starting applications specified in /etc/X11/Xvnc-session
Log file is /home/richrd/.vnc/ubuntu1804:1.log

Use xtigervncviewer -SecurityTypes VncAuth -passwd /home/richrd/.vnc/passwd :1 to connect to the VNC server.

vncserver: Failed command '/etc/X11/Xvnc-session': 256!

=================== tail -15 /home/richrd/.vnc/ubuntu1804:1.log ===================
Starting applications specified in /etc/X11/Xvnc-session has failed.
Maybe try something simple first, e.g.,
    tigervncserver -xstartup /usr/bin/xterm
Afterward, the server command will create a password file and store it in your ~/.vnc folder.
Configure VNC Server
Once the VNC server is installed, run the commands below to configure it.
vncserver -kill :1
Then, create a startup-config file.
nano ~/.vnc/xstartup
Add the lines into the file and save.
#!/bin/sh
unset SESSION_MANAGER
unset DBUS_SESSION_BUS_ADDRESS
exec startxfce4
Run the commands below after the above.
chmod u+x ~/.vnc/xstartup
Next, create a systemd file.
sudo nano /etc/systemd/system/[email protected]
Then, add the lines below to the file and save.
[Unit]
Description=Remote desktop service (VNC)
After=syslog.target network.target

[Service]
Type=simple
User=richard
PAMName=login
PIDFile=/home/%u/.vnc/%H%i.pid
ExecStartPre=/bin/sh -c '/usr/bin/vncserver -kill :%i > /dev/null 2>&1 || :'
ExecStart=/usr/bin/vncserver :%i -geometry 1440x900 -alwaysshared -fg
ExecStop=/usr/bin/vncserver -kill :%i

[Install]
WantedBy=multi-user.target
After saving the file, run the commands below to reload the systemd config.
sudo systemctl daemon-reload
Start and enable the VNC server.
sudo systemctl start [email protected]
sudo systemctl enable [email protected]
I checked to see if VNC is started and running.
sudo systemctl status [email protected]
You should see something similar to the one below.
● [email protected] - Remote desktop service (VNC)
   Loaded: loaded (/etc/systemd/system/[email protected]; indirect; vendor preset: enabled)
   Active: active (running) since Mon 2019-02-04 15:22:07 CST; 17s ago
 Main PID: 14025 (vncserver)
    Tasks: 0 (limit: 4663)
   CGroup: /system.slice/system-vncserver.slice/[email protected]
           ‣ 14025 /usr/bin/perl /usr/bin/vncserver :1 -geometry 1440x900 -alwaysshared -fg

Feb 04 15:22:06 ubuntu1804 systemd[1]: Starting Remote desktop service (VNC).
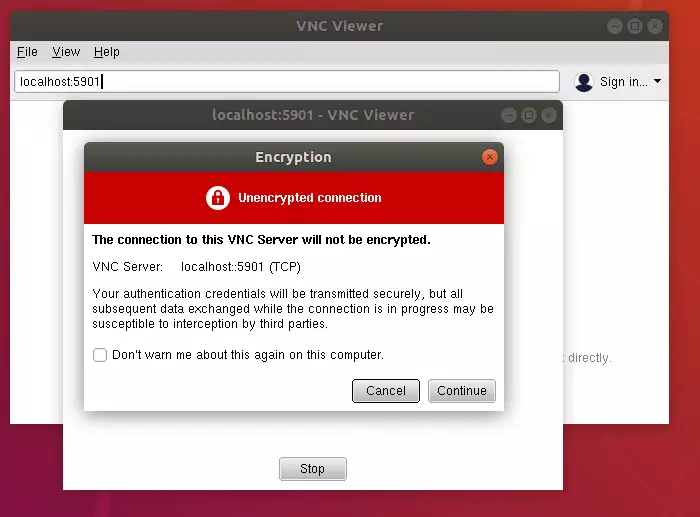
Now you’re all set. Find a VNC client and attempt to access the server.
A good VNC to use is the VNC Viewer from RealVNC. Install it and connect it to the server.
server_name:5901
Type in the password you created above and connected
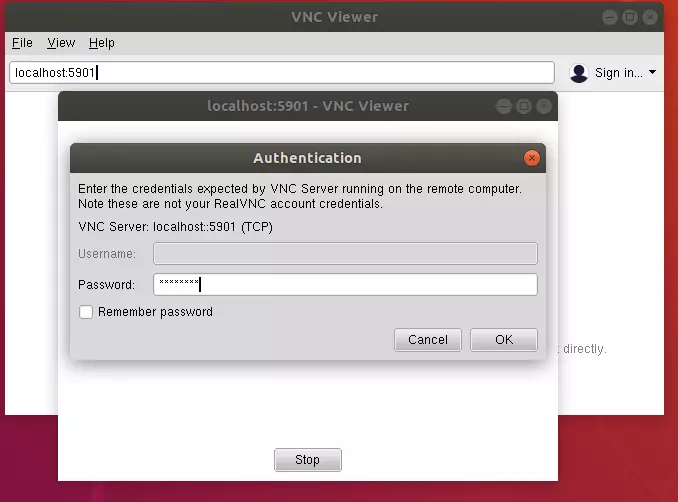
Enjoy!

Congratulations! You’ve successfully installed, configured, and connected to a VNC server on Ubuntu 16.04 | 18.04
You may also like the post below:
Leave a Reply