This brief tutorial shows students and new users how to lock their computers quickly and easily using Windows 10.
Learning how to lock your computer in Windows 10 is essential for keeping your computer secure when you’re away from it. Locking your computer ensures that no one can access your data and content without your permission, even if they have physical access to your computer.
This feature is essential if you use a shared computer in a library, school, or office setting. By locking your computer, you can protect your privacy and prevent unauthorized access to your files and other sensitive information.
When you return, you can resume where you left off and keep your computer secured while you were away without access to your content and data.
When you’re ready to learn how to quickly and easily lock your computer, follow the steps below:
Keyboard Shortcuts
The quickest way to lock your Windows machine is by combining the Windows + L keys.
The Windows key on your keyboard has the Microsoft logo on the left of your spacebar. Press that key and L and lock up your computer while logged in.
Lock from Menu
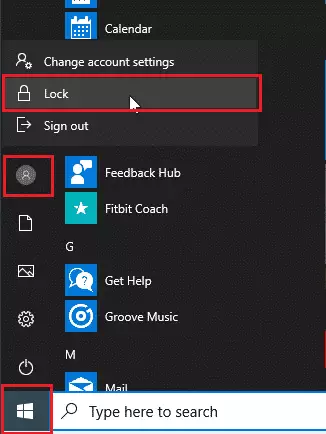
Another way to lock a Windows 10 machine is via its Start menu. Click Start, then click on your account and select Lock, as shown in the image below:
Lock from Task Manager
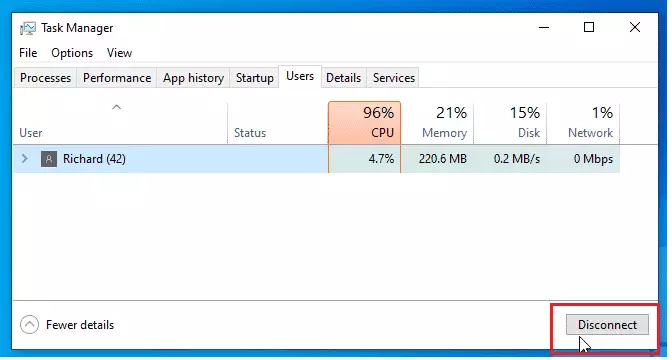
If you want to get fancy, you can lock your computer using Windows Task Manager. To do that, follow the steps below:
- Open Task Manager. You can right-click the taskbar at the bottom of your screen to get to the Task Manager.
- Click on the User tab and select your account.
- Click on the Disconnect button.
- Click Disconnect user to confirm.
Lock from Ctrl + Alt + Delete
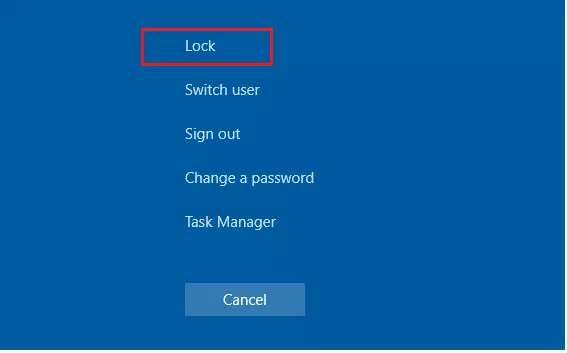
Finally, you can lock your screen simply by pressing Ctrl + Alt + Delete keys to bring up that window, then select Lock as shown in the image below:
That should do it!
Conclusion:
This post shows you how to quickly and easily lock a Windows computer when you’re leaving your computer unattended. If you find any error above, please use the form below to report.
Thanks,

Leave a Reply