This article explains how to install Zulip chat server on Ubuntu Linux.
Zulip is a powerful open-source chat and collaborative software that provides threaded conversations, handles thousands of concurrent chat sessions, and is one of today’s fastest-growing open-source chat servers.
Installing Zulip on Ubuntu Linux provides a fast, secure, and efficient chat platform for organizations that need a reliable and cost-effective alternative to proprietary chat services.
Zulip also supports hundreds of third-party integrations, making it easy to connect with other platforms used by your organization. Furthermore, Ubuntu Linux is a popular and reliable operating system well-suited for running servers, making it a great choice for hosting your Zulip chat server.
Configure Ubuntu Local Host Domain
Before installing Zulip, you will want to set up Ubuntu local domain on the server. To do that, run the commands below to open the Ubuntu local hosts file.
sudo nano /etc/hosts
Then, type in the server address for domain mapping. You can use your public IP address instead of the local one.
127.0.0.1 zulip.example.com
It should look like the lines below:
127.0.0.1              localhost
127.0.1.1              ubuntu1804
127.0.0.1              zulip.example.com

# The following lines are desirable for IPv6 capable hosts
::1     ip6-localhost ip6-loopback
fe00::0 ip6-localnet
ff00::0 ip6-mcastprefix
ff02::1 ip6-allnodes
ff02::2 ip6-allrouters
Save the file and exit
Download and Install Zulip Software
Now that you’ve configured Ubuntu local host with your domain and IP follow the steps below to download Zulip and install it. Get the latest package from the link below:
You can also use the commands below to download via wget and extract.
cd /tmp
wget https://www.zulip.org/dist/releases/zulip-server-latest.tar.gz
tar -xf zulip-server-latest.tar.gz
After extracting the downloaded content, run the commands below to install it on your local server with a self-signed certificate. For a Self-signed cert, you will want to have OpenSSL installed.
If you don’t have OpenSSL installed, use the commands below to install it.
sudo apt install openssl
Install with Self-Signed certificate
Then run the commands below to install with a self-signed certificate (certificate required)
sudo -s ./zulip-server-*/scripts/setup/install --self-signed-cert [email protected] --hostname=example.com
Install with Let’s Encrypt certificate
You can use the Let’s Encrypt SSL tool if you have a public-facing IP. Use the commands below instead.
sudo -s ./zulip-server-*/scripts/setup/install --certbot [email protected] --hostname=zulip.example.com
After a brief moment, Zulip should be installed, and the URL should be printed on the screen to use.
zulip-django: started
zulip-tornado: started
zulip-workers:zulip_events_missedmessage_email_senders: started
zulip-workers:zulip_events_user_activity: started
zulip-workers:zulip_events_deferred_work: started
zulip-workers:zulip_events_embed_links: started
zulip-workers:zulip_events_missedmessage_mobile_notifications: started
zulip-workers:zulip_events_error_reports: started
zulip-workers:zulip_events_digest_emails: started
zulip-workers:zulip_events_email_senders: started
zulip-workers:zulip_deliver_enqueued_emails: started
zulip-workers:zulip_deliver_scheduled_messages: started
+ set +x
+ su zulip -c '/home/zulip/deployments/current/manage.py generate_realm_creation_link'
Please visit the following secure single-use link to register your
new Zulip organization:
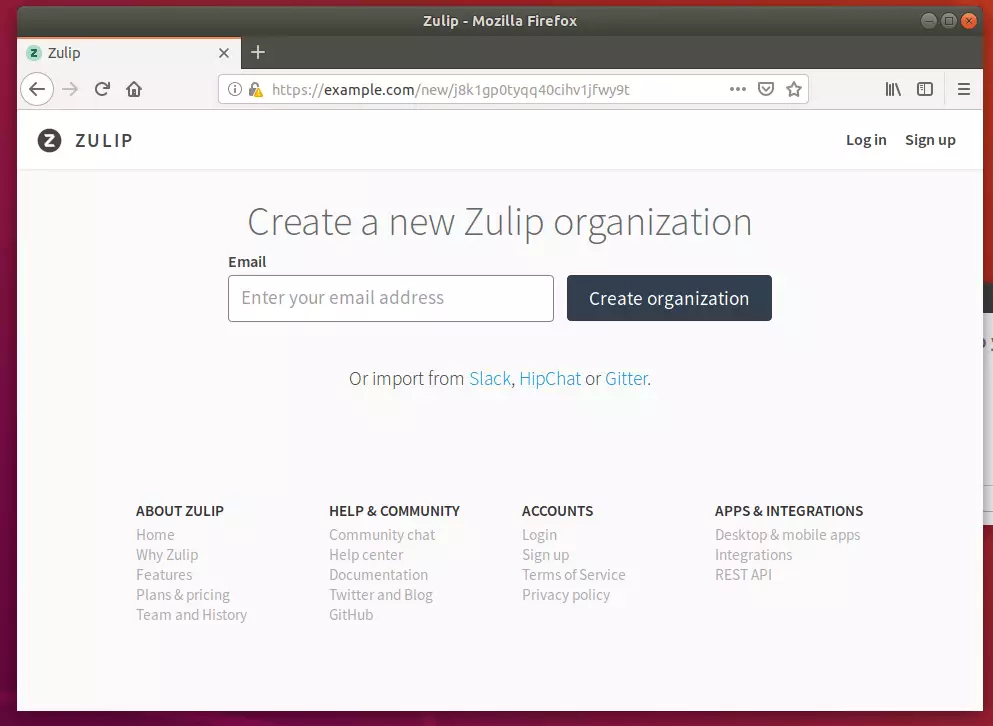
https://zulip.example.com/new/j8k1gp0tyqq40cihv1jfwy9t
That’s it!
After installing, open the link in your browser and create a new Zulip organization.
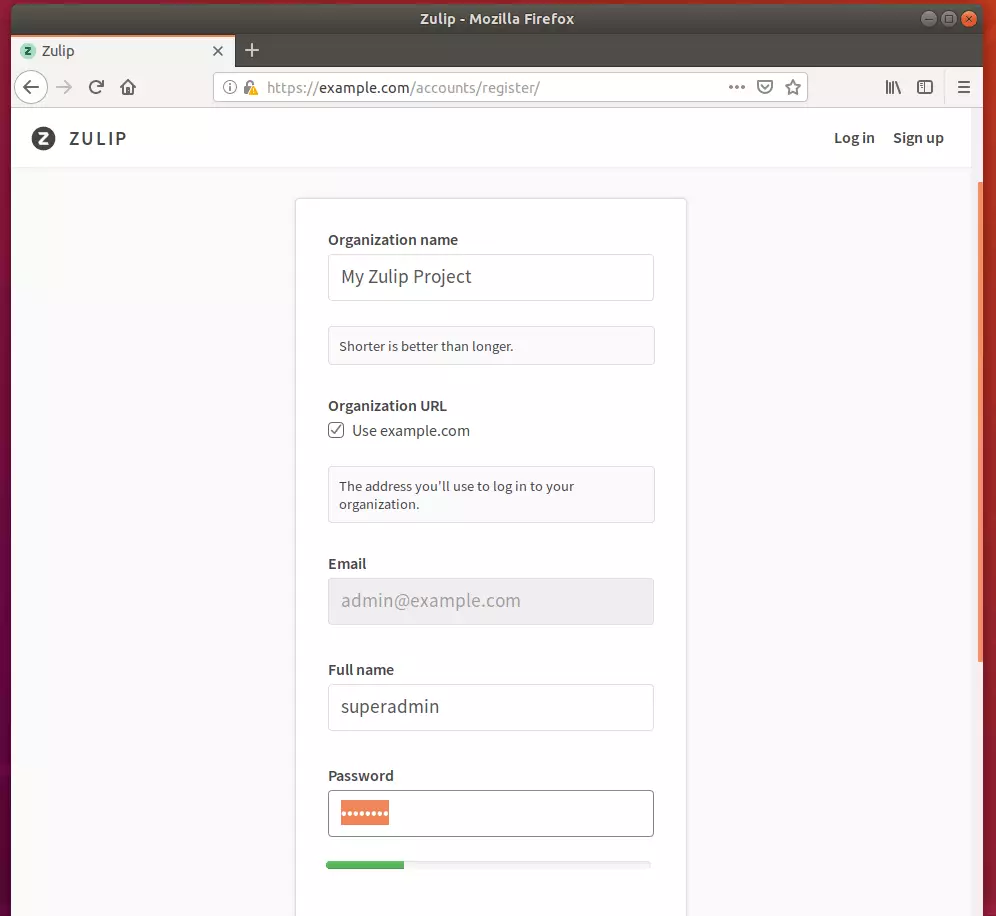
Next, create the admin account. This account will be used to manage the chat platform.
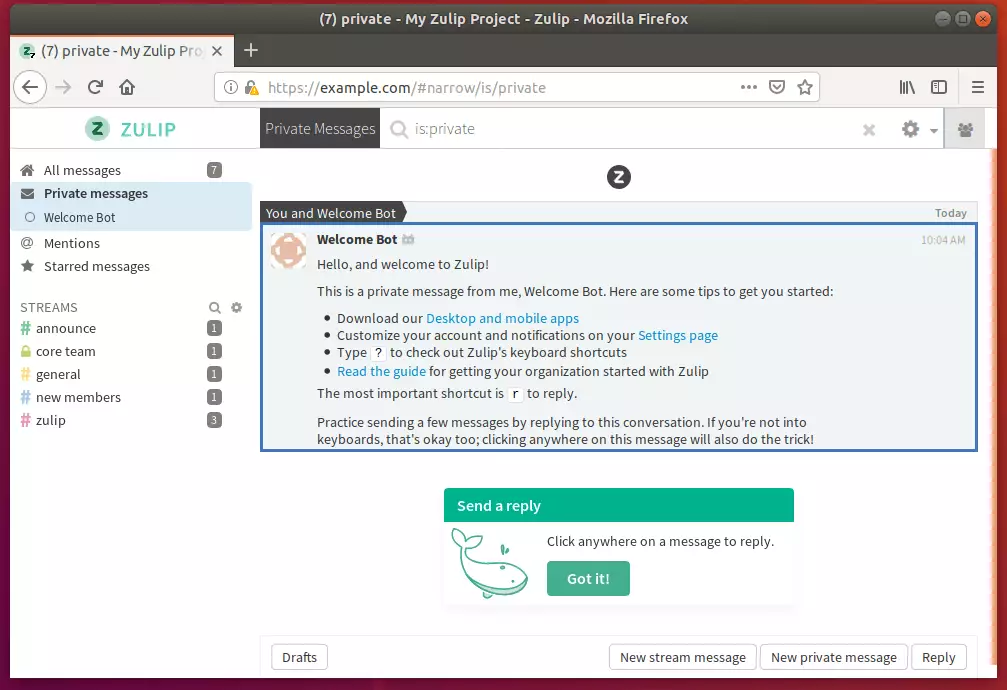
Finally, login and begin using Zulip.
Enjoy!
Congratulations! You have successfully installed and configured the Zulip Chat server on Ubuntu 16.04 | 18.04 LTS servers.


Leave a Reply