How to Install Syncthing on Ubuntu 24.04

Syncthing on Ubuntu 24.04 lets you sync and back up files across multiple computers without using a cloud storage service. This free tool builds a direct, private link between your devices so you can share folders securely.
Your data stays encrypted the whole time it moves from one machine to another. You keep full control of your files and do not need to trust a third-party company with your personal information.
Install Syncthing by opening your terminal and running “sudo apt update” followed by “sudo apt install syncthing”. Enable the service to start automatically with “systemctl –user enable syncthing”. Access the web interface at http://127.0.0.1:8384 to configure your sync settings.
Install Syncthing
To install Syncthing on Ubuntu 24.04, you need to run a few commands in the Terminal (a tool for entering text commands). These commands download the software from the official package repositories and set it up so it runs automatically every time you start your computer.
sudo apt update
sudo apt install syncthing
Configure Syncthing to start automatically whenever you log in by running this command:
systemctl –user enable syncthing
Start or stop the Syncthing service whenever you need with these commands:
systemctl --user start syncthing
systemctl --user stop syncthing
Configure Syncthing
To configure Syncthing and protect your files, you need to set up a username and password in the web dashboard. By default, anyone on your network can view your sync settings unless you add a password to lock down the interface.
- Open your web browser and go to http://127.0.0.1:8384.
- Navigate to the Settings menu in the top right corner.
- Click on the GUI tab.
- Enter a unique username and a strong, secure password in the provided fields.
- Click Save.
The interface will refresh and prompt you to log in with your new credentials.
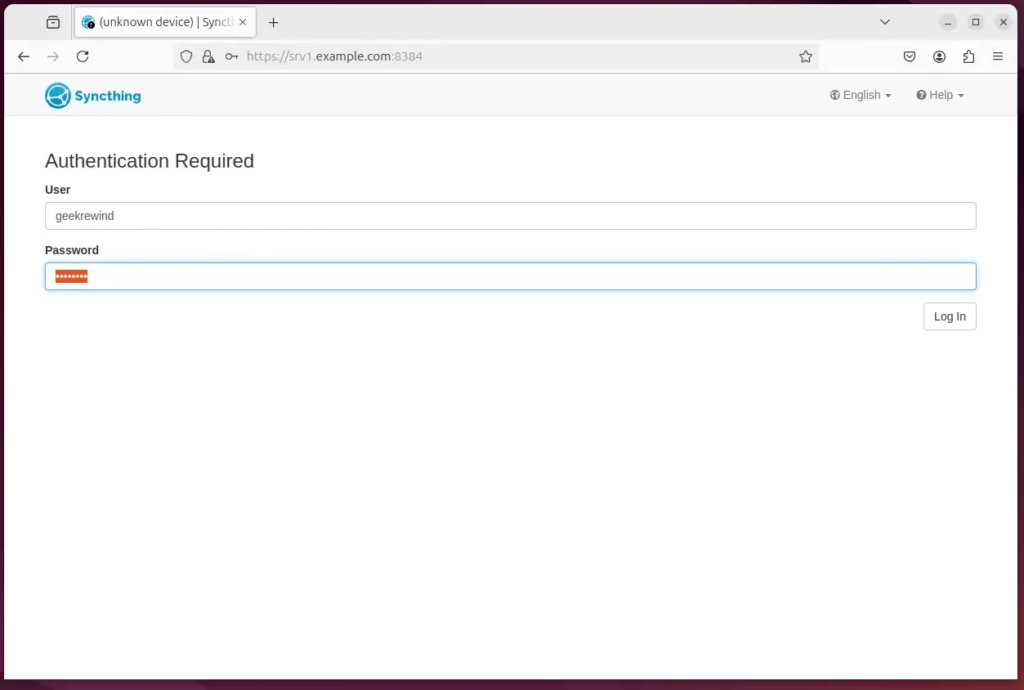
Log in to the Syncthing portal
To log in to the Syncthing portal, open your web browser and go to the local address where the service runs. This opens the main control panel where you manage your connected devices and shared folders.
systemctl --user status syncthing
Open a browser and go to http://127.0.0.1:8384. Navigate to the Settings menu in the top right corner and click the GUI tab. Enter a unique username and a strong, secure password, then click Save.
https://your-ip-address:8384
Enter the username and password you just created to log in.
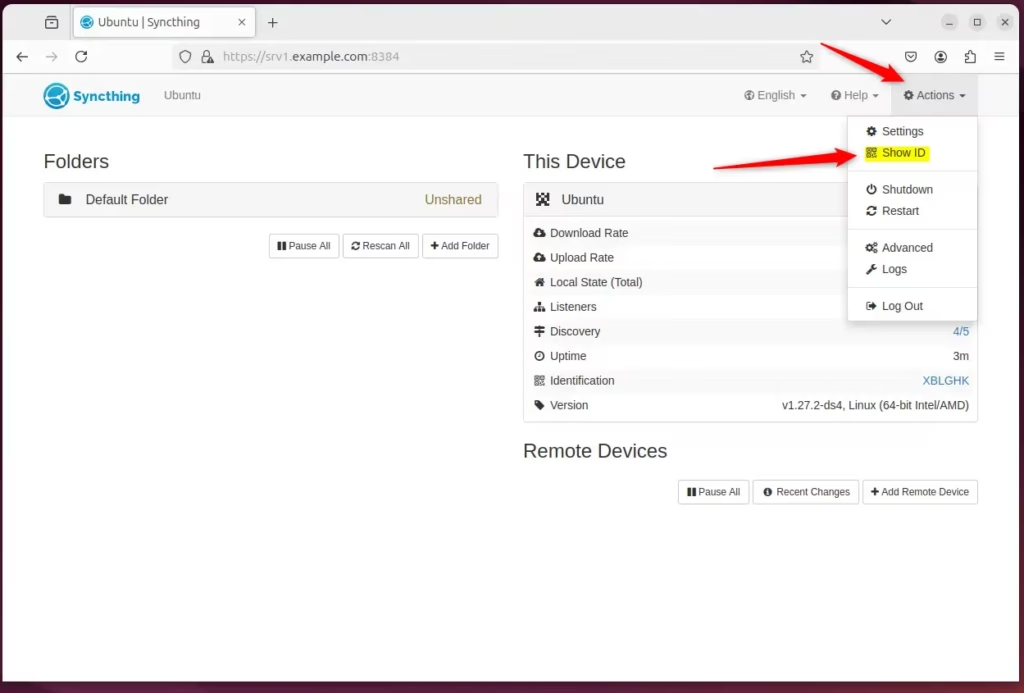
Once you log in, click the "Actions" button and select "Show ID" on the top menu.
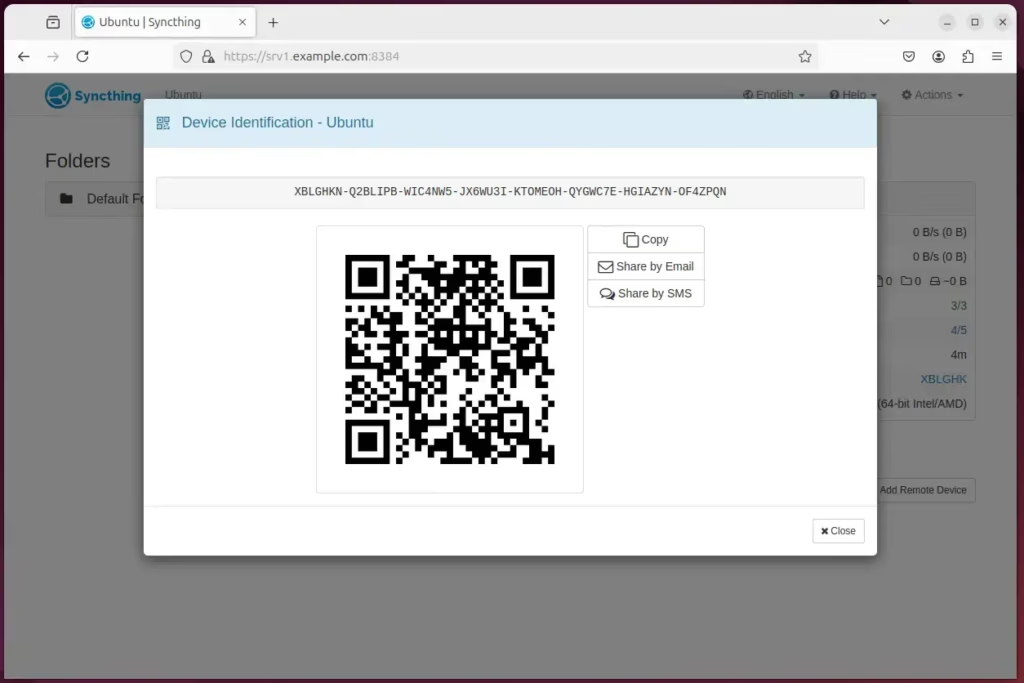
Copy the connection ID and use it to add a remote device.
Click "Add Remote Device" on the remote computer and enter the connection ID you copied from the other computer. Return to the original computer and confirm the request to connect.
Using GUI Wrappers
If you prefer not to use a web browser, you can install a GUI wrapper. These tools appear on your desktop taskbar and simplify managing your sync status. Look for "Syncthing GTK" or "SyncTrayzor" in your software center to streamline your daily management.
Conclusion
Syncthing is a free file synchronization tool that connects your computers and phones directly without using cloud storage. It keeps your files private by sending data straight from one device to another over your local network or the internet.
- Open-source: A free solution for file synchronization.
- Direct Connection: Connects devices directly to keep your data private.
- Customizable: Choose specific folders and set limits to fit your needs.
- Real-time Sync: Files update automatically whenever you make a change.
Was this guide helpful?
100% of readers found this helpful (1 votes)

About the Author
Richard
Tech Writer, IT Professional
Richard, a writer for Geek Rewind, is a tech enthusiast who loves breaking down complex IT topics into simple, easy-to-understand ideas. With years of hands-on experience in system administration and enterprise IT operations, he’s developed a knack for offering practical tips and solutions. Richard aims to make technology more accessible and actionable. He's deeply committed to the Geek Rewind community, always ready to answer questions and engage in discussions.




No comments yet — be the first to share your thoughts!