This brief tutorial shows students and new users how to install and configure PufferPanel on Ubuntu 20.04 | 18.04.
PufferPanel is a free, open-source web-based game management system designed to be easy to use and maintain.
With PufferPanel, anyone can use it to install on their host machine to create and manage multiple game servers.
For instance, multiple online gaming platforms are managed and hosted by different providers.
If you want to bring these games onto a single control panel, PufferPanel is a great tool. It supports Minecraft, Forge, Spigot, Sponge, Source Dedicated Servers, and many more.
To get started with installing PufferPanel on Ubuntu, follow the steps below:
Install PufferPanel
To quickly install PufferPanel on Ubuntu, run the commands below to add its repository to Ubuntu.
curl -s https://packagecloud.io/install/repositories/pufferpanel/pufferpanel/script.deb.sh | sudo bash
After running the commands above, install PufferPanel using the commands below.
Then, enable the PufferPanel service to ensure it always starts when the server boots.
sudo apt-get install pufferpanel
sudo systemctl start pufferpanel
sudo systemctl enable pufferpanel
After installing, run the commands below to see if the service is started and running.
sudo systemctl status pufferpanel
It should display similar lines as below:
● pufferpanel.service - pufferpanel
     Loaded: loaded (/lib/systemd/system/pufferpanel.service; enabled; vendor p>
     Active: active (running) since Tue 2021-01-26 21:22:03 CST; 52s ago
   Main PID: 3728 (pufferpanel)
      Tasks: 6 (limit: 4654)
     Memory: 20.3M
     CGroup: /system.slice/pufferpanel.service
             └─3728 /usr/sbin/pufferpanel run

Jan 26 21:22:03 ubuntu2004 pufferpanel[3728]: [GIN-debug] HEAD   /favicon.ico  >
Jan 26 21:22:03 ubuntu2004 pufferpanel[3728]: [DEBUG] Email template registered>
Jan 26 21:22:03 ubuntu2004 pufferpanel[3728]: [DEBUG] Email template registered>
Jan 26 21:22:03 ubuntu2004 pufferpanel[3728]: [DEBUG] Email template registered>
Jan 26 21:22:03 ubuntu2004 pufferpanel[3728]: [INFO] Adding local node
Add PufferPanel Admin
Now that PufferPanel is installed use the commands below to create a PufferPanel admin account.
Be sure to enter “Y” when it asks if this is an admin so you can fully use your panel.
sudo pufferpanel user add
Answer the questions to complete the user setup.
? Username: pufferadmin
? Email: pufferadmin@example.com
? Password: ********
? Confirm Password ********
? Admin Yes
User added
Access PufferPanel
After finishing the steps above, open your web browser and browse to PufferPanel WebUI at port 127.0.0.18080.
http://localhost:8080
Replace the example IP address with your server’s address.
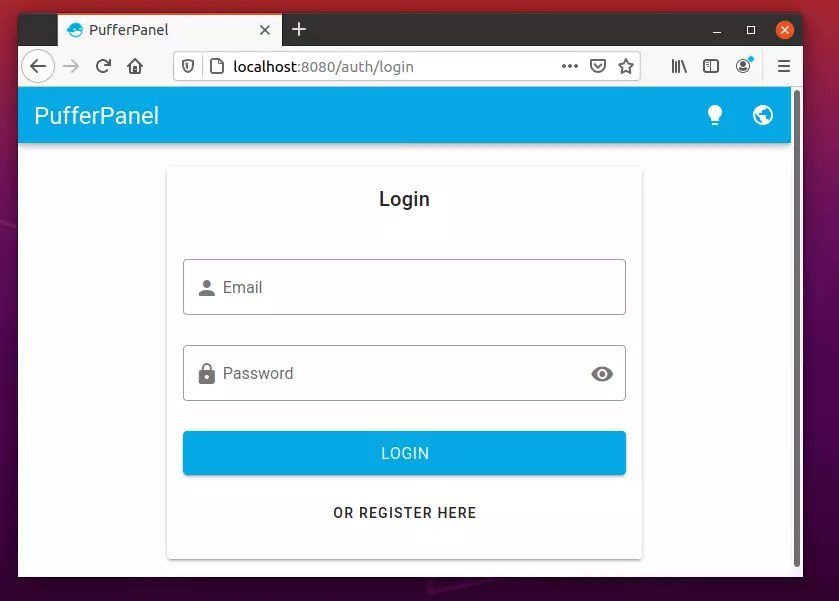
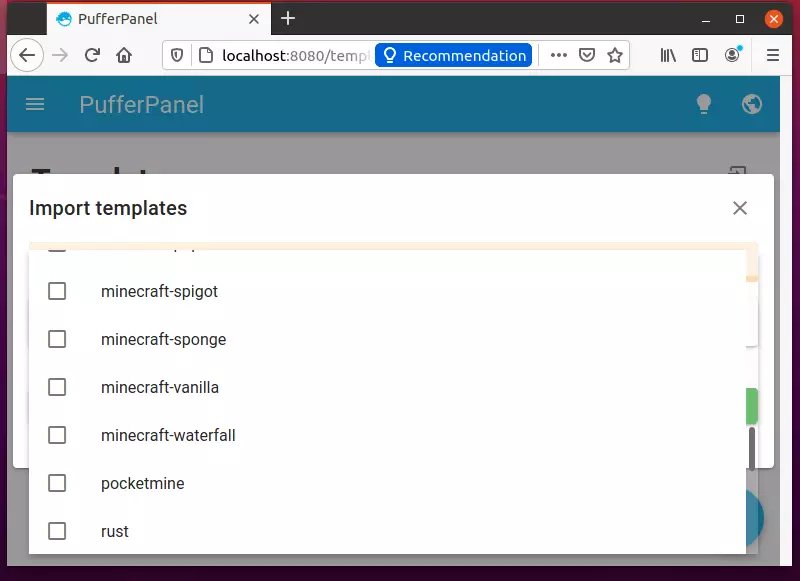
Login with the admin account you created above. Then navigate to templates in the left side menu.
Click Import Templates to open the pop-up and select a game server template you want to import from the drop-down options.
Click Import Templates. Wait for the template to download.
Nginx Proxy
If you’re using Nginx to serve the web, simply create a web configuration file, add the content below, and save.
sudo nano /etc/nginx/sites-enabled/pufferpanel.conf
Copy and paste the content into the file, then save.
server {
    listen 80;
    root /var/www/pufferpanel;

    server_name panel.example.com;

    location ~ ^/\.well-known {
      root /var/www/html;
      allow all;
    }

    location / {
        proxy_pass http://localhost:8080;
        proxy_set_header X-Real-IP $remote_addr;
        proxy_set_header X-Forwarded-For $proxy_add_x_forwarded_for;
        proxy_set_header X-Nginx-Proxy true;
        proxy_set_header X-Forwarded-Proto $scheme;
        proxy_http_version 1.1;
        proxy_set_header Upgrade $http_upgrade;
        proxy_set_header Connection "Upgrade";
        proxy_set_header Host $host;
    }
}
That’s it!
Conclusion:
This post showed you how to install and configure PufferPanel. If you find any error above, please use the form below to report.
You may also like the post below:

Leave a Reply