
This brief tutorial shows students and new users how to install and configure the Pandora FMS system monitoring platform on Ubuntu 18.04 | 16.04.
Pandora FMS (Flexible Monitoring System) is a free and open-source monitoring software that you can use to monitor your IT infrastructure. It supports Windows, Linux, and other systems applications.
Pandora FMS has many features, making it a next-gen enterprise-grade and the most complete open-source systems monitoring platform available today.
For more about Pandora FMS, please visit its homepage.
To get started with installing Pandora FMS on Ubuntu, follow the steps below:
Install Apache HTTP Server
Apache2 HTTP Server is the most popular web server. Install it since Pandora FMS needs it.
To install Apache2 HTTP on the Ubuntu server, run the commands below.
sudo apt update
sudo apt install apache2
After installing Apache2, the commands below can stop, start, and enable the Apache2 service to always start up with the server boots.
sudo systemctl stop apache2.service
sudo systemctl start apache2.service
sudo systemctl enable apache2.service
To determine if the Apache2 HTTP server is installed, simply open your web browser and type in the server’s IP or hostname.
When you see a page similar to the one below, Apache2 is installed and working.
http://localhost
Install MariaDB Database Server
Pandora FMS also needs a database server to store its content. MariaDB database server is a great place to start when looking at open-source database servers for Pandora FMS.
To install MariaDB run the commands below.
sudo apt install mariadb-server mariadb-client
After installing MariaDB, the commands below can stop, start, and enable the service to start when the server boots.
Run these on Ubuntu
sudo systemctl stop mariadb.service
sudo systemctl start mariadb.service
sudo systemctl enable mariadb.service
After that, run the commands below to secure the MariaDB server by creating a root password and disallowing remote root access.
sudo mysql_secure_installation
When prompted, answer the questions below by following the guide.
- Enter current password for root (enter for none): Just press the Enter
- Set root password? [Y/n]: Y
- New password: Enter password
- Re-enter new password: Repeat password
- Remove anonymous users? [Y/n]: Y
- Disallow root login remotely? [Y/n]: Y
- Remove test database and access to it? [Y/n]: Y
- Reload privilege tables now? [Y/n]: Y
Restart MariaDB server
To test if MariaDB is installed, type the commands below to log into the MariaDB server
sudo systemctl status mariadb.service
You should see similar messages below:
mariadb.service - MariaDB 10.1.44 database server
   Loaded: loaded (/lib/systemd/system/mariadb.service; enabled; vendor preset: enabled)
   Active: active (running) since Thu 2020-03-05 12:14:17 CST; 1min 15s ago
     Docs: man:mysqld(8)
           https://mariadb.com/kb/en/library/systemd/
 Main PID: 16048 (mysqld)
   Status: "Taking your SQL requests now."
    Tasks: 27 (limit: 4666)
   CGroup: /system.slice/mariadb.service
           └─16048 /usr/sbin/mysqld

Mar 05 12:14:17 ubuntu1804 /etc/mysql/debian-start[16081]: information_schema
Mar 05 12:14:17 ubuntu1804 /etc/mysql/debian-start[16081]: mysql
Mar 05 12:14:17 ubuntu1804 /etc/mysql/debian-start[16081]: performance_schema
That’s how to install MariaDB on Ubuntu.
MariaDB is configured to use the UNIX auth_socket plugin by default on Ubuntu. You’ll want to run the SQL commands below for the root user to use mysql_native_password.
You’ll need a MariaDB root account to set up Pandora FMS.
sudo mysql -u root -p
USE mysql;
UPDATE user SET plugin='mysql_native_password' WHERE User='root';
Finally, save your changes and exit.
FLUSH PRIVILEGES;
EXIT;
That should do it
Install PHP 7.2-FPM and Related Modules
PHP 7.2-FPM may not be available in Ubuntu default repositories. To install it, you will have to get it from third-party repositories.
Run the commands below to add the below third party repository to upgrade to PHP 7.2-FPM
sudo apt-get install software-properties-common
sudo add-apt-repository ppa:ondrej/php
Then update and upgrade to PHP 7.2-FPM
sudo apt update
Next, run the commands below to install PHP 7.2-FPM and related modules.
sudo apt install php7.2 php7.2-common php7.2-gmp php7.2-curl php7.2-mbstring php7.2-xmlrpc php7.2-mysql php7.2-gd php7.2-bcmath php7.2-xml php7.2-cli php7.2-zip php-php-gettext php-pear php7.2-zip php7.2-sqlite3 php7.2-snmp php-db graphviz php7.2-curl php7.2-ldap dbconfig-common
After installing PHP 7.2, run the commands below to open the PHP default config file for Apache2.
sudo nano /etc/php/7.2/apache2/php.ini
Then, save the changes on the lines below in the file. The value below is an ideal setting to apply in your environment.
file_uploads = On
allow_url_fopen = On
short_open_tag = On
memory_limit = 256M
upload_max_filesize = 100M
max_execution_time = 360
max_input_vars = 1500
date.timezone = America/Chicago
After making the change above, please save the file and close it.
Install Perl and Supported Packages
Pandora FMS uses Perl and will need Perl packages installed.
Run the commands below to install SNMP and Perl packages to support Pandora FMS.
sudo apt install snmp snmpd libnet-telnet-perl libgeo-ip-perl geoip-database-extra libtime-format-perl libxml-simple-perl libxml-twig-perl libdbi-perl libnetaddr-ip-perl libhtml-parser-perl xprobe2 nmap libmail-sendmail-perl traceroute libio-socket-inet6-perl libhtml-tree-perl libsnmp-perl snmp-mibs-downloader libio-socket-multicast-perl libsnmp-perl libjson-perl
Install FMS with Console
Now that all required packages are installed, run the commands below to download Pandora FMS packages and install them from the link below:
https://sourceforge.net/projects/pandora/files/
Or use the commands below to download via the command line terminal and install.
cd /tmp
wget https://sourceforge.net/projects/pandora/files/Tools%20and%20dependencies%20%28All%20versions%29/DEB%20Debian%2C%20Ubuntu/wmi-client_0112-1_amd64.deb
wget https://sourceforge.net/projects/pandora/files/Pandora%20FMS%207.0NG/743/Debian_Ubuntu/pandorafms.console_7.0NG.743.deb
wget https://sourceforge.net/projects/pandora/files/Pandora%20FMS%207.0NG/743/Debian_Ubuntu/pandorafms.server_7.0NG.743.deb
After downloading the above, run the commands below to install and force install additional packages.
sudo dpkg -i pandorafms.console_7.0NG.743.deb pandorafms.server_7.0NG.743.deb
sudo apt-get -f install
After installing, you should see a message with configuration settings for FMS services.
Please, now, point your browser to http://your_IP_address/pandora_console/install.php and follow all the steps described on it.
Setting up pandorafms-server (7.0NG.743) .
Linking pandora_exec.
Creating common Pandora FMS directories
Giving proper permission to /var/spool/pandora
Creating setup directory in /etc/pandora
Enabling start-up pandora & tentacle server daemons
Synchronizing state of pandora_server.service with SysV service script with /lib/systemd/systemd-sysv-install.
Executing: /lib/systemd/systemd-sysv-install enable pandora_server
Synchronizing state of tentacle_serverd.service with SysV service script with /lib/systemd/systemd-sysv-install.
Executing: /lib/systemd/systemd-sysv-install enable tentacle_serverd
Create the Cron script to run hourly Pandora DB tool
Please, now, edit the /etc/pandora/pandora_server.conf and launch the Pandora Server with /etc/init.d/Pandora .
Setting up php (1:7.2+60ubuntu1) .
After installing, open your web browser and browse to the server hostname or IP address followed by /pandora_console as shown below:
http://localhost/pandora_console/install.php
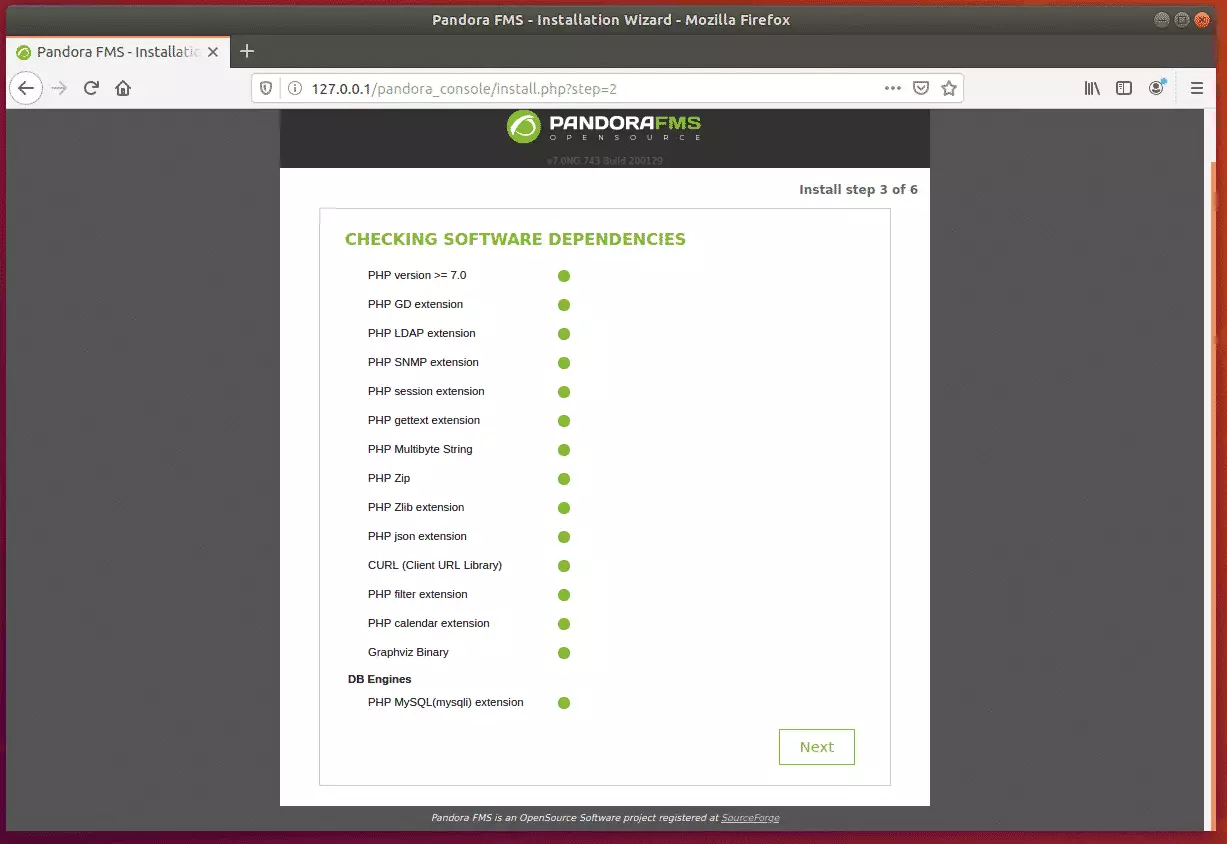
After the page loads, read and follow the Wizard

Next, verify that all requirements and dependencies are installed and continue.
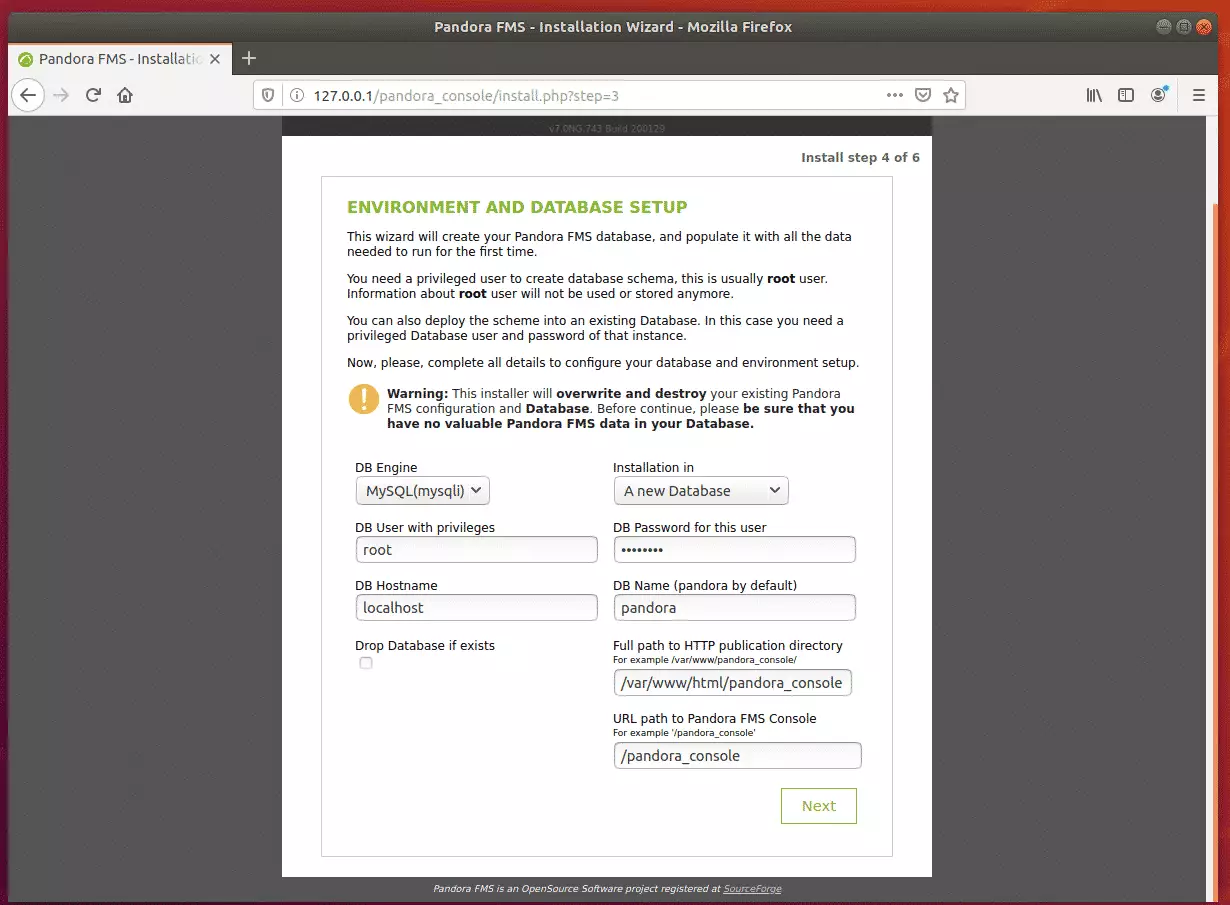
After that, type in the root password you created above. The Wizard should create a database called Pandora. Click Next to continue.
After that, the installation should be complete.
Run the commands below to remove the installer script. You can also select the option to rename the file and continue.
sudo rm /var/www/html/pandora_console/install.php
Then login with the username and password below:
username: admin
password: pandora
 Before you, Pandora FMS can start monitoring and editing the server’s configuration file at /etc/pandora/pandora_server.conf.
Run the commands below to open the configuration file.
sudo nano /etc/pandora/pandora_server.conf
Then, edit the highlighted line to match the Pandora FMS portal database credential. The same root login is used during the installation wizard.
# This must be the same credentials used by your Pandora FMS Console
# but could be different if your console is not running in the same
# host than the server. Check your console setup in /include/config.php

# dbname: Database name (pandora by default)
dbname pandora
# dbuser:  Database user name (pandora by default)
dbuser root
# dbpass: Database password
dbpass root_password

# dbhost: Database hostname or IP address
dbhost 127.0.0.1
# dbport: Database port number
# Default value depends on the dbengine (mysql: 3306)
#dbport 3306
Save the file and exit.
After running the commands below, restart the Pandora FMS service.
sudo systemctl restart pandora_server.service
Next, check Pandora FMS status by running the commands below:
sudo systemctl status pandora_server.service>
You should see similar lines as shown below:
● pandora_server.service - Pandora FMS server daemon
   Loaded: loaded (/lib/systemd/system/pandora_server.service; enabled; vendor preset: enabled)
   Active: active (running) since Fri 2020-03-06 13:56:10 CST; 3s ago
  Process: 10151 ExecStart=/usr/bin/pandora_server /etc/pandora/pandora_server.conf -D (code=exited, status=0/SUCCESS)
 Main PID: 10155 (pandora_server)
    Tasks: 14 (limit: 4666)
   CGroup: /system.slice/pandora_server.service
           └─10155 /usr/bin/perl /usr/bin/pandora_server /etc/pandora/pandora_server.conf -D

Mar 06 13:56:09 ubuntu1804 systemd[1]: Starting Pandora FMS server daemon.
Mar 06 13:56:10 ubuntu1804 pandora_server[10151]: Pandora FMS Server 7.0NG.743 Build 200129 Copyright (c) 2004-2020 Artica ST
That should do it!
You can begin using Pandora FMS to monitor your network.
Conclusion:
This post showed you how to install and configure to monitor your network and systems. If you find any error, please report it in the comment form below.
Thanks,
Leave a Reply