How to Install OpenCast on Ubuntu Linux

|

,

|

This tutorial provides detailed instructions on installing and configuring OpenCast on Ubuntu 18.04 | 16.04. Opencast is a free, Java-based, open-source web-based application used for the management of video capture, processing, and distribution. The guide covers requirements (including dependencies such as Java, FFmpeg, Tesseract, Sox), setting up a MariaDB database, building Opencast source code, and…

This brief tutorial shows students and new users how to install and configure OpenCast on Ubuntu 18.04 | 16.04.

OpenCast is a free, open-source, web-based application for automated video capture, processing, management, and distribution. It is a popular software used by many organizations and universities to record and schedule events and seminars.

Installing OpenCast on Ubuntu Linux allows users to take advantage of the benefits of this powerful tool and easily manage their video content.

Ubuntu is also a free, open-source operating system that is easy to use and widely supported, making it a great platform for running OpenCast.

For more about Opencast, please visit its homepage.

When you’re ready to install OpenCast on Ubuntu, follow the steps below:

Update Ubuntu and Install Dependencies

Opencast required several dependencies, including Tesseract, sox, etc.

To start, run the commands below to update Ubuntu and install the required dependencies.

sudo apt update
sudo apt dist-upgrade
sudo apt install git unzip build-essential software-properties-common hunspell tesseract-ocr sox

You’ll also want the FFmpeg app if you’re editing video files. To install, run the commands below to add the FFmpeg repository to Ubuntu and install it.

sudo add-apt-repository --yes ppa:jonathonf/ffmpeg-4
sudo apt update
sudo apt install ffmpeg

To verify if FFmpeg is installed, run the commands below:

ffmpeg -version

It should output similar lines as shown below:

Output:
ffmpeg version 4.2.2-0york0~18.04 Copyright (c) 2000-2019 the FFmpeg developers
built with gcc 7 (Ubuntu 7.4.0-1ubuntu1~18.04.1)
configuration: --prefix=/usr --extra-version='0york0~18.04' --toolchain=hardened

Continue below with the setup.

Install OpenJDK 8

OpenCast is a Java-based app, so you’ll need Java installed. First, download the Java 8 Development Kit: the official Oracle or Open JDK.

For this tutorial, we’re going to install OpenJDK.

To do that, run the commands below:

sudo apt update
sudo apt-get install openjdk-8-jdk openjdk-8-doc openjdk-8-jre-lib

After installing Java, you can verify it by running the commands below:

java -version

It should output something similar, as shown below:

Output:
openjdk version "1.8.0_242"
OpenJDK Runtime Environment (build 1.8.0_242-8u242-b08-0ubuntu3~18.04-b08)
OpenJDK 64-Bit Server VM (build 25.242-b08, mixed mode)

After, continue below to install Maven.

Download and Install Maven

After installing OpenJDK version 8 above, use the steps below to download Maven. You will also need the latest version of Maven (at least version 3.6.3, version 3.6.3 is recommended).

Next, go and download Apache Maven latest from its download page.

The recommended version of Apache Maven is 3.6.3. Check the Maven download page to see if a newer version is available for you to download. If there are, select those and download them instead.

Run the commands below to download version 3.6.3.

cd /tmp
wget https://downloads.apache.org/maven/maven-3/3.6.3/binaries/apache-maven-3.6.3-bin.tar.gz

Next, run the commands below to extract the downloaded package to the /opt directory.

sudo tar xf /tmp/apache-maven-*.tar.gz -C /opt

Create a symbolic link to the version folder if you want separate versions and update them as they become available.

sudo ln -s /opt/apache-maven-3.6.3 /opt/maven

When the next version is released, you must update the symbolic link to reference the new release folder by running the command above and updating the release number in the folder name.

Setup Maven Environment Variables

After downloading and extracting the Maven package, go and set up its environment variables. To do that, run the commands below:

sudo nano /etc/profile.d/maven.sh

Then copy and paste the lines below and save them into the file.

export JAVA_HOME=/usr/lib/jvm/java-8-openjdk-amd64
export M2_HOME=/opt/apache-maven-3.6.3
export MAVEN_HOME=/opt/apache-maven-3.6.3
export PATH=${M2_HOME}/bin:${PATH}

Finally, run the commands below to update and load the changes.

sudo chmod +x /etc/profile.d/maven.sh
source /etc/profile.d/maven.sh

Now, run the commands below to check the version number.

mvn -version

You should see the content below.

Apache Maven 3.6.3 (cecedd343002696d0abb50b32b541b8a6ba2883f)
Maven home: /opt/apache-maven-3.6.3
Java version: 1.8.0_242, vendor: Private Build, runtime: /usr/lib/jvm/java-8-openjdk-amd64/jre
Default locale: en_US, platform encoding: UTF-8
OS name: "linux", version: "5.3.0-40-generic", arch: "amd64", family: "unix"

Installing ActiveMQ

Apache ActiveMQ is an open-source message broker system. Opencast requires ActiveMQ as a message relay for the administrative user interface.

Run the commands below to download ActiveMQ from the Apache Office package repository. At the time of this writing, the current version was 5.15.8.

cd /tmp
wget http://archive.apache.org/dist/activemq/5.15.8/apache-activemq-5.15.8-bin.tar.gz

After that, extract the downloaded folder, move its content to the /opt directory, and create a folder called activemq

tar -xvzf apache-activemq-5.15.8-bin.tar.gz
sudo mv apache-activemq-5.15.8 /opt/activemq

You’ll want to create dedicated user and group accounts to run ActiveMQ effectively. Simply run the commands below to create an ActiveMQ username and a group name.

sudo addgroup --quiet --system activemq
sudo adduser --quiet --system --ingroup activemq --no-create-home --disabled-password activemq

Next, change the ownership of the /opt/activemq directory so the user can fully control the content.

sudo chown -R activemq:activemq /opt/activemq

After that, you will also want to create an ActiveMQ systemd service so you can control starting, stopping, and enabling its service. To do that, simply run the commands below to create a service file.

sudo nano /etc/systemd/system/activemq.service

Then, copy the content below into the file and save it.

[Unit]
Description=Apache ActiveMQ
After=network.target
[Service]
Type=forking
User=activemq
Group=activemq

ExecStart=/opt/activemq/bin/activemq start
ExecStop=/opt/activemq/bin/activemq stop

[Install]
WantedBy=multi-user.target

After saving it, run the commands below to enable the service.

sudo systemctl daemon-reload
sudo systemctl start activemq
sudo systemctl enable activemq

To verify if the service is functioning, run the commands below to check it.

/opt/activemq/bin/activemq status

You should see a similar output as below:

Output:
INFO: Loading '/opt/activemq//bin/env'
INFO: Using java '/usr/bin/java'
ActiveMQ is running (pid '5453')

After installing ActiveMQ, its default configuration file is located at /opt/activemq/conf/activemq.xml. You can open it and modify it to fit your environment.

After making changes to the file, restart the ActiveMQ service by running the commands below:

sudo systemctl restart activemq

Install MariaDB Database

OpenCast needs a database server to store its content. The MariaDB database server is a great place to start when looking at open-source database servers to use with OpenCast.

To install MariaDB, run the commands below.

sudo apt install mariadb-server mariadb-client

After installing MariaDB, the commands below can stop, start, and enable the service to start when the server boots.

Run these on Ubuntu

sudo systemctl stop mariadb.service
sudo systemctl start mariadb.service
sudo systemctl enable mariadb.service

After that, run the commands below to secure the MariaDB server by creating a root password and disallowing remote root access.

sudo mysql_secure_installation

When prompted, answer the questions below by following the guide.

  • Enter current password for root (enter for none): Just press the Enter
  • Set root password? [Y/n]: Y
  • New password: Enter password
  • Re-enter new password: Repeat password
  • Remove anonymous users? [Y/n]: Y
  • Disallow root login remotely? [Y/n]: Y
  • Remove test database and access to it? [Y/n]:  Y
  • Reload privilege tables now? [Y/n]:  Y

Restart MariaDB server

To test if MariaDB is installed, type the commands below to log on to the MariaDB server.

sudo systemctl status mariadb.service

You should see similar messages below:

mariadb.service - MariaDB 10.1.44 database server
   Loaded: loaded (/lib/systemd/system/mariadb.service; enabled; vendor preset: enabled)
   Active: active (running) since Thu 2020-03-05 12:14:17 CST; 1min 15s ago
     Docs: man:mysqld(8)
           https://mariadb.com/kb/en/library/systemd/
 Main PID: 16048 (mysqld)
   Status: "Taking your SQL requests now."
    Tasks: 27 (limit: 4666)
   CGroup: /system.slice/mariadb.service
           └─16048 /usr/sbin/mysqld

Mar 05 12:14:17 ubuntu1804 /etc/mysql/debian-start[16081]: information_schema
Mar 05 12:14:17 ubuntu1804 /etc/mysql/debian-start[16081]: mysql
Mar 05 12:14:17 ubuntu1804 /etc/mysql/debian-start[16081]: performance_schema

Now that you’ve installed all the required packages continue below to start configuring the servers. First, create a blank OpenCast database.

Run the commands below to log on to MariaDB. When prompted for a password, type the root password you created above.

sudo mysql -u root -p

Then, create a database called Opencast

CREATE DATABASE opencast;

Create a database user called opencastuser with a new password

CREATE USER 'opencastuser'@'localhost' IDENTIFIED BY 'new_password_here';

Then, grant the user full access to the opencast database.

GRANT ALL ON opencast.* TO 'opencastuser'@'localhost' WITH GRANT OPTION;

Finally, save your changes and exit.

FLUSH PRIVILEGES;
EXIT;

Install OpenCast

For this tutorial, we will create a new user account for OpenCast. This user will be used to run the Opencast process.

It is recommended to run OpenCast services as non-root.

To create a user account named opencast with /opt/opencast home directory, run the commands below:

sudo useradd -r -d /opt/opencast opencast

Download the Opencast Source code using Git, then change it into its source directory.

cd /tmp
git clone https://github.com/opencast/opencast.git opencast_source
cd opencast_source

You’ll want to get the latest version checked out. To see a list of available releases, use the commands below:

git tag

You should see a list of all releases with the most recent release at the end.

.
7.5
7.6
8.0
8.1

Check out the latest release using the following command.

git checkout 8.1

Next, build the code using Apache Maven by running the commands below:

mvn clean install -DskipTests

It may take some time to build the code, depending on the speed of your machine. This process will create all binaries for OpenCast and installer modules.

After a successful build, you should see a similar message as below:

INFO] Assemblies // Distribution Admin .. SUCCESS [ 39.871 s]
[INFO] Assemblies // Distribution Admin/Presentation . SUCCESS [ 14.156 s]
[INFO] Assemblies // Distribution All-In-One .. SUCCESS [ 15.232 s]
[INFO] Assemblies // Distribution Ingest .. SUCCESS [ 12.632 s]
[INFO] Assemblies // Distribution Presentation . SUCCESS [ 12.215 s]
[INFO] Assemblies // Distribution Worker .. SUCCESS [ 12.512 s]
[INFO] ------------------------------------------------------------------------
[INFO] BUILD SUCCESS
[INFO] ------------------------------------------------------------------------
[INFO] Total time:  10:24 min
[INFO] Finished at: 2020-03-14T10:36:31-05:00
[INFO] ------------------------------------------------------------------------

Change into the build folder, extract the allinone tar archive, and move it to the OpenCast home directory. They give OpenCast’s user ownership of its home folder.

cd build
tar -xf opencast-dist-allinone*.tar.gz
sudo mv opencast-dist-allinone*/ /opt/opencast/
sudo chown -R opencast:opencast /opt/opencast

Import the database schema and initial data for Opencast installation by running the commands below:

cd /opt/opencast
mysql -u opencastuser -p opencast < docs/scripts/ddl/mysql5.sql

Next, edit the Opencast configuration file to make a few changes in the configuration.

sudo nano /opt/opencast/etc/custom.properties

Make the highlighted changes and save the file.

...
############# config ################
org.opencastproject.admin.email=admin@example.com
org.opencastproject.security.admin.user=admin
org.opencastproject.security.admin.pass=opencast

######### DATABASE #########

# Relational Database configuration.  By default, Opencast uses an embedded H2 database.  A standalone database se$
# is recommended for production systems.  If you run the ddl script for your db vendor (see docs/scripts/ddl/) man$
# (this is recommended) set 'ddl-generation' to 'false'.
org.opencastproject.db.ddl.generation=true

# db.vendor can be any of the values listed at under the "eclipselink.target-database" section of
# http://www.eclipse.org/eclipselink/documentation/2.4/jpa/extensions/p_target_database.htm#target-database
# Common values include MySQL, PostgreSQL.
org.opencastproject.db.vendor=MySQL

# Opencast comes with the jdbc drivers for MySQL (com.mysql.jdbc.Driver) and PostgreSQL (org.postgresql.Driver). T$
# other jdbcDrivers to the Opencast runtime, rebuild the db module with your desired drivers.
org.opencastproject.db.jdbc.driver=com.mysql.jdbc.Driver

# The jdbc connection url, username, and password
org.opencastproject.db.jdbc.url=jdbc:mysql://localhost/opencast
org.opencastproject.db.jdbc.user=opencastuser
org.opencastproject.db.jdbc.pass=database_user_password_here

Save the file and exit.

Next, open the OpenCast web server configuration file.

sudo nano /opt/opencast/etc/org.ops4j.pax.web.cfg

Set the listening address to 0.0.0.0 so the application can be accessed outside the network.

# This property specifies the comma separated list of addresses used
# localhost,10.0.0.1). Host names or IP addresses can be used. Pax Web default value is "0.0.0.0".
org.ops4j.pax.web.listening.addresses=0.0.0.0

Run the commands below to use Opencast configurations for Apache ActiveMQ. First, create a backup of the current ActiveMQ configuration file.

sudo mv /opt/activemq/conf/activemq.xml /opt/activemq/conf/activemq.xml.backup

Next, copy the OpenCast configuration file to its location specified below:

sudo cp /opt/opencast/docs/scripts/activemq/activemq.xml /opt/activemq/conf/activemq.xml

The default Opencast ActiveMQ configuration disables the web administration console. You’ll have to enable it.

Run the commands below to open the file.

sudo nano /opt/activemq/conf/activemq.xml

Scroll down and un-comment the highlighted line below

<!--
Enable web consoles, REST and Ajax APIs and demos
The web consoles requires by default login, you can disable this in the jetty.xml file

Take a look at ${ACTIVEMQ_HOME}/conf/jetty.xml for more details
-->
<import resource="jetty.xml"/>

Save the file and exit, then restart ActiveMQ.

sudo systemctl restart activemq

Next, copy the Opencast startup script to start and manage the Opencast server processes easily.

cd /opt/opencast
sudo cp docs/scripts/service/opencast.service /etc/systemd/system/

Reload the Systemd units and start and enable their service.

sudo systemctl daemon-reload
sudo systemctl start opencast.service
sudo systemctl enable opencast.service

To check the OpenCast service status, run the commands below:

sudo systemctl status opencast.service

It should output similar messages as below:

● opencast.service - Opencast
   Loaded: loaded (/etc/systemd/system/opencast.service; enabled; vendor preset: enabled)
   Active: active (running) since Sat 2020-03-14 10:53:57 CDT; 15s ago
     Docs: https://docs.opencast.org
           https://docs.opencast.org
 Main PID: 29273 (start-opencast)
    Tasks: 89 (limit: 4666)
   CGroup: /system.slice/opencast.service
           ├─29273 /bin/sh /opt/opencast/bin/start-opencast server
           └─29368 /usr/bin/java -Xms128M -Xmx1G -XX:+UnlockDiagnosticVMOptions -Dcom.sun.management.jmxremote -Dor

Mar 14 10:53:57 ubuntu1804 systemd[1]: Started Opencast.
Mar 14 10:53:57 ubuntu1804 start-opencast[29273]: start-opencast: JAVA_HOME not set; results may vary

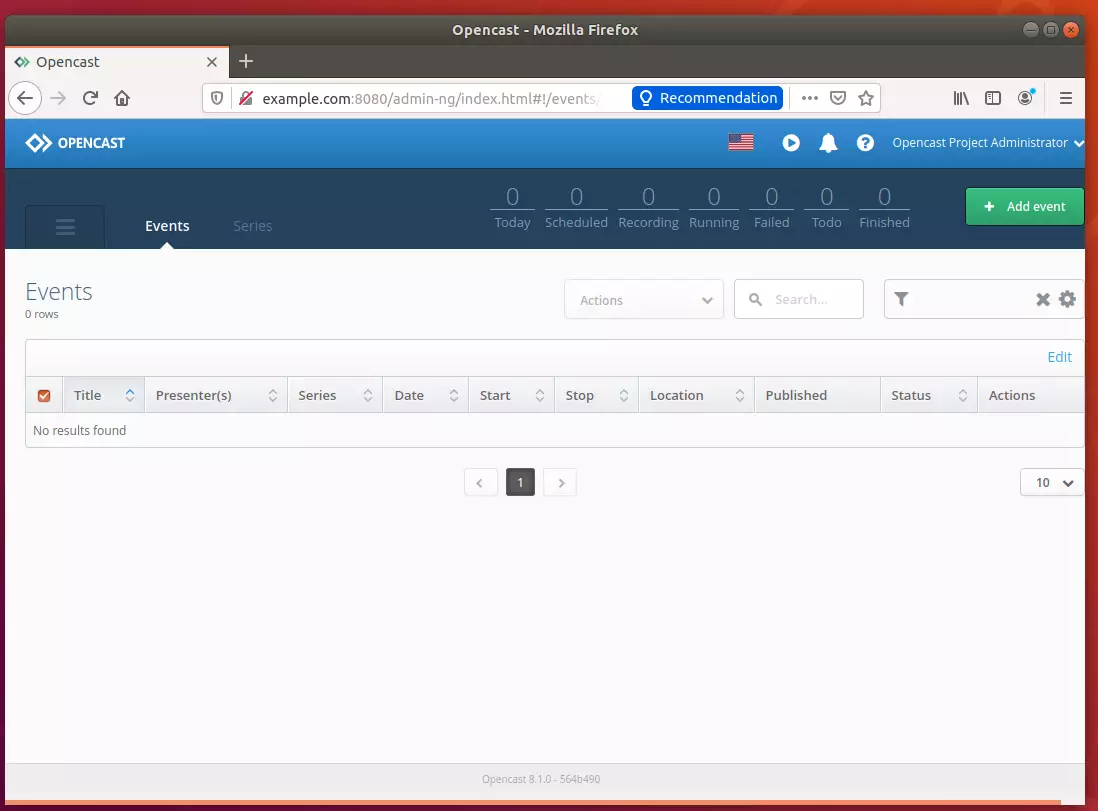
Finally, browse the server’s hostname or IP address, followed by port 8080.

http://example.com:8080

You should see the OpenCast login page.

Login with username and password:

Username: admin
Password: opencast

That’s it!

Conclusion:

This post showed you how to install and configure OpenCast on Ubuntu 18.04 | 16.04. If you find any error above, please use the form below to report it.

Thanks,

Like this:


10 responses to “How to Install OpenCast on Ubuntu Linux”

  1. Abiodun Avatar
    Abiodun

    I followed your procedure but unable to show uploaded video
    as it display ( The media could not be loaded, either because the server or network failed or because the format is not supported.)

  2. hemanshu Avatar
    hemanshu

    i am getting following error , using ubuntu under VMWare , java version 14 and opencast version 8.4 , build is successful.
    hemanshu@hemanshu-virtual-machine:/opt/opencast$ sudo systemctl daemon-reload
    hemanshu@hemanshu-virtual-machine:/opt/opencast$ sudo systemctl start opencast.service
    hemanshu@hemanshu-virtual-machine:/opt/opencast$ sudo systemctl enable opencast.service
    hemanshu@hemanshu-virtual-machine:/opt/opencast$ sudo systemctl status opencast.service
    ● opencast.service – Opencast
    Loaded: loaded (/etc/systemd/system/opencast.service; enabled; vendor preset: enabled)
    Active: failed (Result: exit-code) since Thu 2020-06-04 05:21:38 PDT; 23s ago
    Docs: https://docs.opencast.org
    https://docs.opencast.org
    Main PID: 29494 (code=exited, status=255/EXCEPTION)

    Jun 04 05:21:37 hemanshu-virtual-machine systemd[1]: opencast.service: Main process exited, code=exited, status=255/EXCEPTION
    Jun 04 05:21:37 hemanshu-virtual-machine systemd[1]: opencast.service: Failed with result ‘exit-code’.
    Jun 04 05:21:38 hemanshu-virtual-machine systemd[1]: opencast.service: Scheduled restart job, restart counter is at 5.
    Jun 04 05:21:38 hemanshu-virtual-machine systemd[1]: Stopped Opencast.
    Jun 04 05:21:38 hemanshu-virtual-machine systemd[1]: opencast.service: Start request repeated too quickly.
    Jun 04 05:21:38 hemanshu-virtual-machine systemd[1]: opencast.service: Failed with result ‘exit-code’.
    Jun 04 05:21:38 hemanshu-virtual-machine systemd[1]: Failed to start Opencast.

  3. Greg Logan Avatar
    Greg Logan

    Hi all, Greg Logan from the Opencast project here.

    Abiodun, need more information, try mailing our users list for more help.

    Hemanshu, Your most likely issue is that JDK 14 is not supported yet. Opencast 8 and older only support JDK 8, whereas Opencast 9 and newer will support 8 and 11 for now.

    I’m not able to provide more support here, but I’m happy to help on our users list!

    G

  4. Alex Avatar
    Alex

    Hello followed this guide and stack at the problem after all website at mydomain.com:8080 shows me this message:

    HTTP ERROR 404
    Problem accessing /. Reason:
    Not Found

    I checked the logs and cant figure out whats the reason of this problem, and also i seen no error messages in installation process.
    Thanks in advance.

  5. Lars Kiesow Avatar
    Lars Kiesow

    Hi everyone, interesting to see installation guides pop up all over the internet.
    Note that we generally recommend using the provided RPM and Debian packages for installations and not building it on a production machine from source. For details, see https://docs.opencast.org

    …also, Opencast is written with a lowercase “c” 😉

  6. samantha herath Avatar
    samantha herath

    I followed your procedure but i couldn’t pass this stage i am in 6 installing opencast stage please when i have run the this” command mvn clean install -DskipTests” i have got this error massage help
    INFO] Scanning for projects…
    [INFO] ————————————————————————
    [INFO] BUILD FAILURE
    [INFO] ————————————————————————
    [INFO] Total time: 0.120 s
    [INFO] Finished at: 2020-10-13T10:48:00+05:30
    [INFO] ————————————————————————
    [ERROR] The goal you specified requires a project to execute but there is no POM in this directory (/home/cc). Please verify you invoked Maven from the correct directory. -> [Help 1]
    [ERROR]
    [ERROR] To see the full stack trace of the errors, re-run Maven with the -e switch.
    [ERROR] Re-run Maven using the -X switch to enable full debug logging.
    [ERROR]
    [ERROR] For more information about the errors and possible solutions, please read the following articles:
    [ERROR] [Help 1] http://cwiki.apache.org/confluence/display/MAVEN/MissingProjectException

    thanks

  7. samantha herath Avatar
    samantha herath

    Dear all

    Now i have facing this issues when i tring to run “mvn clean install -DskipTests” then i hav e got following error massage
    [INFO] Opencast :: series-service-impl ……………….. SUCCESS [ 1.923 s]
    [INFO] Opencast :: asset-manager-impl ………………… SUCCESS [ 6.187 s]
    [INFO] Opencast :: admin-ui …………………………. SUCCESS [ 9.502 s]
    [INFO] Opencast :: admin-ui-frontend …………………. FAILURE [ 4.458 s]
    [INFO] Opencast :: animate-api ………………………. SKIPPED
    [INFO] Opencast :: animate-impl ……………………… SKIPPED
    [INFO] Opencast :: animate-remote ……………………. SKIPPED
    [INFO] Opencast :: inspection-service-api …………….. SKIPPED
    [INFO] Opencast :: animate-workflowoperation ………….. SKIPPED
    [INFO] Opencast :: annotation-api ……………………. SKIPPED
    [INFO] Opencast :: annotation-impl …………………… SKIPPED
    [INFO] Opencast :: asset-manager-workflowoperation …….. SKIPPED
    [INFO] Opencast :: asset-manager-storage-aws ………….. SKIPPED
    [INFO] Opencast :: asset-manager-storage-fs …………… SKIPPED
    [INFO] Opencast :: caption-api ………………………. SKIPPED
    [INFO] Opencast :: mpeg7 ……………………………. SKIPPED
    [INFO] Opencast :: caption-impl ……………………… SKIPPED
    [INFO] Opencast :: caption-remote ……………………. SKIPPED
    [INFO] Opencast :: capture-admin-service-impl …………. SKIPPED
    [INFO] Opencast :: comments-workflowoperation …………. SKIPPED
    [INFO] Opencast :: composer-ffmpeg …………………… SKIPPED
    [INFO] Opencast :: composer-service-remote ……………. SKIPPED
    [INFO] Opencast :: inspection-workflowoperation ……….. SKIPPED
    [INFO] Opencast :: composer-workflowoperation …………. SKIPPED
    [INFO] Opencast :: oaipmh-persistence ………………… SKIPPED
    [INFO] Opencast :: conductor ………………………… SKIPPED
    [INFO] Opencast :: cover-image-api …………………… SKIPPED
    [INFO] Opencast :: cover-image-impl ………………….. SKIPPED
    [INFO] Opencast :: cover-image-remote ………………… SKIPPED
    [INFO] Opencast :: cover-image-workflowoperation ………. SKIPPED
    [INFO] Opencast :: crop-api …………………………. SKIPPED
    [INFO] Opencast :: crop-ffmpeg ………………………. SKIPPED
    [INFO] Opencast :: crop-remote ………………………. SKIPPED
    [INFO] Opencast :: crop-workflowoperation …………….. SKIPPED
    [INFO] Opencast :: db ………………………………. SKIPPED
    [INFO] Opencast :: dictionary-api ……………………. SKIPPED
    [INFO] Opencast :: dictionary-hunspell ……………….. SKIPPED
    [INFO] Opencast :: dictionary-none …………………… SKIPPED
    [INFO] Opencast :: dictionary-regexp …………………. SKIPPED
    [INFO] Opencast :: distribution-service-aws-s3-api …….. SKIPPED
    [INFO] Opencast :: distribution-service-aws-s3 ………… SKIPPED
    [INFO] Opencast :: distribution-service-aws-s3-remote ….. SKIPPED
    [INFO] Opencast :: distribution-service-download ………. SKIPPED
    [INFO] Opencast :: distribution-service-download-remote … SKIPPED
    [INFO] Opencast :: distribution-service-streaming-wowza … SKIPPED
    [INFO] Opencast :: distribution-service-streaming-remote .. SKIPPED
    [INFO] Opencast :: email-template-service-api …………. SKIPPED
    [INFO] Opencast :: email-template-service-impl ………… SKIPPED
    [INFO] Opencast :: engage-paella-player ………………. SKIPPED
    [INFO] Opencast :: engage-theodul-api ………………… SKIPPED
    [INFO] Opencast :: engage-theodul-core ……………….. SKIPPED
    [INFO] Opencast :: engage-theodul-plugin-archetype …….. SKIPPED
    [INFO] Opencast :: engage-theodul-plugin-controls ……… SKIPPED
    [INFO] Opencast :: engage-theodul-plugin-custom-mhConnection SKIPPED
    [INFO] Opencast :: engage-theodul-plugin-custom-notifications SKIPPED
    [INFO] Opencast :: engage-theodul-plugin-custom-usertracking SKIPPED
    [INFO] Opencast :: engage-theodul-plugin-custom-matomo …. SKIPPED
    [INFO] Opencast :: engage-theodul-plugin-description …… SKIPPED
    [INFO] Opencast :: engage-theodul-plugin-tab-description .. SKIPPED
    [INFO] Opencast :: engage-theodul-plugin-tab-shortcuts …. SKIPPED
    [INFO] Opencast :: engage-theodul-plugin-tab-slidetext …. SKIPPED
    [INFO] Opencast :: engage-theodul-plugin-tab-downloads …. SKIPPED
    [INFO] Opencast :: engage-theodul-plugin-timeline-statistics SKIPPED
    [INFO] Opencast :: engage-theodul-plugin-video-videojs …. SKIPPED
    [INFO] Opencast :: engage-ui ………………………… SKIPPED
    [INFO] Opencast :: execute-api ………………………. SKIPPED
    [INFO] Opencast :: execute-impl ……………………… SKIPPED
    [INFO] Opencast :: execute-remote ……………………. SKIPPED
    [INFO] Opencast :: execute-workflowoperation ………….. SKIPPED
    [INFO] Opencast :: external-api-index ………………… SKIPPED
    [INFO] Opencast :: external-api ……………………… SKIPPED
    [INFO] Opencast :: fileupload ……………………….. SKIPPED
    [INFO] Opencast :: hello-world-api …………………… SKIPPED
    [INFO] Opencast :: hello-world-impl ………………….. SKIPPED
    [INFO] Opencast :: adopter-statistics-api …………….. SKIPPED
    [INFO] Opencast :: adopter-statistics-impl ……………. SKIPPED
    [INFO] Opencast :: incident-workflowoperation …………. SKIPPED
    [INFO] Opencast :: ingest-download-service-api ………… SKIPPED
    [INFO] Opencast :: working-file-repository-service-api …. SKIPPED
    [INFO] Opencast :: ingest-download-service-impl ……….. SKIPPED
    [INFO] Opencast :: ingestdownloadservice-remote ……….. SKIPPED
    [INFO] Opencast :: working-file-repository-service-impl … SKIPPED
    [INFO] Opencast :: ingest-service-impl ……………….. SKIPPED
    [INFO] Opencast :: ingest-download-service-workflowoperation SKIPPED
    [INFO] Opencast :: inspection-service-ffmpeg ………….. SKIPPED
    [INFO] Opencast :: inspection-service-remote ………….. SKIPPED
    [INFO] Opencast :: statistics-writer-workflowoperation …. SKIPPED
    [INFO] Opencast :: live-schedule-api …………………. SKIPPED
    [INFO] Opencast :: live-schedule-impl ………………… SKIPPED
    [INFO] Opencast :: logging-workflowoperation ………….. SKIPPED
    [INFO] Opencast :: lti-service-api …………………… SKIPPED
    [INFO] Opencast :: lti ……………………………… SKIPPED
    [INFO] Opencast :: lti-service-remote ………………… SKIPPED
    [INFO] Opencast :: lti-service-impl ………………….. SKIPPED
    [INFO] Opencast :: mattermost-notification-workflowoperation SKIPPED
    [INFO] Opencast :: message-broker-impl ……………….. SKIPPED
    [INFO] Opencast :: metadata …………………………. SKIPPED
    [INFO] Opencast :: notification-workflowoperation ……… SKIPPED
    [INFO] Opencast :: oaipmh-api ……………………….. SKIPPED
    [INFO] Opencast :: oaipmh …………………………… SKIPPED
    [INFO] Opencast :: oaipmh-remote …………………….. SKIPPED
    [INFO] Opencast :: publication-service-configurable ……. SKIPPED
    [INFO] Opencast :: publication-service-configurable-remote SKIPPED
    [INFO] Opencast :: publication-service-oaipmh …………. SKIPPED
    [INFO] Opencast :: publication-service-oaipmh-remote …… SKIPPED
    [INFO] Opencast :: publication-service-youtube-remote ….. SKIPPED
    [INFO] Opencast :: publication-service-youtube-v3 ……… SKIPPED
    [INFO] Opencast :: runtime-info ……………………… SKIPPED
    [INFO] Opencast :: runtime-info-ui …………………… SKIPPED
    [INFO] Opencast :: runtime-info-ui-ng ………………… SKIPPED
    [INFO] Opencast :: scheduler-impl ……………………. SKIPPED
    [INFO] Opencast :: scheduler-remote ………………….. SKIPPED
    [INFO] Opencast :: schema …………………………… SKIPPED
    [INFO] Opencast :: search-service-feeds ………………. SKIPPED
    [INFO] Opencast :: search-service-impl ……………….. SKIPPED
    [INFO] Opencast :: search-service-remote ……………… SKIPPED
    [INFO] Opencast :: security-shibboleth ……………….. SKIPPED
    [INFO] Opencast :: security-aai ……………………… SKIPPED
    [INFO] Opencast :: security-cas-client-wrapper ………… SKIPPED
    [INFO] Opencast :: security-cas ……………………… SKIPPED
    [INFO] Opencast :: security-ldap …………………….. SKIPPED
    [INFO] Opencast :: security-lti ……………………… SKIPPED
    [INFO] Opencast :: series-service-remote ……………… SKIPPED
    [INFO] Opencast :: serviceregistry …………………… SKIPPED
    [INFO] Opencast :: silencedetection-api ………………. SKIPPED
    [INFO] Opencast :: silencedetection-impl ……………… SKIPPED
    [INFO] Opencast :: silencedetection-remote ……………. SKIPPED
    [INFO] Opencast :: smil-impl ………………………… SKIPPED
    [INFO] Opencast :: sox-api ………………………….. SKIPPED
    [INFO] Opencast :: sox-impl …………………………. SKIPPED
    [INFO] Opencast :: sox-remote ……………………….. SKIPPED
    [INFO] Opencast :: sox-workflowoperation ……………… SKIPPED
    [INFO] Opencast :: static …………………………… SKIPPED
    [INFO] Opencast :: static-file-service-impl …………… SKIPPED
    [INFO] Opencast :: statistics-export-service-impl ……… SKIPPED
    [INFO] Opencast :: statistics-service-impl ……………. SKIPPED
    [INFO] Opencast :: statistics-service-remote ………….. SKIPPED
    [INFO] Opencast :: statistics-provider-influx …………. SKIPPED
    [INFO] Opencast :: statistics-provider-random …………. SKIPPED
    [INFO] Opencast :: studio …………………………… SKIPPED
    [INFO] Opencast :: termination-state-api ……………… SKIPPED
    [INFO] Opencast :: termination-state-aws ……………… SKIPPED
    [INFO] Opencast :: termination-state-impl …………….. SKIPPED
    [INFO] Opencast :: textanalyzer-api ………………….. SKIPPED
    [INFO] Opencast :: textanalyzer-impl …………………. SKIPPED
    [INFO] Opencast :: textanalyzer-remote ……………….. SKIPPED
    [INFO] Opencast :: textanalyzer-workflowoperation ……… SKIPPED
    [INFO] Opencast :: textextractor-tesseract ……………. SKIPPED
    [INFO] Opencast :: themes-workflowoperation …………… SKIPPED
    [INFO] Opencast :: timelinepreviews-api ………………. SKIPPED
    [INFO] Opencast :: timelinepreviews-ffmpeg ……………. SKIPPED
    [INFO] Opencast :: timelinepreviews-remote ……………. SKIPPED
    [INFO] Opencast :: timelinepreviews-workflowoperation ….. SKIPPED
    [INFO] Opencast :: transcription-service-api ………….. SKIPPED
    [INFO] Opencast :: transcription-service-persistence …… SKIPPED
    [INFO] Opencast :: transcription-service-google-speech-impl SKIPPED
    [INFO] Opencast :: transcription-service-ibm-watson-impl .. SKIPPED
    [INFO] Opencast :: transcription-service-amberscript …… SKIPPED
    [INFO] Opencast :: transcription-service-workflowoperation SKIPPED
    [INFO] Opencast :: urlsigning-service-impl ……………. SKIPPED
    [INFO] Opencast :: urlsigning-verifier-service-api …….. SKIPPED
    [INFO] Opencast :: urlsigning-verifier-service-impl ……. SKIPPED
    [INFO] Opencast :: userdirectory-ldap ………………… SKIPPED
    [INFO] Opencast :: userdirectory-moodle ………………. SKIPPED
    [INFO] Opencast :: userdirectory-sakai ……………….. SKIPPED
    [INFO] Opencast :: userdirectory-brightspace ………….. SKIPPED
    [INFO] Opencast :: userdirectory-canvas ………………. SKIPPED
    [INFO] Opencast :: user-interface-configuration ……….. SKIPPED
    [INFO] Opencast :: usertracking-api ………………….. SKIPPED
    [INFO] Opencast :: usertracking-impl …………………. SKIPPED
    [INFO] Opencast :: videoeditor-api …………………… SKIPPED
    [INFO] Opencast :: videoeditor-ffmpeg-impl ……………. SKIPPED
    [INFO] Opencast :: videoeditor-remote ………………… SKIPPED
    [INFO] Opencast :: workflow-workflowoperation …………. SKIPPED
    [INFO] Opencast :: videoeditor-workflowoperation ………. SKIPPED
    [INFO] Opencast :: videogrid-service-api ……………… SKIPPED
    [INFO] Opencast :: videogrid-service-impl …………….. SKIPPED
    [INFO] Opencast :: videogrid-remote ………………….. SKIPPED
    [INFO] Opencast :: videogrid-workflowoperation ………… SKIPPED
    [INFO] Opencast :: videosegmenter-api ………………… SKIPPED
    [INFO] Opencast :: videosegmenter-ffmpeg ……………… SKIPPED
    [INFO] Opencast :: videosegmenter-remote ……………… SKIPPED
    [INFO] Opencast :: videosegmenter-workflowoperation ……. SKIPPED
    [INFO] Opencast :: waveform-api ……………………… SKIPPED
    [INFO] Opencast :: waveform-ffmpeg …………………… SKIPPED
    [INFO] Opencast :: waveform-remote …………………… SKIPPED
    [INFO] Opencast :: waveform-workflowoperation …………. SKIPPED
    [INFO] Opencast :: workflow-condition-parser ………….. SKIPPED
    [INFO] Opencast :: workflow-service-impl ……………… SKIPPED
    [INFO] Opencast :: workflow-service-remote ……………. SKIPPED
    [INFO] Opencast :: working-file-repository-service-remote . SKIPPED
    [INFO] Opencast :: workspace-impl ……………………. SKIPPED
    [INFO] Assemblies ………………………………….. SKIPPED
    [INFO] Assemblies // Apache Karaf Features ……………. SKIPPED
    [INFO] Assemblies // Distribution Admin ………………. SKIPPED
    [INFO] Assemblies // Distribution Admin/Presentation …… SKIPPED
    [INFO] Assemblies // Distribution All-In-One ………….. SKIPPED
    [INFO] Assemblies // Distribution Ingest ……………… SKIPPED
    [INFO] Assemblies // Distribution Presentation ………… SKIPPED
    [INFO] Assemblies // Distribution Worker ……………… SKIPPED
    [INFO] ————————————————————————
    [INFO] BUILD FAILURE
    [INFO] ————————————————————————
    [INFO] Total time: 02:53 min
    [INFO] Finished at: 2020-10-16T14:23:33+05:30
    [INFO] ————————————————————————
    [ERROR] Failed to execute goal com.github.eirslett:frontend-maven-plugin:1.7.6:install-node-and-npm (install node and npm) on project opencast-admin-ui-frontend: Could not download Node.js: Got error code 404 from the server. -> [Help 1]
    [ERROR]
    [ERROR] To see the full stack trace of the errors, re-run Maven with the -e switch.
    [ERROR] Re-run Maven using the -X switch to enable full debug logging.
    [ERROR]
    [ERROR] For more information about the errors and possible solutions, please read the following articles:
    [ERROR] [Help 1] http://cwiki.apache.org/confluence/display/MAVEN/MojoFailureException
    [ERROR]
    [ERROR] After correcting the problems, you can resume the build with the command
    [ERROR] mvn -rf :opencast-admin-ui-frontend

    please help me thanks

    please help me

    1. Arpit Avatar
      Arpit

      Hi
      I am getting same error.
      If you have a solution pls guide me.
      Thanks in advance

  8. Ignus Crous Avatar
    Ignus Crous

    Please help, not sure why i am getting this error?

    BUILD FAILURE
    [INFO] ————————————————————————
    [INFO] Total time: 01:33 min
    [INFO] Finished at: 2020-11-10T13:06:48Z
    [INFO] ————————————————————————
    [ERROR] Failed to execute goal com.github.eirslett:frontend-maven-plugin:1.7.6:bower (bower install) on project opencast-admin-ui: Failed to run task: ‘bower –allow-root install’ failed. org.apache.commons.exec.ExecuteException: Process exited with an error: 1 (Exit value: 1) -> [Help 1]
    [ERROR]
    [ERROR] To see the full stack trace of the errors, re-run Maven with the -e switch.
    [ERROR] Re-run Maven using the -X switch to enable full debug logging.
    [ERROR]
    [ERROR] For more information about the errors and possible solutions, please read the following articles:
    [ERROR] [Help 1] http://cwiki.apache.org/confluence/display/MAVEN/MojoFailureException
    [ERROR]
    [ERROR] After correcting the problems, you can resume the build with the command
    [ERROR] mvn -rf :opencast-admin-ui

  9. Sebastian Avatar
    Sebastian

    Hi
    I am new to opencast.

    Followed your instruction and Installed opencast successfully in ubuntu18.

    When we create users, user unable to login and user got the following error.
    “Your user does not have access to this resource”

    Can anyone please tell what is the reason for this error?

    Also please give the details for differ roles in opencast

Leave a Reply to samantha herath Cancel reply

Your email address will not be published. Required fields are marked *

This site uses Akismet to reduce spam. Learn how your comment data is processed.