
This brief tutorial shows students and new users how to install Jellyfin on Ubuntu 20.04 | 18.04.
Jellyfin is an open-source media stream allowing users to organize and stream their content from their server without restrictions or fees. It is similar to popular media servers like Netflix or Plex, but unlike them, Jellyfin is completely free, open-source, and customizable.
Installing Jellyfin on Ubuntu Linux provides users with a reliable, secure, and flexible media streaming solution. Ubuntu is a popular Linux distribution that offers a stable and secure platform for running servers.
Installing Jellyfin on Ubuntu allows users to set up a home media server easily and stream their content to any device. Additionally, Ubuntu provides a user-friendly interface and a vast community of developers and users who can help with any issues that may arise during the installation or use of Jellyfin.
Installing Jellyfin on Ubuntu is a great way to enjoy your media content on your own terms and without limitations.
To get started setting up Jellyfin, follow the steps below:
Prepare Ubuntu
Before installing Jellyfin, run the commands below to install these packages in Ubuntu.
Install HTTPS transport for APT and enable the Universe repository to obtain all the FFMpeg dependencies.
sudo apt update
sudo apt install apt-transport-https
sudo add-apt-repository universe
Add Jellyfin repository
After installing the packages above, run the commands below to add the Jellyfin repository to Ubuntu.
First, run the commands below to import the GPG signing key for the repository.
wget -O - https://repo.jellyfin.org/ubuntu/jellyfin_team.gpg.key | sudo apt-key add -
Then, run the commands below to create a repository file for Jellyfin.
echo "deb [arch=$( dpkg --print-architecture )] https://repo.jellyfin.org/ubuntu $( lsb_release -c -s ) main" | sudo tee /etc/apt/sources.list.d/jellyfin.list
When you’re done, continue below.
Install Jellyfin
At this point, you should be ready to install Jellyfin. Run the commands below to update and install Jellyfin.
sudo apt update
sudo apt install jellyfin
After installing the above, the commands below can start and stop, enabling Jellyfin to start when your computer boots automatically.
sudo systemctl start jellyfin
sudo systemctl stop jellyfin
sudo systemctl enable jellyfin
To validate that Jellyfin is installed and working, run the commands below to see its status.
sudo systemctl status jellyfin
That should display similar lines as shown below:
● jellyfin.service - Jellyfin Media Server
     Loaded: loaded (/lib/systemd/system/jellyfin.service; enabled; vendor preset: enabled)
    Drop-In: /etc/systemd/system/jellyfin.service.d
             └─jellyfin.service.conf
     Active: active (running) since Mon 2021-03-01 16:54:25 CST; 1min 26s ago
   Main PID: 3485 (jellyfin)
      Tasks: 20 (limit: 4654)
     Memory: 85.4M
     CGroup: /system.slice/jellyfin.service
             └─3485 /usr/bin/jellyfin --webdir=/usr/share/jellyfin/web --restartpath=/usr/lib/jellyfin/restart>

Mar 01 16:54:32 ubuntu2004 jellyfin[3485]: [16:54:32] [INF] Registering publisher for urn:schemas-upnp-org:dev>
Finally, open your browser and browse to the server hostname or IP address, followed by port #8096.
http://localhost:8096
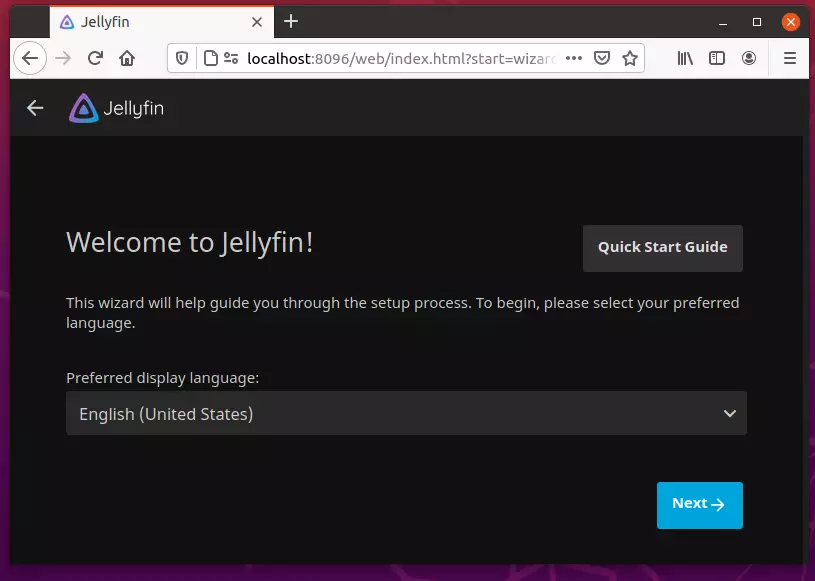
That will open the Jellyfin portal, where you can set up your account and manage your media content.
The wizard will help guide you through the setup process. To begin, you’ll need to select your preferred language.
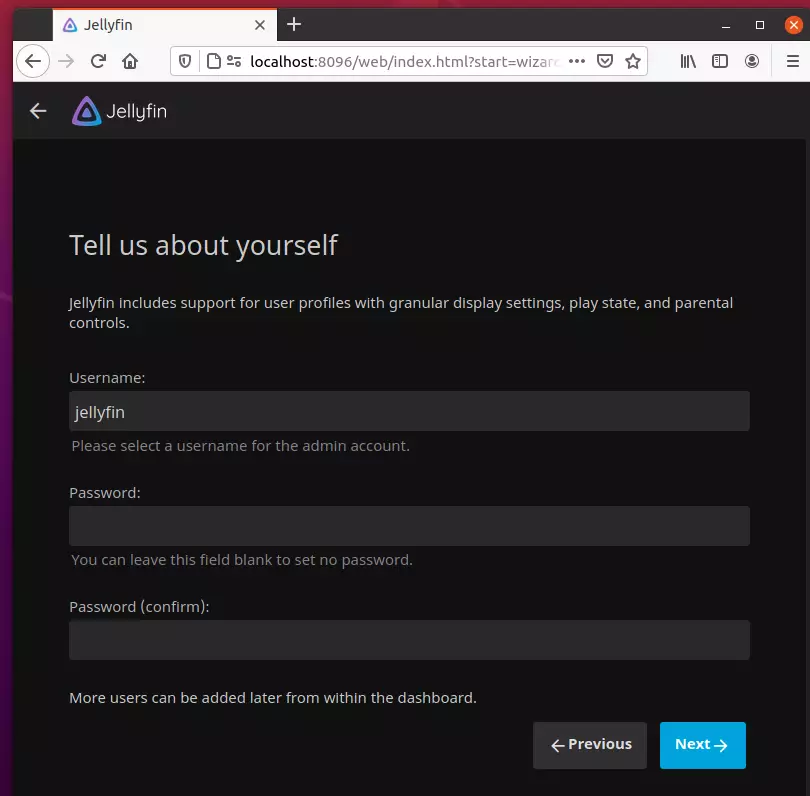
Jellyfin supports user profiles with granular display settings, play state, and parental controls.
After that, begin adding the media library you want to stream.
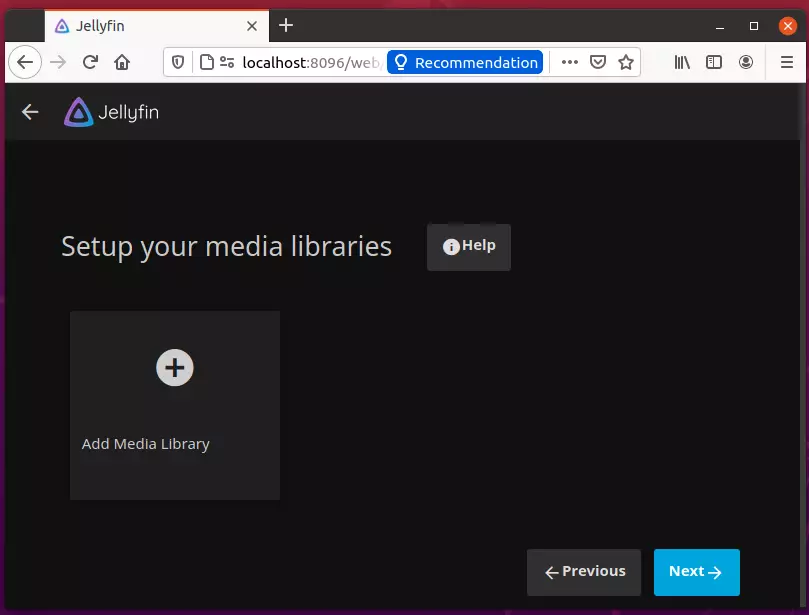
That’s it!
Conclusion:
This post showed you how to install the Jellyfin media server on Ubuntu 20.04 | 18.04. If you find any error above, please use the comment form below to report.

Leave a Reply