

This post shows students and new users how to install the GlassFish JAVA application server on Ubuntu Linux. GlassFish is an accessible, open-source server for deploying Java-based applications.
GlassFish allows developers to build and publish JAVA applications at scale with ease. It includes a complete administration console, clustering support, and other developer and production-focused tools and features.
The glassFish project is now supported and owned by Oracle Corporation. Oracle has licensing terms that you may want to read carefully before using GlassFish at your business or enterprise.
Below, we will show you how to install and configure GlassFish on Ubuntu Linux.
How to install the GlassFish JAVA application server on Ubuntu Linux
As mentioned above, GlassFish is an accessible, open-source server for deploying JAVA-based applications so that developers can build and publish applications quickly.
Below is how to install it on Ubuntu Linux.
To install GlassFish, you must first install Java. The open-source Java should work great with GlassFish.
Run the commands below to install OpenJDK on Ubuntu Linux. This will install the current stable version of OpenJDK for Ubuntu Linux.
sudo apt update
sudo apt install default-jdk
To check the version of Java installed, run the commands below:
java --version
That should output similar lines as shown below:
openjdk 11.0.15 2022-04-19
OpenJDK Runtime Environment (build 11.0.15+10-Ubuntu-0ubuntu0.20.04.1)
OpenJDK 64-Bit Server VM (build 11.0.15+10-Ubuntu-0ubuntu0.20.04.1, mixed mode, sharing)
Once Java is installed, continue below to download GlassFish and install it.
Now that JAVA is installed, run the commands below to download and extract GlassFish on Ubuntu Linux.
wget https://download.eclipse.org/ee4j/glassfish/glassfish-6.1.0.zip
sudo unzip glassfish-6.1.0.zip -d /opt/
Next, create the GlassFish systemd daemon file to manage the GlassFish service. To do that, run the commands below to create a glassfish file. Service.
sudo nano /usr/lib/systemd/system/glassfish.service
Then copy and paste the lines below into the file and save.
[Unit]
Description = GlassFish Server v6.1.0
After = syslog.target network.target

[Service]
User = root
ExecStart = /usr/bin/java -jar /opt/glassfish6/glassfish/lib/client/appserver-cli.jar start-domain
ExecStop = /usr/bin/java -jar /opt/glassfish6/glassfish/lib/client/appserver-cli.jar stop-domain
ExecReload = /usr/bin/java -jar /opt/glassfish6/glassfish/lib/client/appserver-cli.jar restart-domain
Type = forking

[Install]
WantedBy = multi-user.target
Once the file is created, run the commands below to reload the systemd daemon by running the commands below.
sudo systemctl daemon-reload
You should be able to start and enable the GlassFish service using the commands below.
sudo systemctl start glassfish
sudo systemctl enable glassfish
To see if GlassFish is running, run the commands below.
sudo systemctl status glassfish
After running the status command above, you should see similar lines like the ones below:
● glassfish.service - GlassFish Server v6.1.0
     Loaded: loaded (/lib/systemd/system/glassfish.service; enabled; vendor preset: enabled)
     Active: active (running) since Mon 2022-05-30 17:41:40 CDT; 12s ago
   Main PID: 5124 (java)
      Tasks: 92 (limit: 4628)
     Memory: 306.4M
     CGroup: /system.slice/glassfish.service
             └─5124 /usr/lib/jvm/java-11-openjdk-amd64/bin/java -cp /opt/glassfish6/glassfish/modules/glassfish.jar -XX:+UnlockDiagnosticVMOptions ->

May 30 17:41:27 ubuntu2004 systemd[1]: Starting GlassFish Server v6.1.0...
May 30 17:41:40 ubuntu2004 java[5111]: Waiting for domain1 to start ...........
May 30 17:41:40 ubuntu2004 java[5111]: Successfully started the domain : domain1
By default, GlassFish administrative user has no password set up. Therefore, you will probably want to create one for the admin user.
Run the commands below to do that.
sudo /opt/glassfish6/bin/asadmin --port 4848 change-admin-password
It would be best if you were prompted to type and confirm a new password for the admin account.
Enter admin user name [default: admin]>
Enter the admin password> [ENTER]
Enter the new admin password> [type new password]
Enter the new admin password again> [retype password]

Command change-admin-password executed successfully.
Once the password is created, you probably should run the commands below to secure the account.
sudo /opt/glassfish6/bin/asadmin --port 4848 enable-secure-admin
You should be prompted with the following prompts:
Enter admin user name>  admin
Enter admin password for user "admin">
You must restart all running servers for the change in secure admin to take effect.
Command enable-secure-admin executed successfully.
After that, restart the GlassFish service.
sudo systemctl restart glassfish
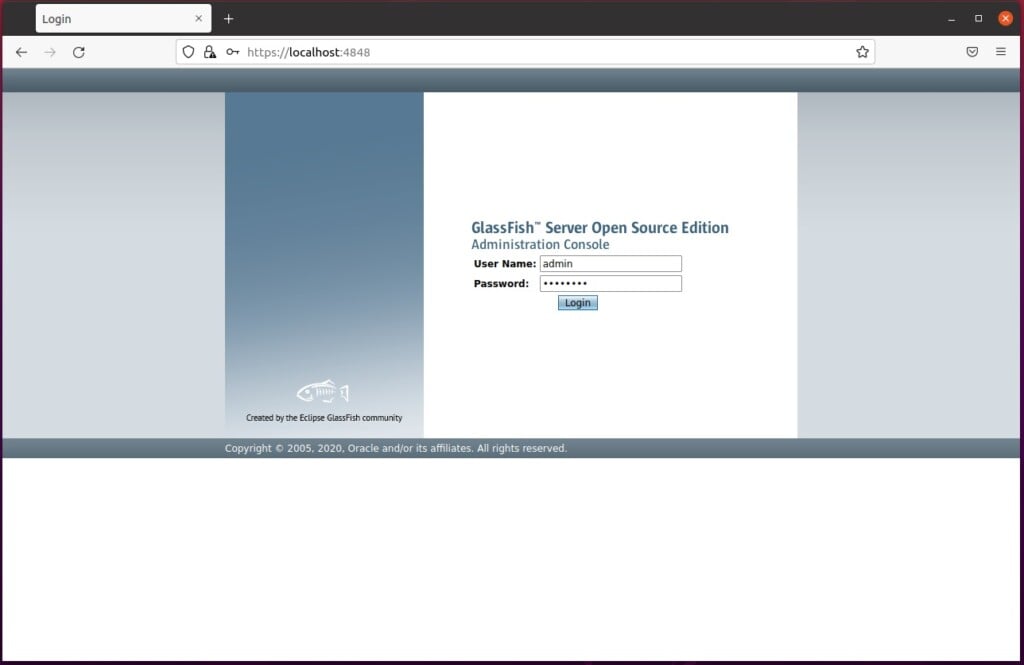
Now open your browser and browse to the server hostname or IP address followed by port 4848.
https://localhost:4848
You will be greeted with the GlassFish admin console. Type in the admin username and password created above to sign in.
Once you have successfully signed in, you should see a screen like the one below.
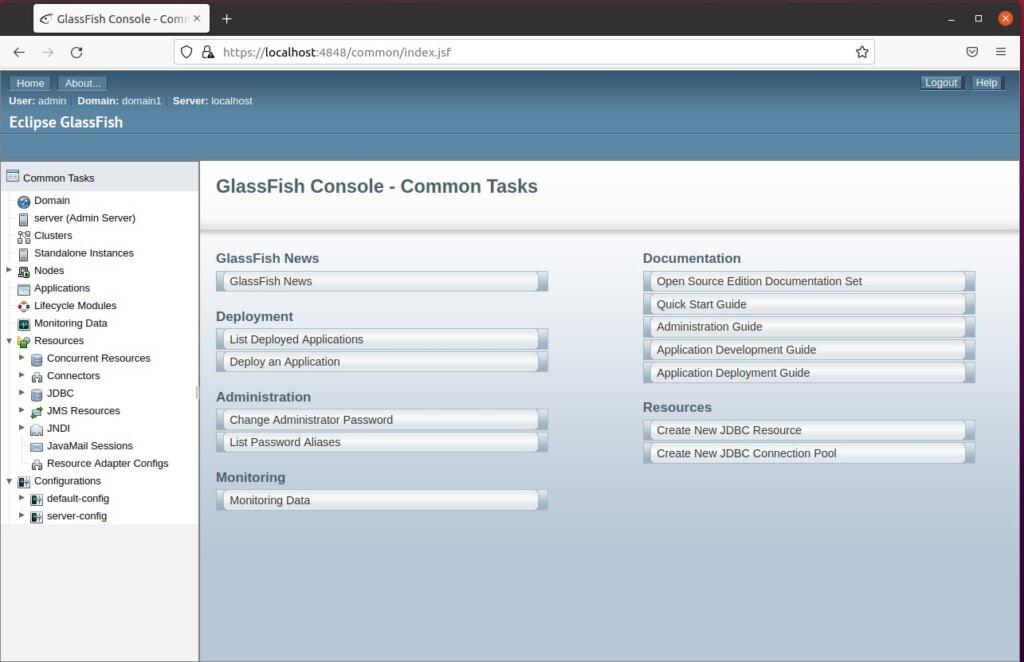
That should be it.
If you want to run a reverse proxy server to use a domain name or more advanced settings, read the posts below to learn how to set up a reverse proxy server with either Nginx or Apache to use with GlassFish.
Conclusion:
- GlassFish is a powerful and accessible open-source server Oracle Corporation supports for deploying Java-based applications.
- Following the detailed installation guide, developers can easily build and publish Java applications at scale on Ubuntu Linux.
- It offers a complete administration console, clustering support, and other tools and features for development and production environments.
- Users should ensure they carefully review the licensing terms provided by Oracle Corporation when considering the use of GlassFish for business or enterprise purposes.
- For more advanced settings and domain name usage, users can explore setting up a reverse proxy server with either Nginx or Apache to use with GlassFish.


Leave a Reply