
This article explains installing Gitea, a self-hosted Git service, on Ubuntu 24.04.
Gitea is a lightweight, self-hosted version control system with a web interface for managing Git repositories. It is designed for easy installation and maintenance, making it a popular choice for developers looking to host their code repositories without the complexity of more extensive solutions like GitHub or GitLab.
Gitea features a clean and intuitive web interface, similar to GitHub, making it a user-friendly platform for managing repositories.
Gitea is more than just a version control system; it is a platform that enhances effective collaboration. Features like issue tracking, pull requests, code reviews, and wikis enable teams to work together seamlessly.
Set up Ubuntu
Gitea requires a Git service, so you need Git installed. Additionally, you must create an account to run Gitea services on your machine.
To get all these done, run the command below to install Git.
sudo apt update
sudo apt install git
Next, create a Git account to run Gitea by executing the command below.
sudo adduser --system --group --disabled-password --shell /bin/bash --home /home/git --gecos 'Git Version Control' git
If the command above was successful, you should see a similar output.
info: Selecting GID from range 100 to 999 ...
info: Adding system user `git' (UID 122) ...
info: Adding new group `git' (GID 124) ...
info: Adding new user `git' (UID 122) with group `git' ...
info: Creating home directory `/home/git' ...
Install MariaDB
Gitea needs a database server to store its content. A good open-source database server to use is MariaDB.
Run the command below to install MariaDB.
sudo apt install mariadb-server
After installing MariaDB, create an empty database for Gitea.
Run the command below to log on to the MariaDB database server.
sudo mariadb
Then, run the command below to change the [GLOBAL innodeb_file_per_table] to On.
SET GLOBAL innodb_file_per_table = ON;
Next, create a Gitea database called giteadb
CREATE DATABASE giteadb;
Then, create a database user called giteauser with a new password
CREATE USER 'giteauser'@'localhost' IDENTIFIED BY 'Type_new_password_here';
After that, run the command below to grant the user full access to the database.
GRANT ALL ON giteadb.* TO 'giteauser'@'localhost' WITH GRANT OPTION;
Next, run the commands below to update the database character set.
ALTER DATABASE giteadb CHARACTER SET = utf8mb4 COLLATE utf8mb4_unicode_ci;
Finally, save your changes and exit.
FLUSH PRIVILEGES;
EXIT;
Download and install Gitea
After setting up Ubuntu and installing MariaDB with a database, you can download the Gitea file for installation.
To download the latest files, use the link below.
https://github.com/go-gitea/gitea/releases
Run the commands below to download the Gitea file. Replace the version number with the latest.
cd /tmp
wget https://github.com/go-gitea/gitea/releases/download/v1.23.5/gitea-1.23.5-darwin-10.12-amd64
Next, move the downloaded files to the [/var/lib/] directory and adjust the directory’s permissions as needed.
sudo mv gitea-1.23.5-darwin-10.12-amd64 /usr/local/bin/gitea
sudo chmod +x /usr/local/bin/gitea
sudo chown git:git /usr/local/bin/gitea
First, create the necessary folders for Gitea and update their permissions using the commands below.
sudo mkdir -p /var/lib/gitea/{custom,data,indexers,public,log}
sudo chown git:git /var/lib/gitea/{data,indexers,log}
sudo chmod 750 /var/lib/gitea/{data,indexers,log}
sudo mkdir /etc/gitea
sudo chown git:git /etc/gitea
sudo chmod 770 /etc/gitea
After that, run the commands below to create the Gitea systemd script.
sudo nano /etc/systemd/system/gitea.service
Then copy and paste the content below into the file and save it.
[Unit]
Description=Gitea (Git with a cup of tea)
After=syslog.target
After=network.target

[Service]
RestartSec=2s
Type=simple
User=git
Group=git
WorkingDirectory=/var/lib/gitea/

ExecStart=/usr/local/bin/gitea web --config /etc/gitea/app.ini
Restart=always
Environment=USER=git HOME=/home/git GITEA_WORK_DIR=/var/lib/gitea


[Install]
WantedBy=multi-user.target
When all is done, reload the systemd and start Gitea services.
sudo systemctl daemon-reload
sudo systemctl enable gitea
sudo systemctl start gitea
To check Gitea’s status, run the commands below:
sudo systemctl status gitea
You should see a similar message below:
gitea.service - Gitea (Git with a cup of tea)
     Loaded: loaded (/etc/systemd/system/gitea.service; enabled; preset: enable>
     Active: active (running) since Wed 2025-03-19 12:56:30 CDT; 1ms ago
   Main PID: 5576 ((gitea))
      Tasks: 1 (limit: 4551)
     Memory: 0B (peak: 0B)
        CPU: 0
     CGroup: /system.slice/gitea.service
             └─5576 "(gitea)"
Gitea should be installed and ready to configure.
Open your browser and browse to the server hostname or IP address followed by port 3000.
http://localhost:3000/install
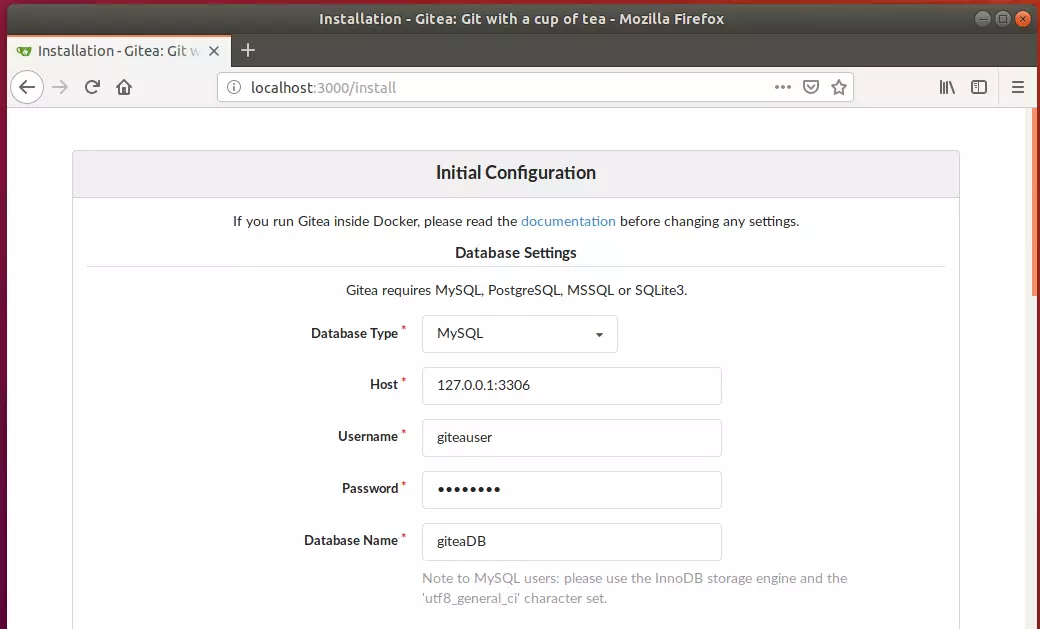
You should see Gitea set up the initial web portal.
Type in the database connection info and continue with the setup.
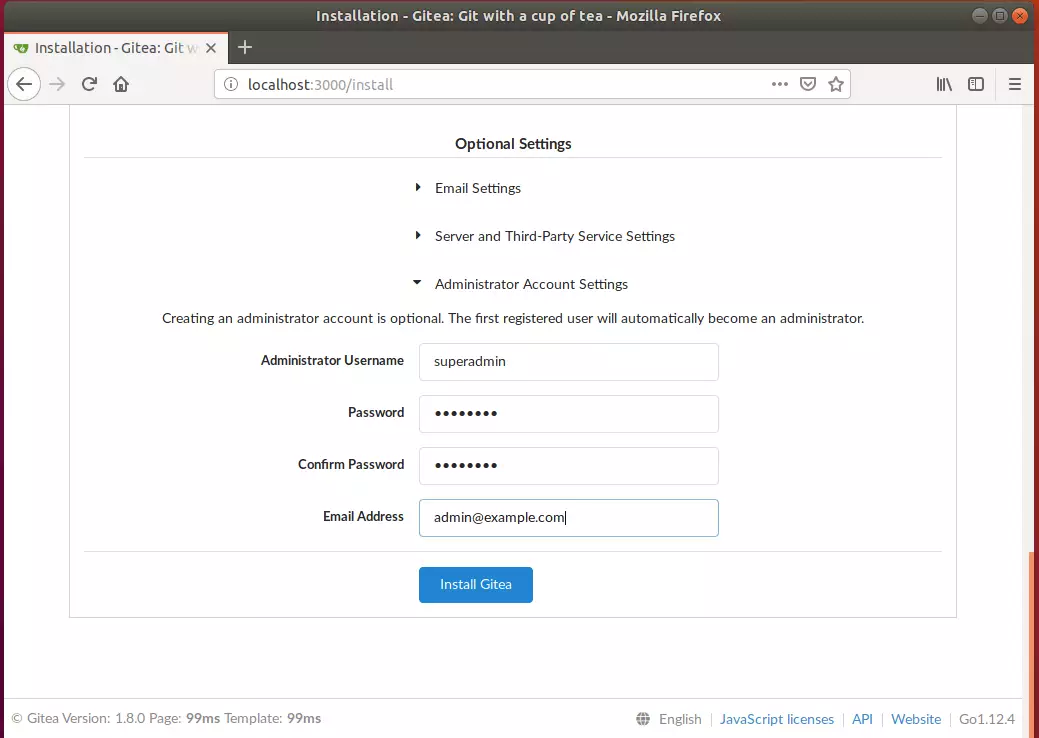
Set up the backend admin account as well.
Login and enjoy!
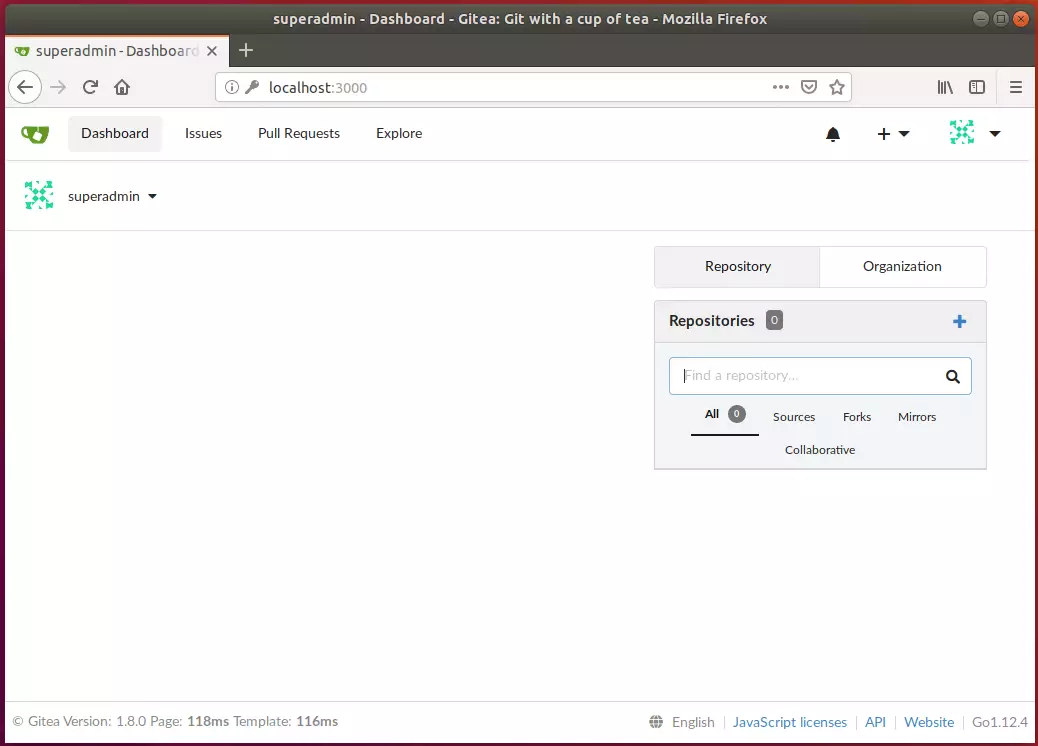
After the installation, you should be able to log on and use Gitea as a git service.
Conclusion:
By following this tutorial, you have successfully installed Gitea on your Ubuntu server. Here are the key takeaways:
- Gitea provides a lightweight and efficient self-hosted Git service, offering you full control over your repositories.
- The installation process is straightforward, requiring only a few simple commands.
- With Gitea, you benefit from robust project management tools and rich features, including issue tracking and collaboration capabilities.
- Securing your MariaDB installation and configuring Gitea properly enhances the safety and functionality of your Git service.
- You can now manage your projects effectively and enjoy the conveniences of a version-controlled environment.
Start leveraging Gitea to streamline your development workflow!
Leave a Reply