
This brief tutorial shows students and new users how to install Rancher on Ubuntu 18.04 | 16.04.
Rancher is a free and open-source Kubernetes management software stack that helps developers and users efficiently manage containers. Rancher has an enormous community of users and allows you to build and launch Kubernetes compute nodes directly from the Rancher web interface.
Rancher centrally manages your on-premise or hybrid clusters to ensure security and accelerate the transformation, allowing you to deploy and manage your stacks.
Developers and businesses looking for tools to deploy Kubernetes nodes quickly will find Rancher helpful.
For more about Rancher, please check its homepage.
To get started with installing and configuring Rancher, please follow the steps below:
Install Docker on Ubuntu
Since Rancher is a Docker-based tool, you must first install Docker. By default, the latest stable version of Docker is not available on the Ubuntu 16.04 default repository. So, you will need to add Docker’s repository to Ubuntu.
Run the commands below to install the below tools to add Docker’s repository.
sudo apt update
sudo apt install apt-transport-https ca-certificates curl software-properties-common
Next, add the Docker office repository key by running the commands below:
curl -fsSL https://download.docker.com/linux/ubuntu/gpg | sudo apt-key add -
If you wish to verify the above repository, simply run the commands below:
sudo apt-key fingerprint 0EBFCD88
The commands above should output similar lines as shown below:
Output:
pub   rsa4096 2017-02-22 [SCEA]
      9DC8 5822 9FC7 DD38 854A  E2D8 8D81 803C 0EBF CD88
uid           [ unknown] Docker Release (CE deb) <[email protected]>
sub   rsa4096 2017-02-22 [S]
Now that the official GPG key is installed, run the commands below to add its stable repository to Ubuntu. To add the nightly or test repository, add the word nightly or test (or both) after the word stable in the commands below.
sudo add-apt-repository "deb [arch=amd64] https://download.docker.com/linux/ubuntu $(lsb_release -cs) stable"
At this point, Docker’s official GPG and repository should be installed on Ubuntu.
For those who currently have older versions of Docker, run the commands below to remove them.
sudo apt remove docker docker-engine docker.io containerd runc
When you have removed all previous versions of Docker, run the commands below to install the latest and current stable version of Docker.
To install a specific version of Docker, run the apt-cache command. Then select the version to install.
apt-cache madison docker-ce

Output:
docker-ce | 5:18.09.5~3-0~ubuntu-bionic | https://download.docker.com/linux/ubuntu bionic/stable amd64 Packages
docker-ce | 5:18.09.4~3-0~ubuntu-bionic | https://download.docker.com/linux/ubuntu bionic/stable amd64 Packages
docker-ce | 5:18.09.3~3-0~ubuntu-bionic | https://download.docker.com/linux/ubuntu bionic/stable amd64 Packages
docker-ce | 5:18.09.2~3-0~ubuntu-bionic | https://download.docker.com/linux/ubuntu bionic/stable amd64 Packages
.
Now to install a specific version, run the commands below with the version you wish to install
sudo apt install docker-ce=5:19.03.5~3-0~ubuntu-bionic docker-ce-cli=5:19.03.5~3-0~ubuntu-bionic containerd.io
If you want the latest version without specifying the above, run the commands below. The command below will always install the highest possible version.
sudo apt update
sudo apt install docker-ce docker-ce-cli containerd.io
That should install Docker software on Ubuntu.
Once the Docker is installed, check the status of Docker with the following command:
sudo systemctl status docker
The above commands should output similar lines as shown below:
docker.service - Docker Application Container Engine
   Loaded: loaded (/lib/systemd/system/docker.service; enabled; vendor preset: enabled)
   Active: active (running) since Mon 2020-02-03 21:24:18 CST; 43s ago
     Docs: https://docs.docker.com
 Main PID: 4780 (dockerd)
    Tasks: 10
   CGroup: /system.slice/docker.service
           └─4780 /usr/bin/dockerd -H fd:// --containerd=/run/containerd/containerd.sock

Feb 03 21:24:18 ubuntu1804 dockerd[4780]: time="2020-02-03T21:24:18.017323352-06:00" level=warning msg="Your kernel does not support cgroup rt runtime"
Feb 03 21:24:18 ubuntu1804 dockerd[4780]: time="2020-02-03T21:24:18.017409229-06:00" level=warning msg="Your kernel does not support cgroup blkio weight"
Feb 03 21:24:18 ubuntu1804 dockerd[4780]: time="2020-02-03T21:24:18.017498784-06:00"
Install Rancher
Now that Docker is installed, you can install Rancher simply by running the commands below.
sudo docker run -d --restart=unless-stopped -p 8080:8080 rancher/server:stable
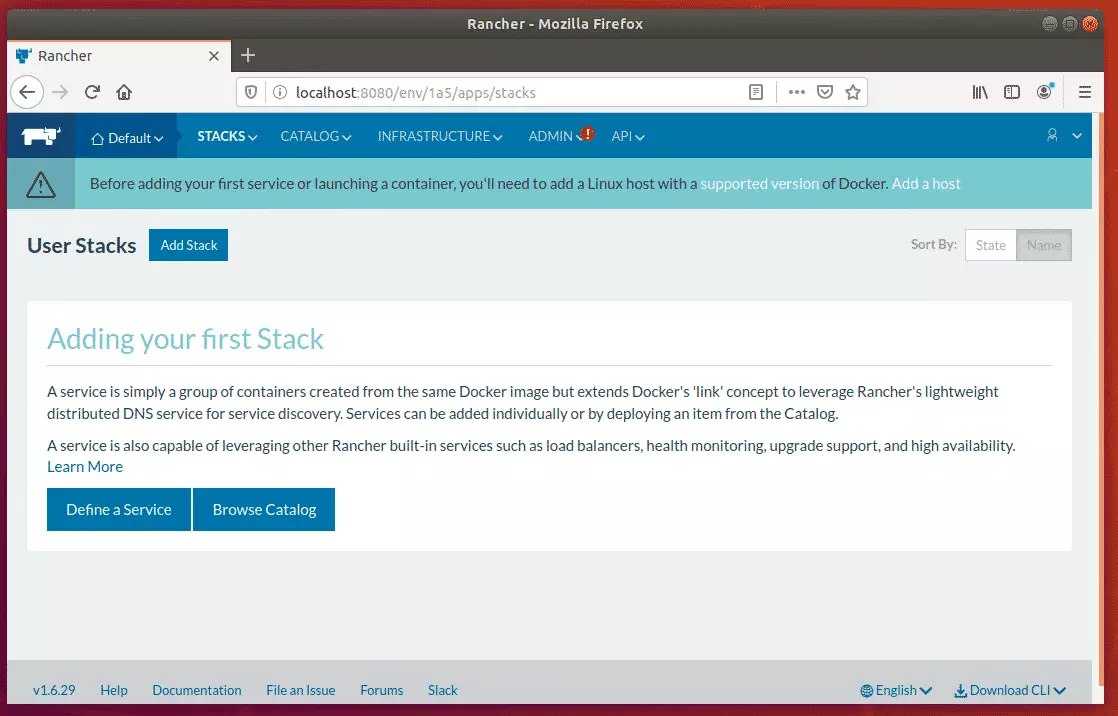
Once the Rancher is installed, you can access its portal via the server IP address or hostname followed by port 8080.
Configure Rancher
Now, open your web browser and type the URL http://localhost:8080.
When you first access Rancher’s portal, you will not be prompted for a username or password. To enhance its security, you should enable access restriction.
Rancher supports many access controls, including Active Directory, Azure AD, Github, OpenLDAP, SAML, and Local Authentication.
To configure Rancher local authentication, click on the ADMIN menu and click on Access Control. You should see the following page:
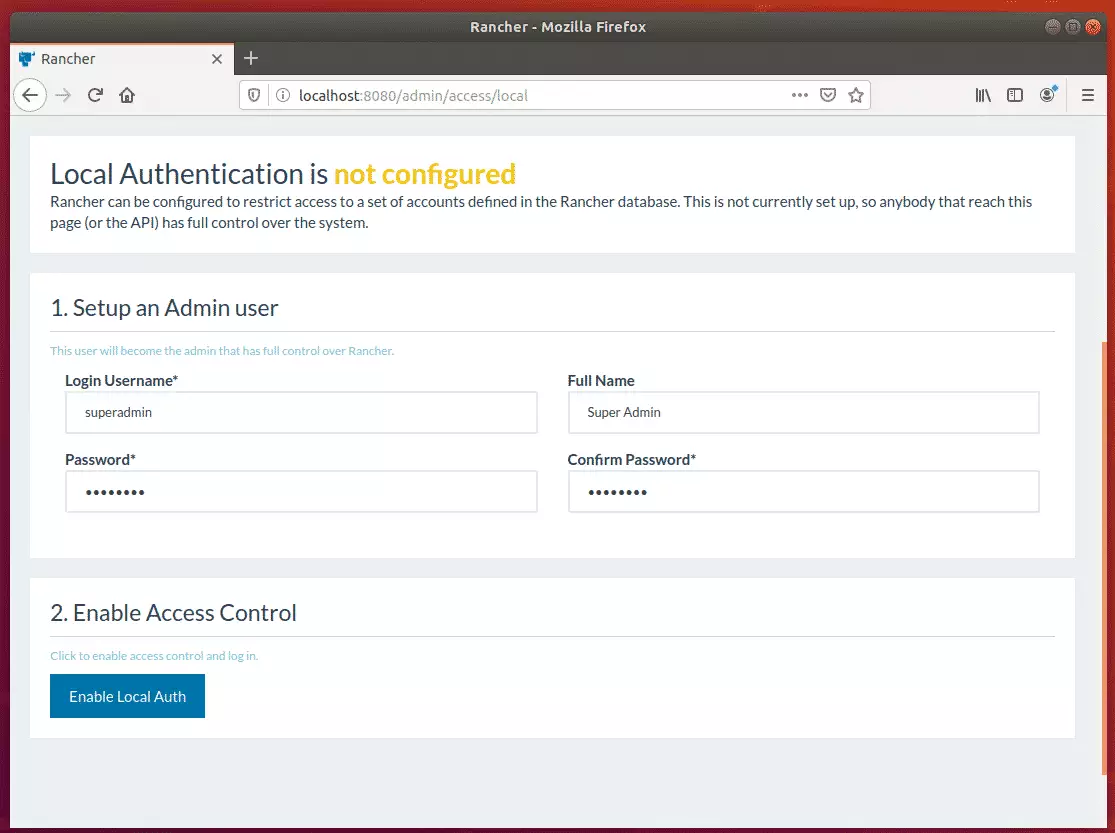
On the access control page, you must provide an admin username and password and click the Enable Local Auth button.
After that, local authentication should be enabled and access restricted to only accounts created on the system.
From there, you can begin to configure Rancher to suit your environment.
Conclusion
This post showed you how to install Rancher on Ubuntu 18.04 | 16.04. If you find any errors above, please use the form below to report them.
Thanks,
You may also like the post below:
Leave a Reply