
This brief tutorial shows students and new users how to turn on or off Remote Assistance Connection in Windows 10.
The Windows remote assistance connection feature allows someone you trust, a technical person, or a family member or friend to connect to your computer and help resolve issues.
This feature is enabled by default and could be a security risk in some environments. Keeping connections open to everyone from anywhere might not be the best way to run a secure environment.
Disabling Remote Assistance Connection in Windows can be beneficial in terms of security. This feature allows someone you trust, a technical person, or a family member or friend to connect to your computer and help resolve issues remotely.
However, enabling this feature can be a security risk in some environments. Keeping connections open to everyone from anywhere might not be the best way to run a secure environment. Hence, some Windows users might want to enable it temporarily to help friends, and others connect to troubleshoot and fix problems, disabling or turning it off when not in use.
To get started with turning off the remote assistance connection in Windows, follow the steps below:
Disable from Windows Settings
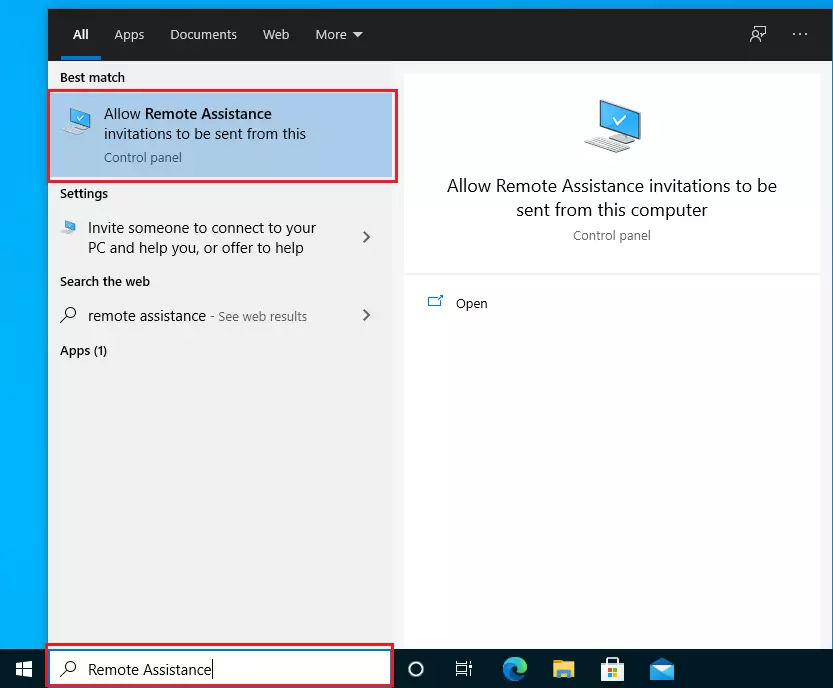
One way to turn the Remote Assistance Connection on or off is via the Windows System settings page. One can use the search box at the bottom left and type Remote Assistance, as shown in the image below. Then select and open.
Or you can type the commands below into the search box or Run the command box.
SystemPropertiesRemote
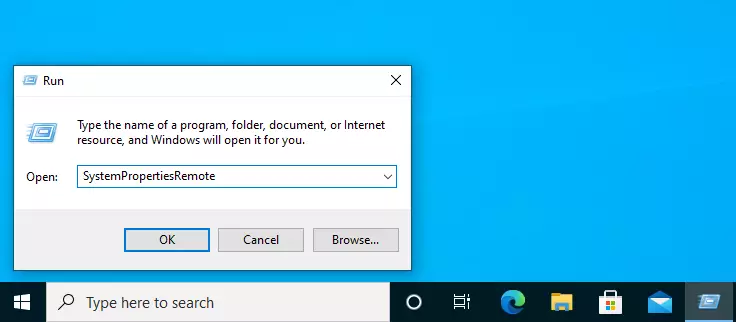
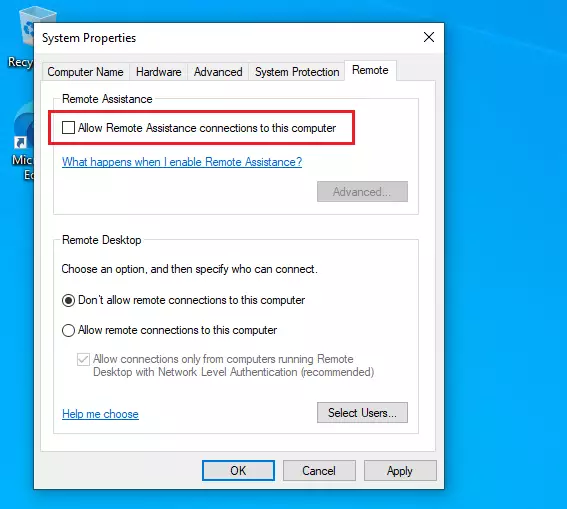
This will open the Windows System Properties window.
Uncheck the box under Remote Assistance to disable. If you want to enable it, check the box.
Disable from the Command line
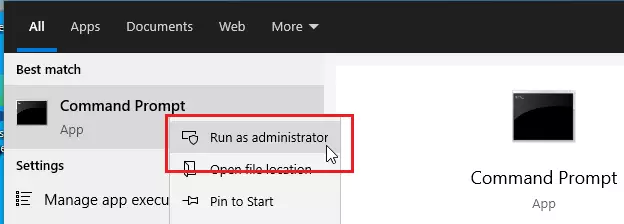
Those comfortable with the Windows command terminal can simply run the commands below to disable or enable Remote Assistance.
Open Windows Command Prompt as administrator. This runs the commands below:
Disable Remote Assistance:
netsh advfirewall firewall set rule group="Remote Assistance" new enable=no
Enable Remote Assistance:
netsh advfirewall firewall set rule group="Remote Assistance" new enable=yes
Disable via Windows Registry
Another way to disable or enable it is via the Windows registry. Open the Windows comment prompt as administrator, then run the commands below to turn Windows Remote Assistance on or off
Disable:
reg add "HKLM\System\CurrentControlSet\Control\Remote Assistance" /v "fAllowFullControl" /t REG_DWORD /d "0" /f
Enable:
reg add "HKLM\System\CurrentControlSet\Control\Remote Assistance" /v "fAllowFullControl" /t REG_DWORD /d "1" /f
That should do it!
Conclusion:
- Remote Assistance in Windows 10 is a useful feature for troubleshooting.
- It is enabled by default, but can pose security risks in certain environments.
- Users can disable Remote Assistance to enhance security when not in use.
- There are multiple methods to enable or disable this feature: through Windows Settings, Command Prompt, or Windows Registry.
- Temporarily enabling Remote Assistance can aid in resolving issues quickly with trusted individuals.


Leave a Reply