
WordPress, the most popular content management system (CMS), can be configured in many ways on many different platforms. If you’re hosting WordPress on a dedicated server with root access, you can customize the WordPress environment for maximum performance.
If you’re hosting WordPress on a shared platform, you’re usually limited by how the hosting provider’s systems are configured.
This brief tutorial shows you how to resolve this frequent error when running WordPress on some platforms:
‘Fatal error: Maximum execution time of 30 seconds exceeded.’
The error above mainly occurs when updating a WordPress plugin or theme. It happens when a PHP code in WordPress takes a long time to run and reaches the maximum time limit set on the server.
This can be configured in a PHP configuration file or within WordPress configuration.
By default, the maximum execution time is 30 – 60 seconds after PHP is installed. Sometimes, updating and uploading themes and plugins in WordPress takes a long time.
If it takes longer than 30 seconds, the PHP process will fail and display that error. Below is how to resolve this:
Hosting WordPress on a Dedicated (Ubuntu) Server
If you’re hosting WordPress on a dedicated server with root access via SSH, you simply run the commands below to open the PHP main configuration file.
First, determine when PHP is loaded from.
A simple way to find where the PHP default configurations file is stored is to run the command below.
php --ini
When you run the command above, you’ll see a list of locations for the PHP module configuration when you run the command aboveions. The main file you’re looking for is the Loaded Configuration File. This is the default configuration file that is loaded each time PHP runs.
Configuration File (php.ini) Path: /etc/php/7.2/cli
Loaded Configuration File: /etc/php/7.2/cli/php.ini
Scan for additional .ini files in: /etc/php/7.2/cli/conf.d
Additional .ini files parsed: /etc/php/7.2/cli/conf.d/10-mysqlnd.ini,
Now that you know, simply run the commands below to open PHP default configuration files. (Apache2, Nginx, and CLI)
sudo nano /etc/php/7.2/cli/php.ini
sudo nano /etc/php/7.2/apache2/php.ini
sudo nano /etc/php/7.2/nginx/php.ini
Then, use the down arrow key to scroll down the file and modify these highlighted lines. You should see the section that reads “PHP Limits” below; you’ll also find the PHP default file maximum upload size.
;PHP Limits
;
max_execution_time = 600
max_input_time = 900
memory_limit = 256M
post_max_size = 32M
;
;
;;;;;;;;;;;;;;;;
; File Uploads ;
;;;;;;;;;;;;;;;;
; Whether to allow HTTP file uploads.
; http://php.net/file-uploads
file_uploads = On
; Temporary directory for HTTP uploaded files (will use system default if not
; specified).
; http://php.net/upload-tmp-dir
;upload_tmp_dir =
; Maximum allowed size for uploaded files.
; http://php.net/upload-max-filesize
upload_max_filesize = 100M
When you’re done changing the lines to suit your environment, save and exit. Then restart your webserver and PHP.
sudo systemctl reload apache2.service
sudo systemctl reload nginx.service
sudo systemctl reload php7.2-fpm.service
Each line above works with Apache2, Nginx, and Nginx with PHP-FPM.
Shared Hosting Environment
If you’re on a shared hosting environment with web-based access to your files from a hosting tool, then use the steps below to configure.
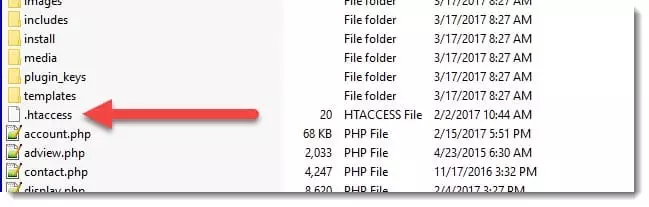
From the root directory where WordPress files are, you’ll mostly see a .htaccess file there. WordPress uses this file to manipulate how Apache (server) serves files from its root directory and subdirectories.
This file might be useless if you’re running WordPress on a host using Nginx. Since host hosting providers offer Apahce2 Web hosting, you might see one.
Browse to the WordPress directory.
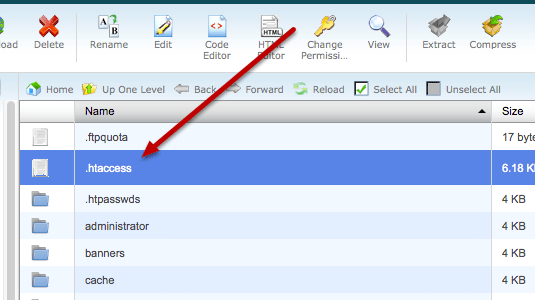
Go to the root directory, where you can find your wp-config.php file. You should be able to find your .htaccess file.
Download a copy onto your computer to save it as a backup.
Please open it and add the highlighted line.
php_value max_input_time 1000
php_value max_execution_time 300
php_value post_max_size 64M
php_value upload_max_filesize 64M
php_value memory_limit 256M
Suppose you use FTP/sFTP to connect to your host and edit. Then, edit the file and add the lines above. Then save to upload the changes.
Once you’re done, try to do what you couldn’t do before.
In most cases, the settings above should resolve your problem. If not, then you may have other issues at the system’s level. Contact your host provider for assistance.
That should do it! I hope you like this post.
You may also like the post below:
Leave a Reply