
This article explains how to enable and use the Night light feature in Windows 11.
Concerns exist regarding the blue light emitted by computer screens and its potential long-term effects on eye health. The blue light emitted by your monitor can cause eye strain and interfere with sleep, particularly when used in the evening.
Learning to enable Night Light in Windows 11 is crucial because it reduces the blue light emitted by your computer screen, which can help lessen eye strain and enhance sleep quality.
This feature can be scheduled to turn on and off automatically, providing a convenient way to safeguard your eye health.
Turn on the Night Light
Users can enable Night Light in Windows to protect their eye health.
Here’s how to do it.
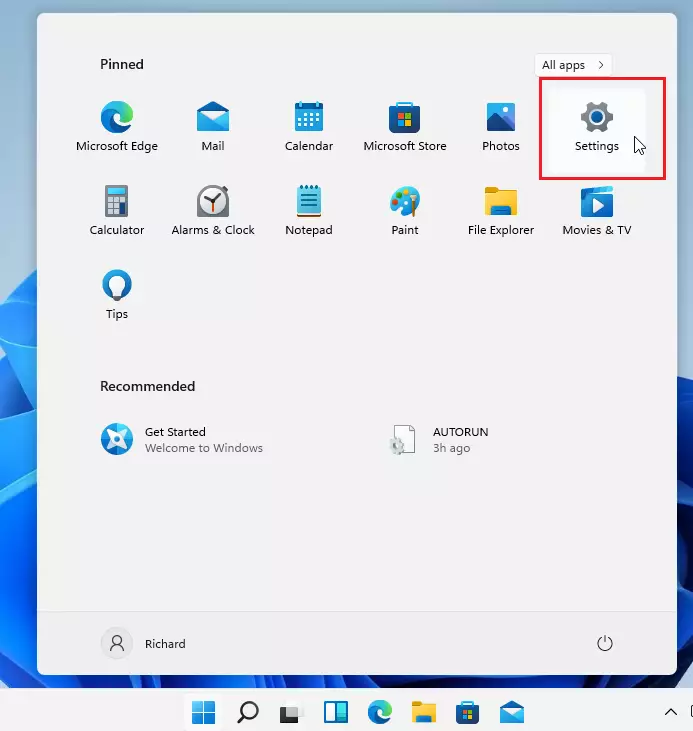
To enable this feature in Windows 11, click on Start and select Settings.
On the System Settings page, select Display.

When the Display settings page opens, go to the Night light and toggle the button to turn it on.
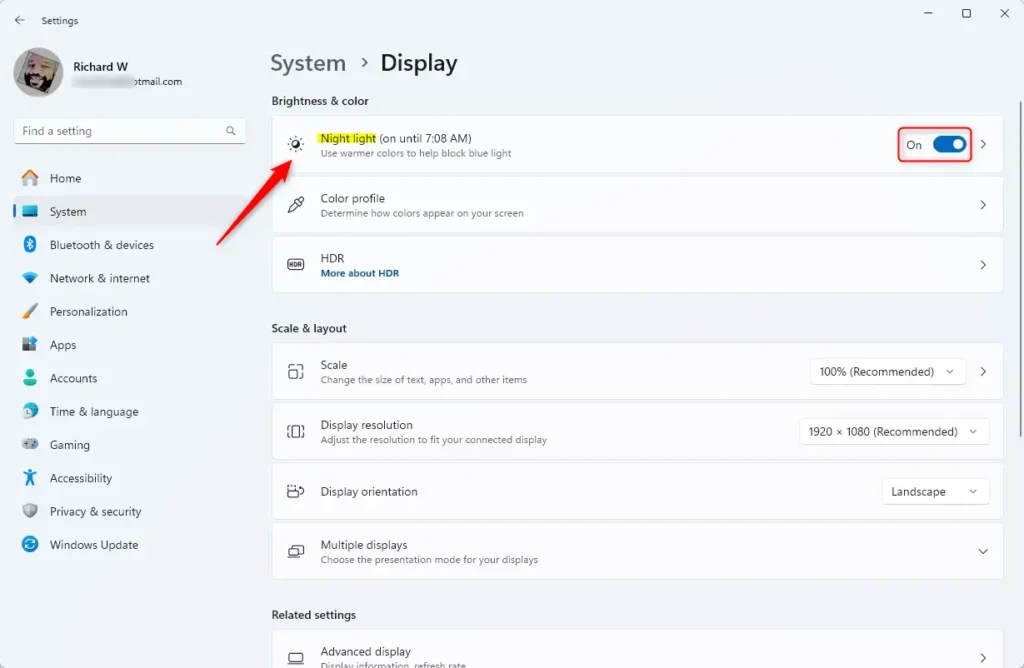
The night light should now be active. If activated at night, you should immediately see your desktop screen emitting less blue and switching to a warmer color to help you sleep.
If the color strength is unsatisfactory, you can adjust it as needed. An arrow is located to the right of the toggle button.
Click on that to access additional settings or enable the night light feature.
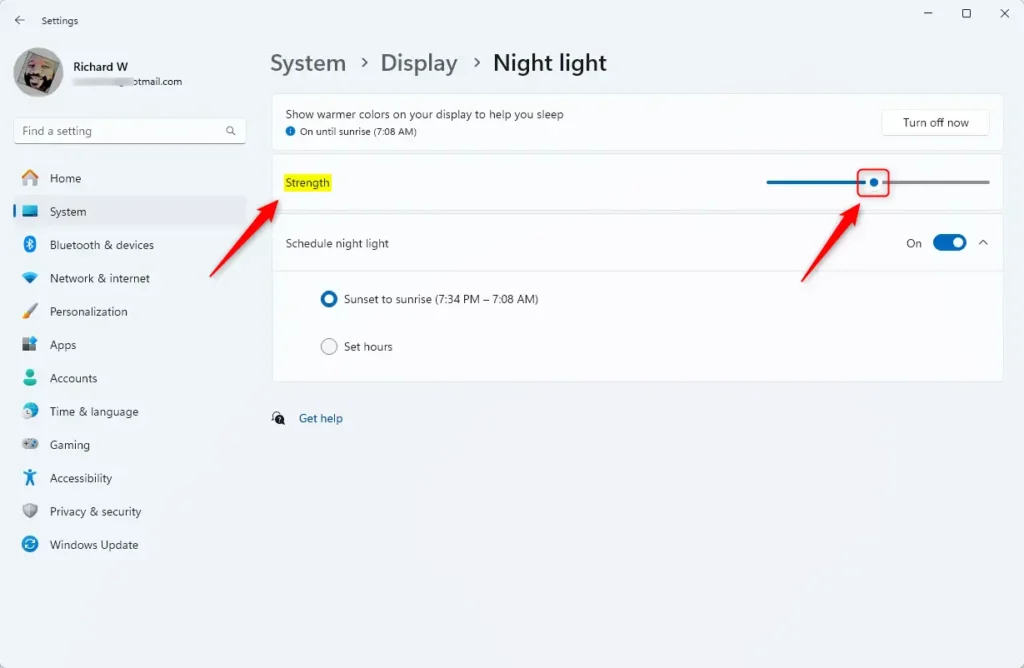
Now, you can adjust the strength of the color to your desire by toggling on a line that ranges from 1 to 100. The closer you move this toggle to 100, the warmer the night light gets.
Schedule Night Light
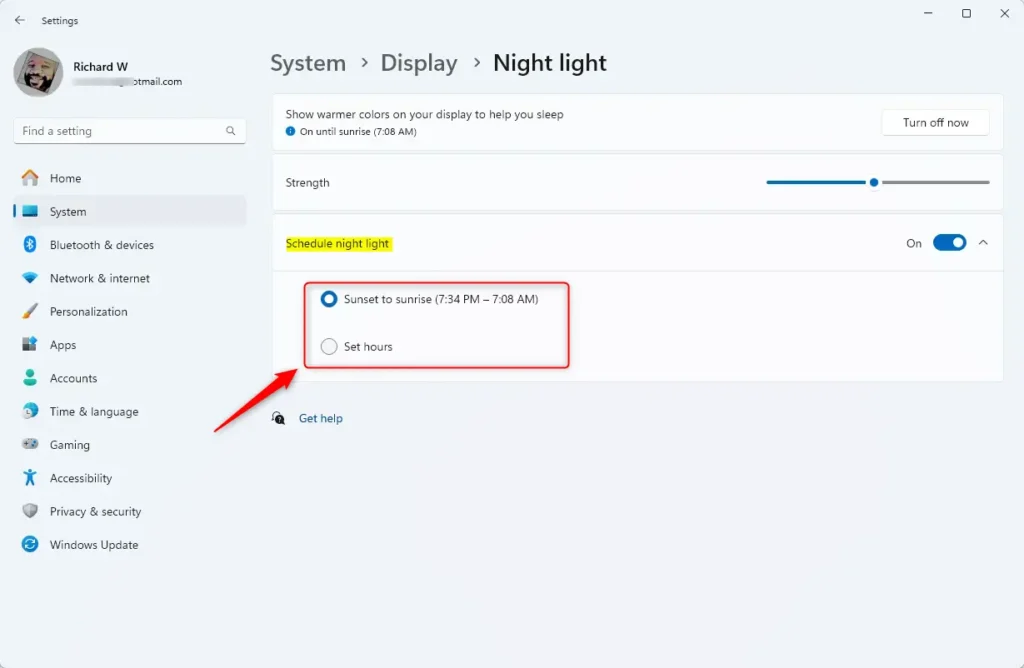
You can also schedule Night Light to automatically adjust your screen brightness at a particular time of the night. By default, the schedule is set for sunset to sunrise or from (9:05 PM to 5:33 AM).
The Sunset to Sunrise option automatically warms the temperature of your computer monitor after sunset. Again, this makes the Display easier on your eyes and reduces eye strain.
If this schedule isn’t suitable for your case, you can adjust the time here and schedule by manually setting the hours.
If you work late at night and feel your eye is strained, you may want to enable this feature. It may come in handy, especially for late-night owls.
Conclusion:
- Enabling Night Light in Windows 11 reduces blue light exposure and protects your eye health.
- The feature provides a customizable warm color screen that can alleviate eye strain, especially during nighttime use.
- Users can manually adjust the color strength to suit their preferences.
- The scheduling feature allows automatic adjustments based on sunset times, enhancing convenience and eye comfort.
- Night Light can improve sleep quality and overall well-being for users working late or spending prolonged hours in front of screens.
Leave a Reply