
This post shows steps for students and new users to enable or disable “minimize windows when a monitor is disconnected” in Windows 11.
The default behavior in Windows 11 is that when multiple displays are connected and you disconnect a monitor, Windows will automatically minimize the number of windows opened on the disconnected monitor and stack them on the primary monitor.
You can turn this feature on and off so that Windows doesn’t automatically minimize app windows on disconnected monitors but instead shows them on the main display in their current state.
Enabling or disabling window minimization when a monitor is unplugged in Windows 11 can be helpful for those who use multiple displays. By default, when a monitor is disconnected, Windows 11 will minimize the windows opened on the disconnected monitor and stack them on the primary monitor.
This can frustrate some users who prefer to keep their windows open and visible on the main display. By turning off this feature, you can ensure that Windows doesn’t automatically minimize app windows on disconnected monitors and instead shows them on the main display in their current state.
How to turn On or Off minimize windows when the monitor is disconnected in Windows 11
As mentioned above, Windows will automatically minimize windows opened on the disconnected monitor and be stacked on the primary monitor.
This feature is turned on by default. Below is how to disable it if you don’t want Windows automatically minimized on a disconnected display.
Windows 11 has a centralized location for the majority of its settings. As a result, everything can be done, from system configurations to creating new users and updating Windows from its System Settings pane.
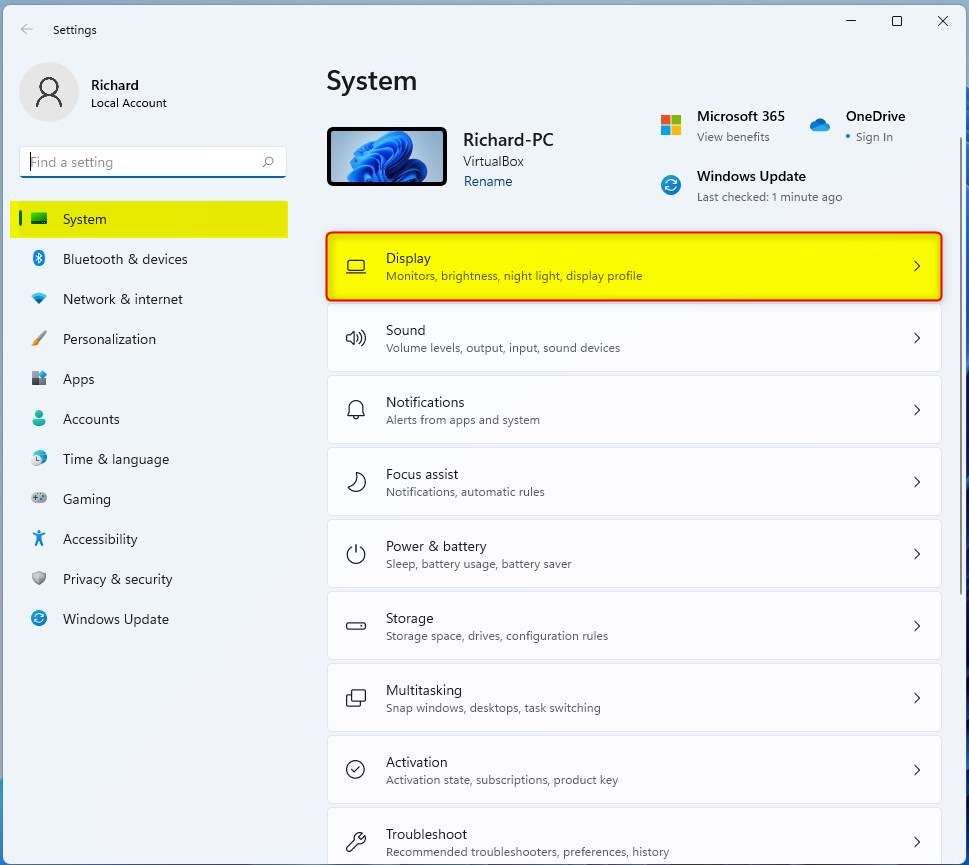
To get to System Settings, you can use the Windows key + I shortcut or click on Start ==> Settings, as shown in the image below:

Alternatively, you can use the search box on the taskbar and search for Settings. Then select to open it.
In Windows Settings, click the Display tile on the right pane, as highlighted in the image below.
On the System> Display settings pane, select Multiple display tile to expand.
Under the expanded Multiple displays tile, check or uncheck the box next to “Minimize windows when a monitor is disconnected” to enable or disable.

That should do it! You can now close the Windows settings app.
Enable or disable minimize windows when the monitor is disconnected via Registry Editor
Another way to control this behavior is to use the Windows Registry Editor.
First, open Windows Registry Editor.
Then, navigate to the registry key below.
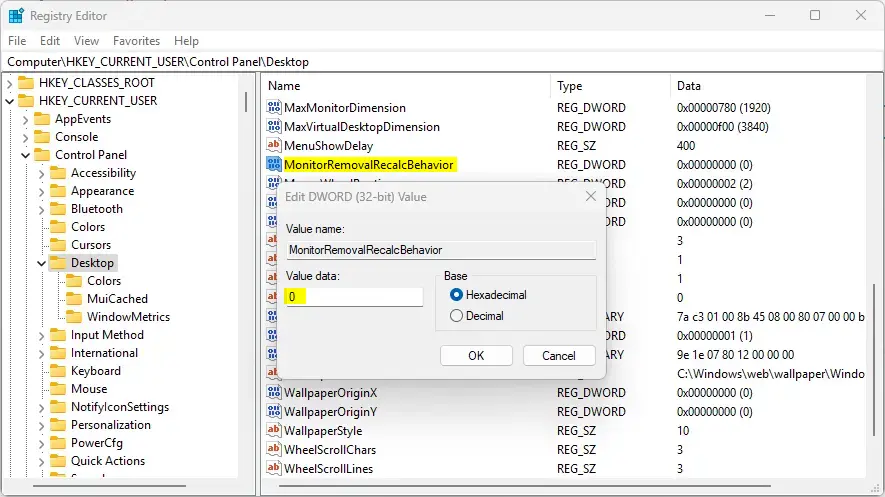
Computer\HKEY_CURRENT_USER\Control Panel\Desktop
Next, double-click the MonitorRemovalRecalcBehavior (REG_DWORD) name on the Desktop key’s right pane to open it.
Then, enter a value using the table below:
0= Enable the feature to minimize the window when the monitor is disconnected1= Disable minimizing the window when the monitor is disconnected
If you do not see the “MonitorRemovalRecalcBehavior” item, right-click a blank area and create a new DWORD (32-bit) registry item.
Then, enter the name “MonitorRemovalRecalcBehavior” and the value you want.
To restore the default behavior, delete the “MonitorRemovalRecalcBehavior“ item that was created.
You may have to reboot your computer to apply the changes.
Conclusion:
- Windows 11 allows enabling or disabling the automatic minimization of app windows when a monitor is disconnected.
- This feature can be controlled through the Windows Settings app by accessing the “Multiple display” settings and toggling the “Minimize windows when a monitor is disconnected” option.
- Alternatively, users can utilize the Windows Registry Editor to achieve the same effect by modifying the “MonitorRemovalRecalcBehavior” registry key.
- After making changes, users may need to reboot their computer to apply the updated settings and observe the desired behavior.
Leave a Reply