
This post shows students and new users steps to disable or enable sending diagnostics data to Microsoft in Windows 11.
Microsoft uses diagnostics and feedback to collect information about your Windows devices. When you enable sending diagnostic data, Microsoft uses that information to keep Windows secure and up to date, troubleshoot problems, and make product improvements.
Windows sends two types of diagnostic data to Microsoft as described below:
- Required diagnostic data – gathers a limited set of information critical for understanding the device and its configuration, including basic device information, quality-related information, app compatibility, and Microsoft Store.
- Optional diagnostic data – includes additional details about your device and its settings, capabilities, and health.
For privacy reasons, if you want to turn off sending diagnostic data to Microsoft, the steps below show you how.
How to disable or enable sending diagnostics to Microsoft in Windows 11
As mentioned above, Microsoft uses diagnostics and feedback to collect information about your Windows devices. When you allow sending diagnostic data, Microsoft uses that information to keep Windows secure and up to date, troubleshoot problems, and make product improvements.
Below is how to change this setting in Windows 11.
First, open the Windows Settings app.
Then, select System on the left and Clipboard tile on the right to expand it.
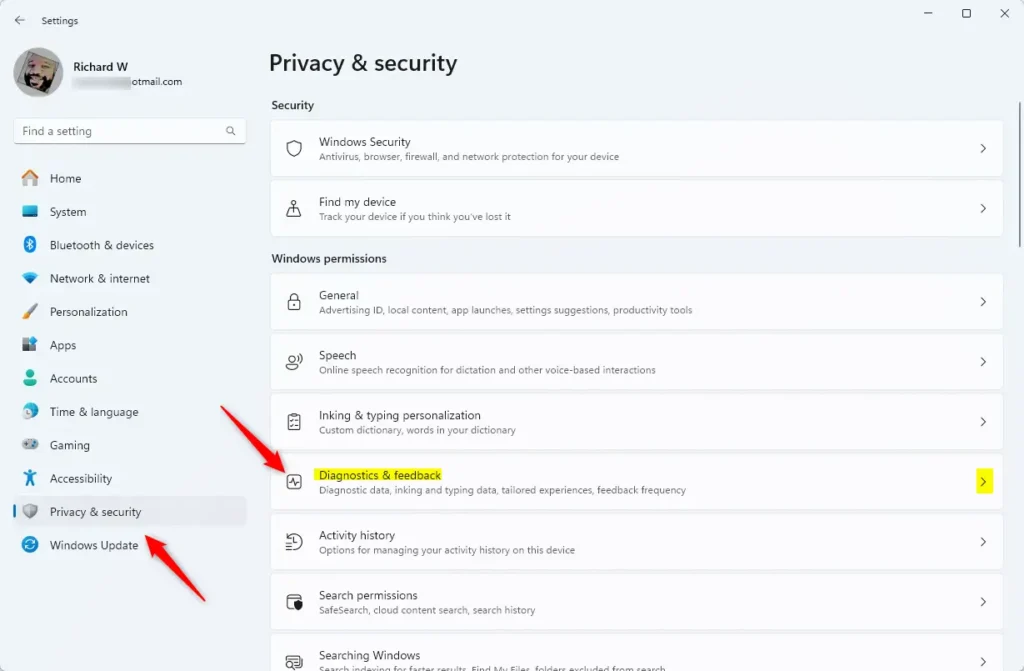
Next, select the “Diagnostic data” tile to expand it. Then, toggle the switch button to the On position to enable “Sending required + optional data” to Microsoft.
To disable it, toggle the button to the Off position.
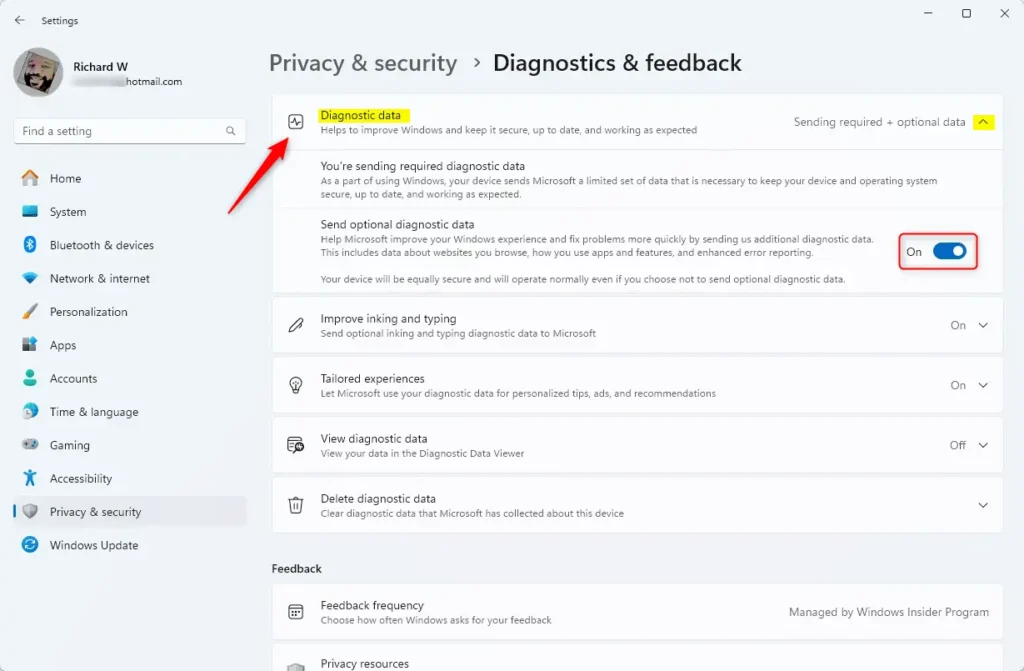
Exit the Settings app when you’re done.
Enable or disable sending diagnostic data using group policy
Another way to disable or enable sending diagnostic data to Microsoft is to use the Local Group Policy Editor.
First, open the Local Group Policy Editor (gpedit.msc). (Search for “Edit group policy”) on the Start menu.
Then, navigate the folders below:
Computer Configuration > Administrative Templates > Windows Components > Data Collection and Preview Builds
In the Group Policy details pane on the right, locate and double-click the “Allow Diagnostic Data” settings.
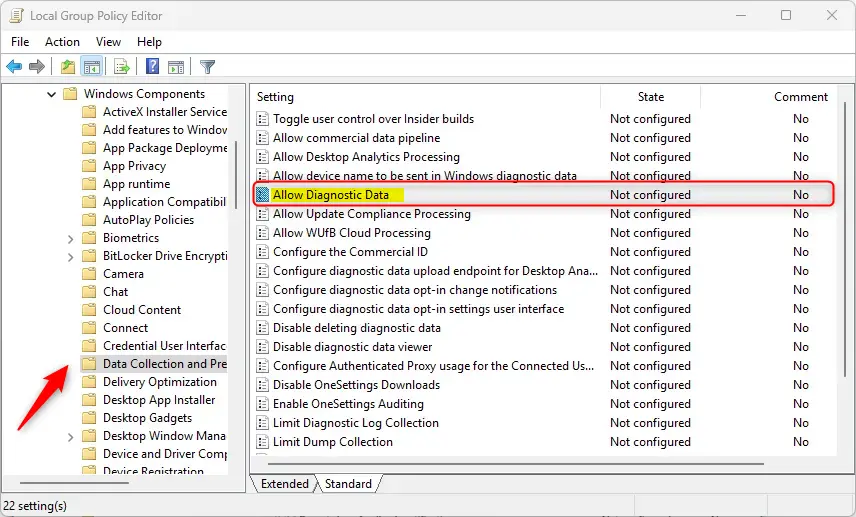
On the “Allow Diagnostic Data” window, set the option to Not Configure, Enabled, or Disabled.
- Not Configured (default)
- Enabled
- Diagnostic data off (not recommended) – No diagnostic data is sent from the device.
- Send required diagnostic data – This is the minimum diagnostic data necessary to keep Windows secure, up-to-date, and performing as expected. This disables the “Optional diagnostic data” control in the Settings app.
- Send optional diagnostic data – Additional diagnostic data is collected that helps us detect, diagnose, and fix issues and make product improvements.
- Disabled – The device will send required diagnostic data; the end user can choose whether to send optional diagnostic data from the Settings app.

Click OK to save your changes. You may have to reboot your device for the settings to apply.
Turn on or off sending diagnostic data using the Windows Registry Editor
Yet another way to enable or disable sending diagnostic data is to use the Windows Registry editor.
First, open the Windows Registry and navigate to the folder key path below.
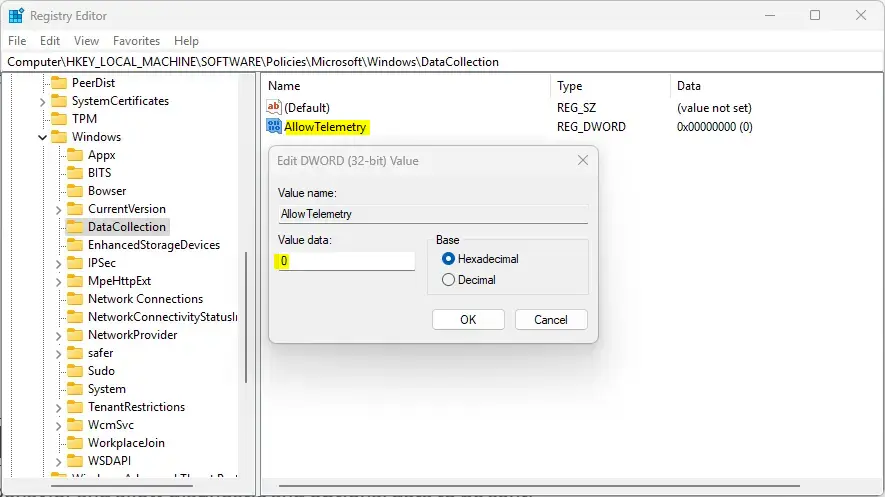
Computer\HKEY_LOCAL_MACHINE\SOFTWARE\Policies\Microsoft\Windows\DataCollection
Next, double-click the AllowTelemetry (REG_DWORD) name on the DataCollection key’s right pane to open it.
Then, use the value table below to enable or disable sending diagnostic data.
- Enter
0to disable sending diagnostic data - Enter
1to send required diagnostic data - Enter
3to send optional diagnostic data
If you do not see the “AllowTelemetry” item, right-click a blank area and create a new DWORD (32-bit) registry item.
Then, enter the name “AllowTelemetry” and the value you want.
To restore the default behavior and allow diagnostic and optional data to be sent, delete the “AllowTelemetry” name created above.
Save your changes and restart your computer.
That should do it!
Conclusion:
- Disabling or enabling the sending of diagnostic data to Microsoft in Windows 11 can help users take control of their privacy settings.
- Users can manage the diagnostic data settings through the Windows Settings app, Local Group Policy Editor, and Windows Registry Editor.
- Users must understand the implications of sending diagnostic data and choose the appropriate setting based on their privacy preferences.
- Following the outlined steps, users can effectively manage the transmission of required and optional diagnostic data to Microsoft, ensuring a personalized Windows experience.
Leave a Reply