How to Use Voice Recorder on Windows 11

Windows 11 includes a built-in app called Sound Recorder (it was called Voice Recorder in Windows 10, and you may still see that name in older guides). It captures lectures, interviews, meetings and quick voice notes without any extra software. It works the same on Windows 11 Home and Pro.
Open the Start menu , type Sound Recorder, and press Enter to launch the app. Click the blue microphone icon to begin recording, speak at normal volume, then click the stop button. The audio saves automatically as an.m4a file in your Documents folder.
Why use Sound Recorder?
Microsoft installs Sound Recorder with Windows, so there is nothing to download and no account to set up. It is a small app that uses very little memory, so it runs fine on older or low-powered PCs.
If the app is missing, someone may have uninstalled it. You can get it back by searching for Sound Recorder in the Microsoft Store and installing it again.
What happens when done?
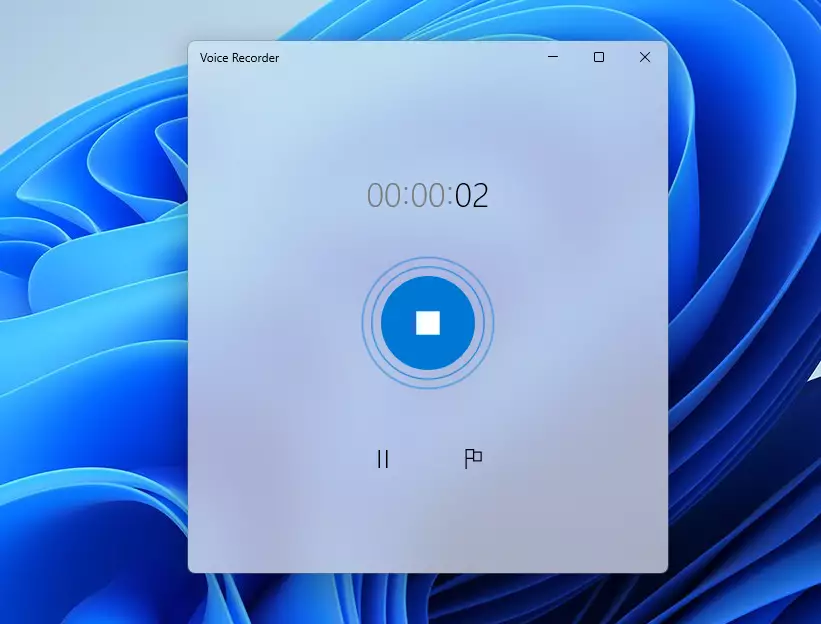
When you click the stop button, the app ends the session and saves the audio as an .m4a file. You don’t need to export anything. From the app you can then rename the recording, trim it, or share it. Newer versions of the app also let you pick a different file format in its settings.
Setting Up Your Microphone
If this is off, the app will open but record silence or show an error.
- Open Settings Privacy & security Microphone
- Turn on Microphone access. You should see the toggle switch to On.
- Scroll down the list of apps and make sure Sound Recorder is allowed to use the microphone. If you can’t find a toggle for it, check that Let apps access your microphone is also on.
If you have more than one microphone, such as a webcam mic and a headset, check which one Windows is using under Settings System Sound. Look in the Input section and select the right device. Speak, and watch the volume bar move to confirm the mic is picking you up.
How to Record Audio
Open the app from the Start menu:
- Open the Start menu.
- Type Sound Recorder into the search bar.
- Click the app in the results to launch it. The Sound Recorder window should open with a large record button in the middle or at the bottom.
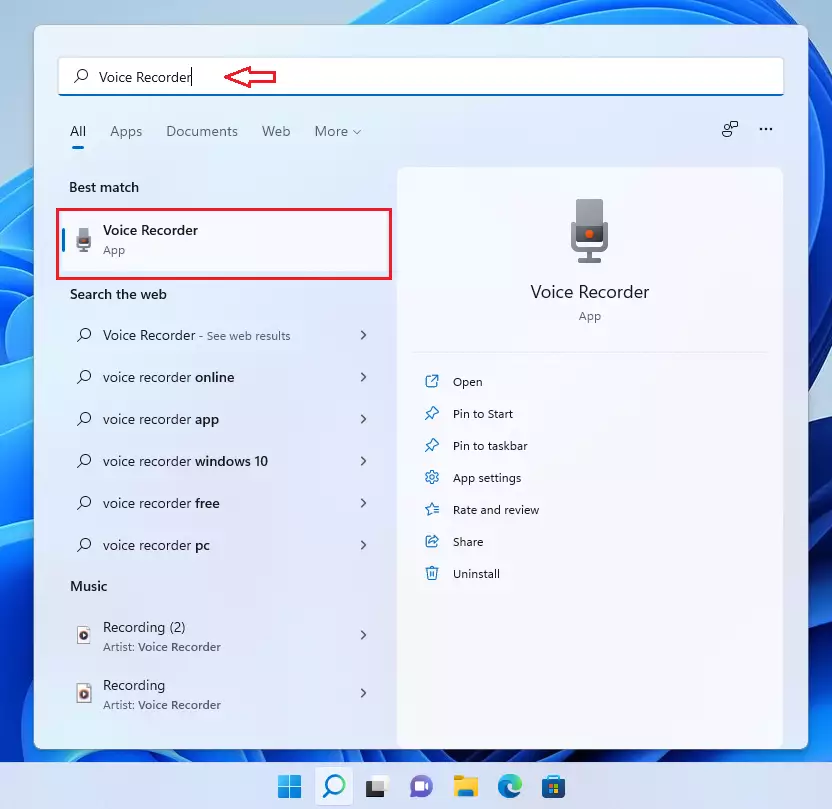
There is a faster way: press the Windows key, type Sound Recorder, and press Enter. If you use the app often, right-click it in the search results and choose Pin to taskbar or Pin to Start.
With the app open, click the large blue microphone icon to begin recording. The timer should start counting up, which tells you audio is being captured.
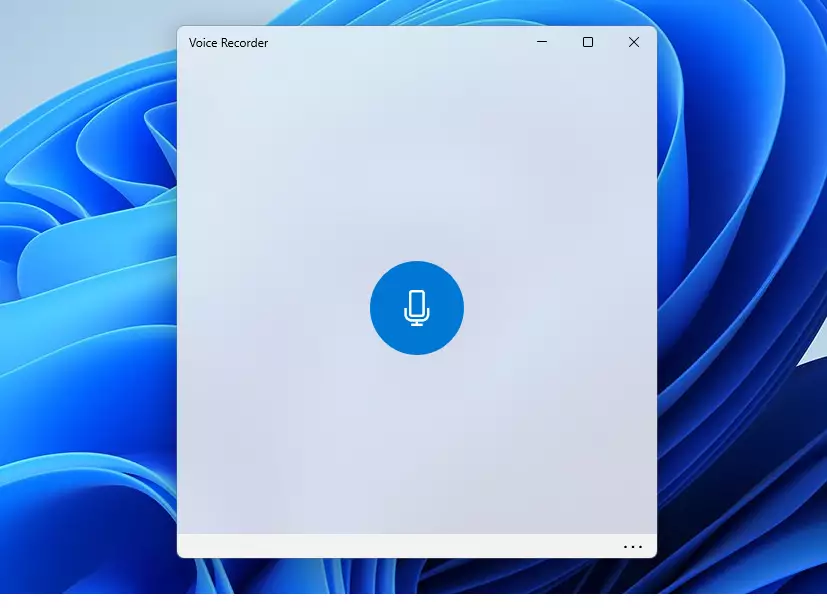
- Click the blue microphone icon to start. Speak at a normal volume, about an arm's length from the mic.
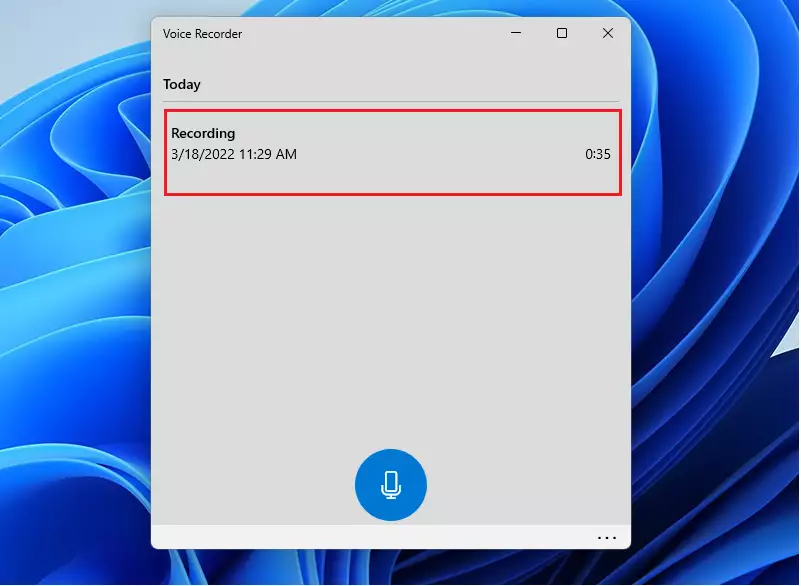
- Click the stop button to finish. The recording is saved right away and shows up in your list.
While you are recording, the app also offers a pause button, so you can break for a moment without ending the file. A flag button lets you mark important moments, which helps when you review a long recording.
Your recordings appear in the left sidebar, organized by date. Click one to select it and play it back. You can also rename it, trim it, share it, or delete it from the app. Right-clicking a recording or using the buttons near the playback controls shows these options.
Give recordings a meaningful name soon after you make them. "Recording (14)" is hard to find again a month later.
File Management and Storage
Recordings save automatically to your Documents folder under C:\Users\username\Documents\Sound Recordings. Replace "username" with your own Windows user name. You can open File Explorer, go to Documents, and open the Sound Recordings folder to copy, move or back up the files like any other file.
If you use OneDrive folder backup, your Documents folder may be synced, so the recordings can appear on your OneDrive too.
Pro Tips for Multitasking
Sound Recorder stays active in the background, so you can keep working while it captures. Keep the app open, though. Closing it will end the session.
Sound Recorder does not turn your recording into text. If you want to dictate text instead, click into any text field and press Win + H to open Windows voice typing. It types what you say as you say it, but it does not transcribe a saved .m4a file. You need a working microphone and an internet connection for this feature.
Summary
Sound Recorder is a simple, built-in way to capture audio on Windows 11. To recap: allow microphone access in Settings, record with the blue microphone icon, stop to save, and find your .m4a files in the app sidebar or in your Documents\Sound Recordings folder. If a recording comes out silent, check your microphone permission and input device first.
Was this guide helpful?

About the Author
Richard
Tech Writer, IT Professional
Richard is a writer at Geek Rewind who turns complex IT tasks into clear, step-by-step guides. He draws on years of hands-on experience in system administration and enterprise IT operations, focusing on Windows, Linux and WordPress: the problems people actually run into, and the fixes that work. His server and WordPress guides come from systems he runs himself. Richard builds and maintains the platform behind Geek Rewind, from its Ubuntu servers and Nginx configuration to its custom WordPress plugins. Many new tutorials start with readers' questions, and he's always glad to answer them in the comments.


No comments yet — be the first to share your thoughts!