
This brief tutorial shows students and new users how to log in to Windows 11 without typing passwords each time.
The Windows login screen is a security feature that helps protect your PC from others. Someone will need to know your password before they are allowed to sign in. Access will be denied without knowing the correct password to sign on to Windows.
Logging in to Windows 11 without a password can be a convenient and time-saving option for users who don’t want to enter their password every time they sign in. It can also be useful for those who are the sole computer users and don’t need password protection.
However, it’s important to remember that removing password protection can also increase the risk of unauthorized access to your computer, so it’s recommended to use it only in situations where it’s safe.
To get started with logging in to Windows without passwords, follow the steps below:
Enable Passwordless login
With Windows 11, passwordless login has been removed. You must first enable the option before users can log in without passwords.
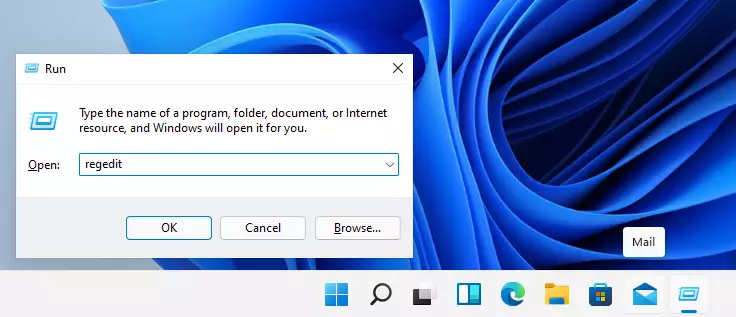
Press the Windows key + R to open the run command box to enable it. Then, type the commands below to open the registry editor.
regedit
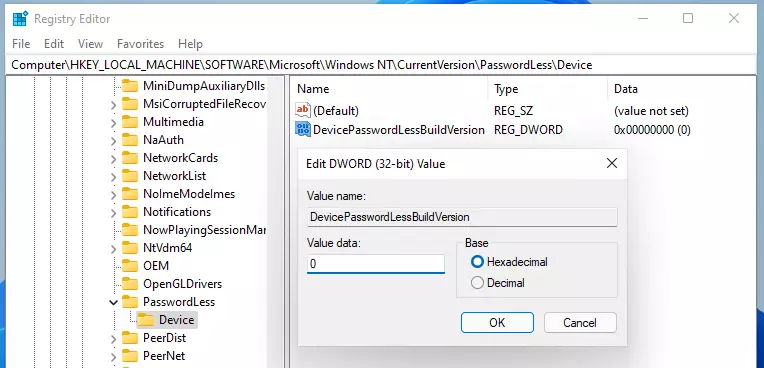
Then browse to the path below:
HKEY_LOCAL_MACHINE\SOFTWARE\Microsoft\Windows NT\CurrentVersion\PasswordLess\Device
Double-click DevicePasswordLessBuildVersion to open. Then, change the value to 0 and close.
Disable password login
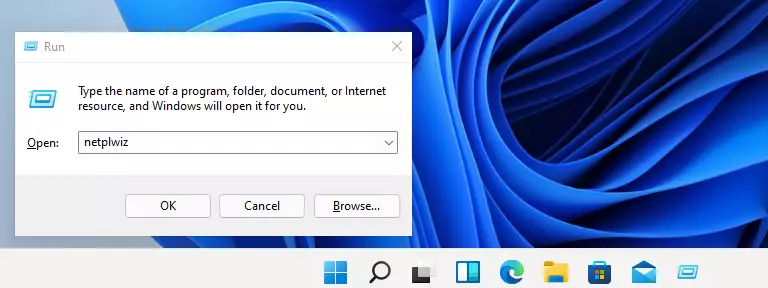
Now the passwordless login is enabled, use the Run command box again.
Or Press the Windows key + R on your keyboard. (The Windows key is the one to the left of your space bar with the Windows logo on it)
When the Run app opens, type the line below into the box and press Enter.
netplwiz
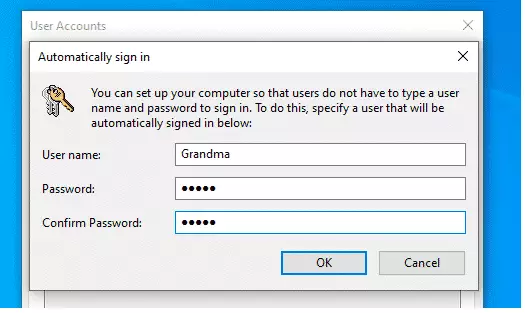
Select the user you want to log in automatically when it opens without always typing a password.
Then, uncheck the box that reads, “Users must enter a username and password to use this computer.“
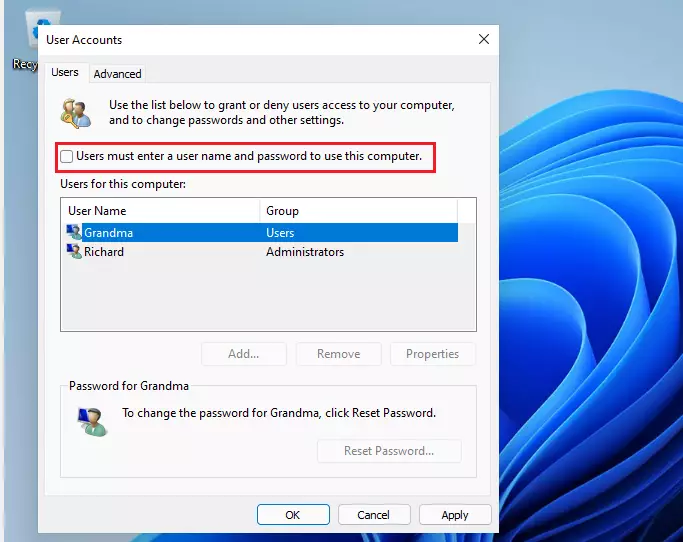
After selecting the user from the list and unchecking the box, click the Apply button.
You will be prompted to type the username originally entered when the account was created.
Type it and confirm it, then press Enter or select OK.
Restart Windows
Now that you’ve set up the account to log in without first typing the password, restart your computer, and you’ll notice Windows will sign you in without typing a password.
Conclusion:
- Logging in to Windows 11 without a password can enhance convenience for individual users.
- It is a helpful option for those who do not require password security on their personal devices.
- Users should weigh the risks associated with reduced security before enabling passwordless login.
- To set up, follow the outlined steps carefully to ensure proper configuration.
- Always consider the safety of your computer environment when deciding to remove password protection.
Leave a Reply