3 Simple Steps to Connect Wi-Fi on Windows 11

Connect your Windows 11 PC to the internet using the Quick Settings menu or the Settings app.
Click the icons on the right side of your Taskbar to open Quick Settings, then select your Wi-Fi network and enter its password. Alternatively, press Win+I, go to Network & Internet, click Wi-Fi , select your network, and enter the password to connect.
Why Connect to Wi-Fi?
Wireless networking links your computer to the internet without cables, giving you fast and flexible access anywhere in your home or office.
What Changed in 🪟 Windows 11?
In Windows 11, the Wi-Fi icon has moved from its previous location on the Taskbar . It’s now found within Quick Settings, a feature that groups Wi-Fi, sound, and battery controls together on the right side of your Taskbar.
Method 1Connect Using Quick Settings
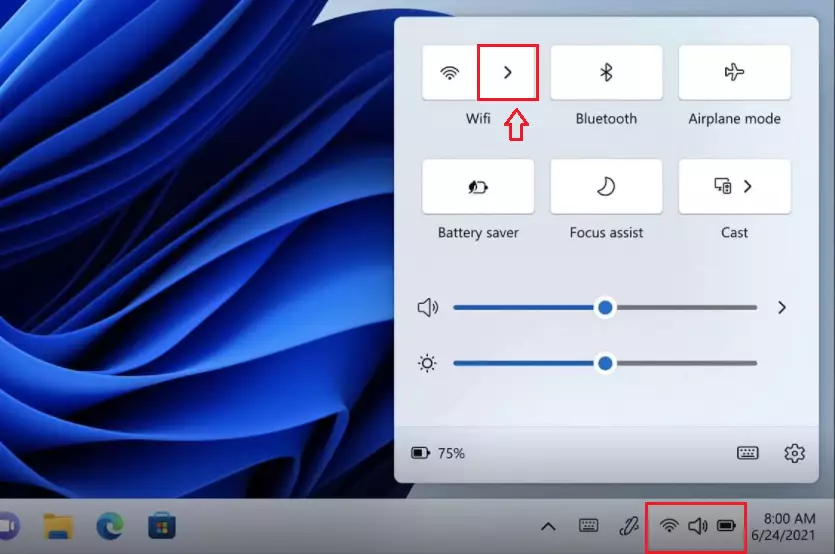
The Quick Settings menu groups Wi-Fi , sound, and battery controls into a single panel. Open it by clicking the network and volume icons in the bottom-right corner of the taskbar .
Step 1Open Quick Settings
Click the Wi-Fi icon on the taskbar to open the Quick Settings panel, where you can toggle wireless networking on or off.
Step 2Find the Wi-Fi Option
Look for the Wi-Fi symbol in the upper part of the Quick Settings panel. Click the right-pointing arrow next to it.
Step 3Turn On Wi-Fi (If Needed)
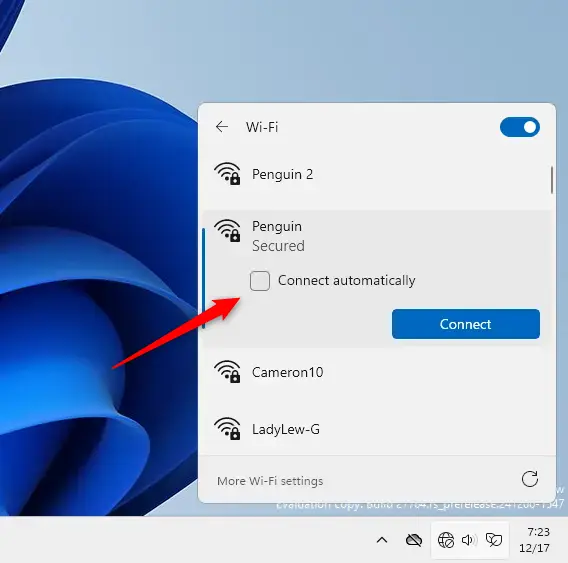
Ensure the Wi-Fi switch is set to 'On'. Windows will then list all the Wi-Fi networks it can find nearby.
Step 4Select Your Network
Find your Wi-Fi network name in the list and click on it to select it.
Step 5Enter Your Password
Type your Wi-Fi password carefully, paying attention to uppercase and lowercase letters.
Step 6Connect
Click Connect. Your computer will establish a connection to the network.
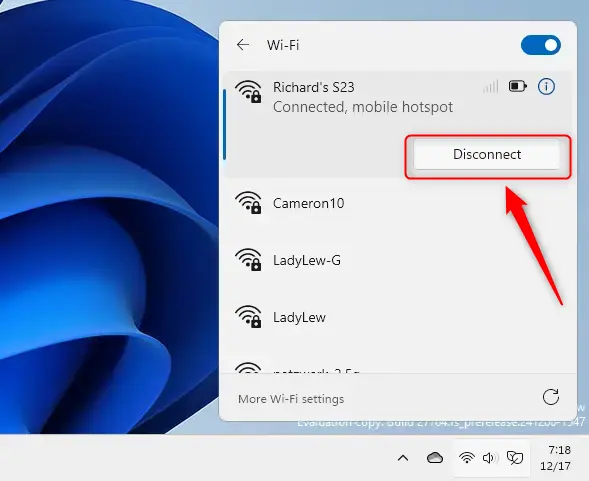
You are now connected to Wi-Fi.
Method 2Connect Using Windows Settings
Settings offers greater control and more options as a centralized hub for all your computer adjustments.
Step 1Open Windows Settings
Open the Settings app by pressing the Windows key plus I on your keyboard, or search for Settings in the taskbar search box.

Alternatively, click the search box on your Taskbar. Type Settings and open it.
Step 2Go to Network Settings
Click Network & Internet on the left side. Then, click Wi-Fi on the right side of your screen.
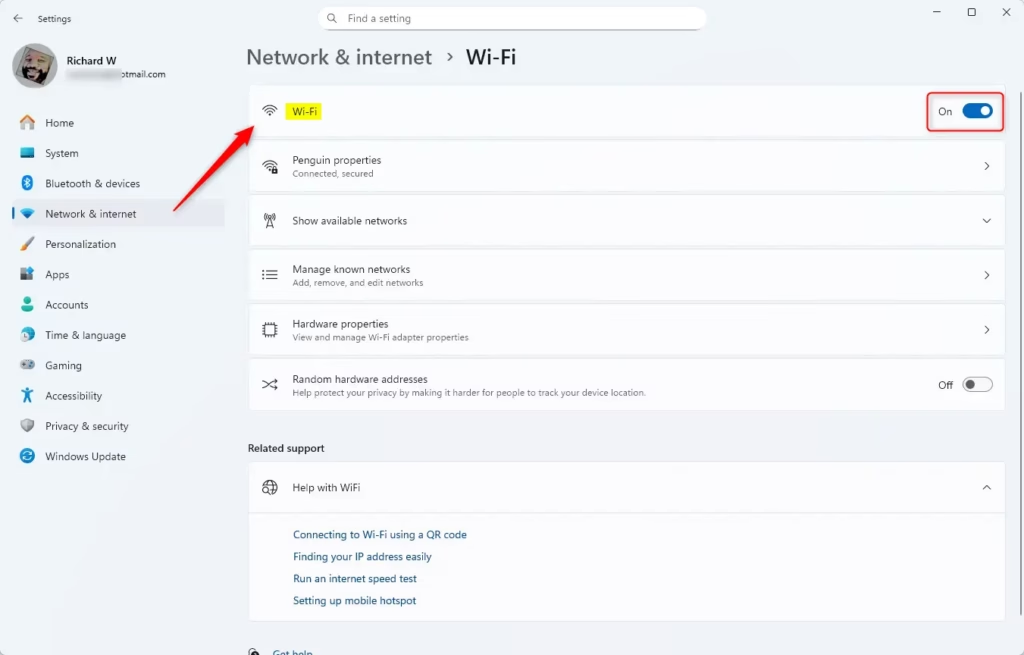
Step 3Turn On Wi-Fi
Ensure the Wi-Fi switch is set to 'On'. Then, click 'Show available networks.'
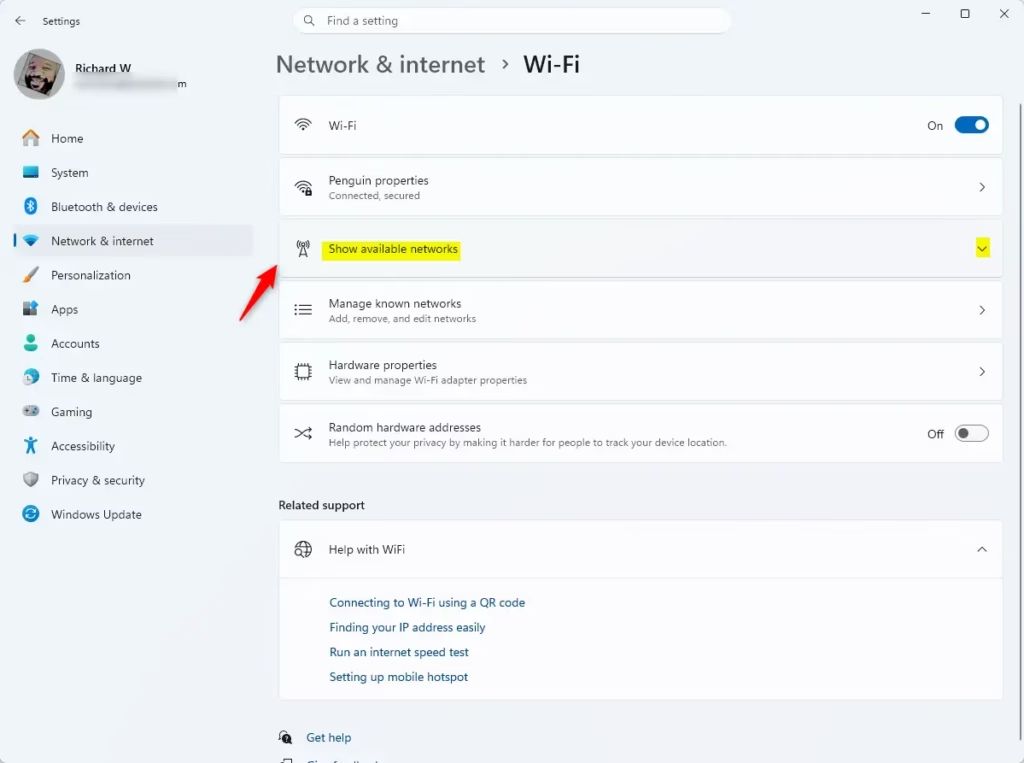
Step 4Select Your Network
Windows displays all nearby wireless networks. Locate your network name and click on it.
Step 5Enter Your Password
Type your Wi-Fi password into the designated field. Be attentive to uppercase and lowercase letters.
Step 6Connect
Click Next or Connect. Your computer will then connect to the network.
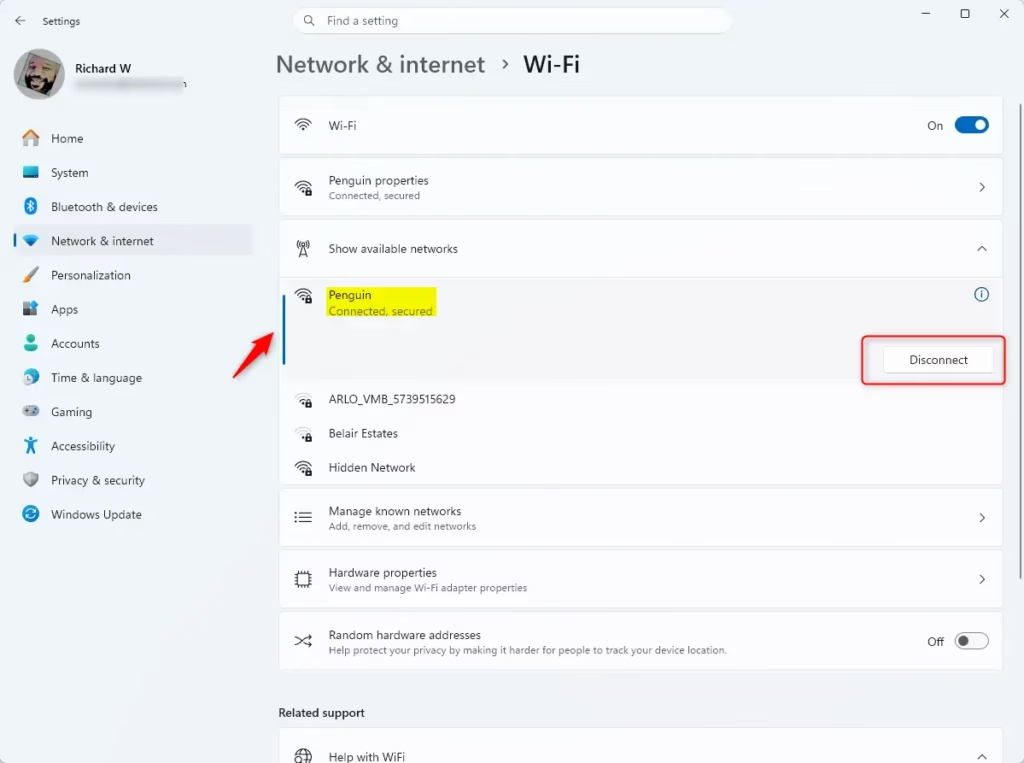
You're now connected to Wi-Fi!
Summary
Connecting to Wi-Fi on Windows 11 takes just a few seconds using the Quick Settings menu or the main Settings app. You can open the network list from the bottom right corner of your taskbar, pick your wireless network from the list, type in your security key, and get online right away without digging through complicated menus.
- Quick Settings: Click the icons on the bottom right of your Taskbar. Find Wi-Fi. Select your network. Enter your password. Done.
- Windows Settings: Press
Windows key + I. Go to Network & Internet. Click Wi-Fi. Select your network. Enter your password. Done.
Each method takes only a few clicks. Once your password is entered, Windows connects automatically, providing wireless internet access.
Was this guide helpful?

About the Author
Richard
Tech Writer, IT Professional
Richard is a writer at Geek Rewind who turns complex IT tasks into clear, step-by-step guides. He draws on years of hands-on experience in system administration and enterprise IT operations, focusing on Windows, Linux and WordPress: the problems people actually run into, and the fixes that work. His server and WordPress guides come from systems he runs himself. Richard builds and maintains the platform behind Geek Rewind, from its Ubuntu servers and Nginx configuration to its custom WordPress plugins. Many new tutorials start with readers' questions, and he's always glad to answer them in the comments.


No comments yet — be the first to share your thoughts!