
This post shows students and new users how to install phpMyAdmin on Google Cloud servers running Ubuntu Linux. We have gone through a series of posts, starting with registering a domain name, setting up a Google Cloud server, and installing software and packages to help us build and manage our websites online.
We’re now ready to install phpMyAdmin to help us connect and manage our MySQL or MariaDB databases from our browsers.
phpMyAdmin is a free and open-source administration tool for MySQL and MariaDB. Written in PHP, it comes with all the features you need to create, manage and perform all database functions, and it can be paired with a MySQL or MariaDB database.
This is the seventh post in this series, which can be used as a beginner’s guide to learn how to create a website domain, set up a Google Cloud server with Ubuntu Linux, and install software and packages to build and run a website online.
In this series:
- How to create a website domain
- How to set up a Google Cloud server with Ubuntu Linux
- How to install Apache on a Google Cloud server (alternative to Nginx)
- How to install Nginx on Google Cloud server (alternative to Apache)
- How to install PHP on a Google Cloud server
- How to install MySQL or MariaDB database server
Now that you’ve learned how to create a website domain set up a Google Cloud server, and installed Apache, Nginx, PHP, MySQL, or MariaDB, you can continue below to tie all together with phpMyAdmin.
When we started this series, we said a web server allows content to be published and served to web clients and audiences browsing your website. A PHP or server-side scripting language allows for a dynamic and more functional website. A database server allows you to store your website content efficiently.
Other software and packages may also be needed to enhance the functionality of a website. Below, we’ll show you how to install these tools with phpMyAdmin.
In our first post, we also said that it can’t be used after creating a domain name until it is forwarded or pointed to a server. The second post showed you how to point a domain to a server we created. Then we showed you how to install software and packages to help us run personal cloud storage service.
We’re ready to connect to our Google Cloud server and install phpMyAdmin by tying the software and packages installed in our previous posts.
How to connect to Google Cloud servers
Google Cloud server (Compute Engine) allows users to connect using SSH from the browser window to their virtual machine (VM) instance within the Google Cloud Console.
SSH from the browser supports the following:
- Web browsers
- The latest version of Google Chrome
- Firefox
- Microsoft Edge
- Microsoft Internet Explorer 11 and later
- Safari 8 and later. Note that Safari in private browser mode is not supported.
- Virtual machine configurations
- All Linux VM images are natively available in Google Cloud.
No additional software or browser extensions are needed. Simply login to Google Cloud Console and go to Menu ==> Compute Engine ==> VM instances.
In the list of virtual machine instances, click SSH in the row of the instance that you want to connect to.

Alternatively, you can open an SSH connection to an instance by clicking its name and SSH from the instance details page.
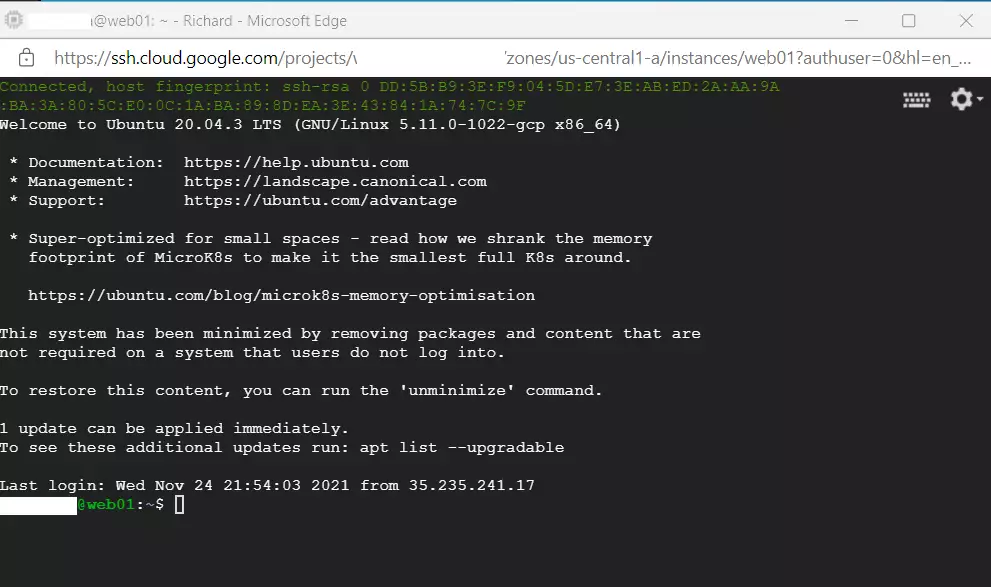
An SSH terminal window with the Ubuntu Linux instance created in the series’s second post will open.
You should now be able to run commands in Ubuntu Linux created on the Google Cloud server.
How to phpMyAdmin on Google Cloud Servers
Installing and managing a phpMyAdmin website on Ubuntu Linux is no different, whether on Google Cloud servers or a local VM instance.
Once you installed all required packages, phpMyAdmin can be set up directly from your browser by browsing the server hostname or IP address.
Below is a detailed post and help install phpMyAdmin on Ubuntu Linux with Apache or Nginx. Click on it to learn more about installing and managing phpMyAdmin on Ubuntu Linux.
How to install phpMyAdmin on Ubuntu Linux with Apache
How to install phpMyAdmin on Ubuntu Linux with Nginx
Each link above will show you all the steps we performed in our previous posts to get here. You also will learn how to secure your phpMyAdmin website with free Let’s Encrypt SSL certificates.
Following the links above and performing all the steps, you can create an online store using phpMyAdmin.
Conclusion:
In this tutorial, we have successfully guided you through installing phpMyAdmin on a Google Cloud server running Ubuntu Linux. Here are the key takeaways:
- You can manage MySQL or MariaDB databases efficiently using phpMyAdmin.
- Establishing an SSH connection to your Google Cloud instance is straightforward.
- You learned about the prerequisites for installing phpMyAdmin, including the necessary software and configurations.
- Detailed guides for installing phpMyAdmin with both Apache and Nginx are available for your convenience.
- This setup enhances your ability to create and manage websites effectively.
By following the instructions, you are now equipped to handle your database management needs with ease!
Leave a Reply