
This post shows students and new users steps to install Node.js and npm on Ubuntu Linux to allow users and developers to run Node. js-based applications.
Node.js is an open-source, cross-platform solution primarily used to build back-end server apps using JavaScript runtime, built on Chrome’s V8 JavaScript engine. Chrome V8 engine, on the other hand, is Google’s open-source high-performance JavaScript engine written in C++ and used in Google Chrome, the open-source project.
Npm is the default package manager for Node.js and the world’s largest software registry.
This post will show multiple ways to install these two popular packages using Ubuntu Linux. The steps below show three ways to install Node.js and npm packages on Ubuntu Linux.
For more about Node.js, please visit the project’s homepage.
To get started with installing Node.js and npm on Ubuntu Linux, follow the steps below:
How to install Node.js from Ubuntu repositories
By default, Node.js and npm packages are available in Ubuntu’s default repositories. However, the versions in Ubuntu repositories might not necessarily be the latest. The installation is pretty straightforward.
Run the following commands to update the package index and install Node.js and npm:
sudo apt update
sudo apt install nodejs npm
The command above will install several Node.js and npm packages, including the tools necessary to compile and install native addons from npm.
Once the installation is complete, run the commands below to check the version installed.
nodejs --version
That should output a similar line as shown below:
v10.19.0
As you can see, the latest version of Ubuntu is v10.19.0. However, newer v11, v12, v13, and v14 have also been released.
How to Install Node.js and npm from Snap
Another way to install Node.js is via Snap package management. This might be the easiest way to do it.
Snaps are containerized software packages that are simple to create and install. They are applications packaged with all their dependencies to run on all popular Linux distributions from a single build, allowing them to update automatically and roll back gracefully.
To install via Snap, run the commands below install Snap.
sudo apt update
sudo apt install snapd
Once Snap is installed, simply run the commands below to get Node.js and npm installed via Snap. Choose the correct Node.js versions you want to install in Ubuntu.
For the Latest release (version 14),
sudo snap install node --channel=14/stable --classic
For version 13, run this:
sudo snap install node --channel=13/stable --classic
For the LTS (version 10)
sudo snap install node --channel=10/stable --classic
How to Install Node.js and npm from NodeSource
NodeSource is the company’s enterprise-grade Node repository that maintains and contains the latest versions of Node.js.
You can use the NodeSource repository to install a specific version of Node.js. At the time of this writing, the repository contains Node.js versions 14, 14, 12, 11, 10, and 8.
To install Node.js from NodeSource, simply run the commands below to add a specific repository for your desired version.
Then for the Latest release (version 14), add this PPA.
curl -sL https://deb.nodesource.com/setup_14.x | sudo -E bash -
For (version 12), run the commands below:
curl -sL https://deb.nodesource.com/setup_12.x | bash -
To install the LTS release (version 10), use this PPA
curl -sL https://deb.nodesource.com/setup_10.x | bash -
After that, you can now install the version of Node.js from the particular repository you chose. If you add multiple repositories, the latest version of Node.js will be installed and not the LTS.
Install Node.js and npm
Once the NodeSource repositories are added, simply run the command to install Node.js from the repository added.
sudo apt install nodejs
After installing, both Node.js and npm modules should be installed and ready to use.
You can use the commands below to view the version number installed.
node --version
npm --version
The commands will list the currently installed version:
v14.0.0
6.14.4
To test whether the web server is properly installed, run the commands below to create a test file called http_server.js in your home folder.
cd ~/
nano http_server.js
Then copy and paste the content below into the file and save it.
const http = require('http');

const hostname = '127.0.0.1';
const port = 3000;

const server = http.createServer((req, res) => {
  res.statusCode = 200;
  res.setHeader('Content-Type', 'text/plain');
  res.end('Hello Worldn');
});

server.listen(port, hostname, () => {
  console.log(`Server running at http://${hostname}:${port}/`);
});
After that, save the file and run the commands below to start the server.
node http_server.js
You should see an output that reads:
The server running at http://127.0.0.1:3000/
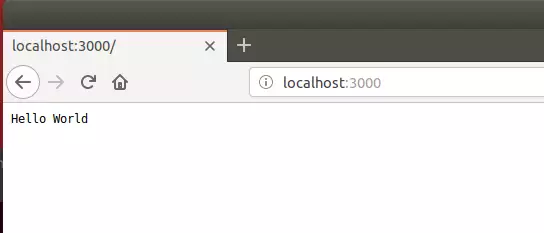
Now open your browser and browse to the server hostname or IP address followed by port 3000. and you should see a default page with Hello World
http://localhost:3000
That should do it!
Conclusion:
This post showed you how to install Node.js and npm on Ubuntu Linux. Please use the comment form below if you find any errors above or have something to add.
Leave a Reply